Stepping aboard a vessel, there’s a subtle, reassuring rhythm to the sounds of the water. But a steady, unwanted gurgle from the lowest part of the hull tells a different story. That’s the distinct call of bilge water, a reminder that every boat relies on a silent, diligent guardian. Installing a reliable automatic bilge pump, like a Rule model, isn’t just a maintenance task; it’s an act of seamanship that provides real peace of mind, ensuring you stay afloat and dry whether you’re aboard or away.The process starts with choosing the right guardian for your bilge area.
Consider the volume you need to move—measured in gallons per hour—and the type of automatic operation you prefer, be it a unit with a built-in float switch or one paired with a separate float switch. Proper bilge pump mounting is the foundation for reliable performance, demanding a thoughtful approach to placement and attachment. You’ll be working in the often-confined space at the very bottom of the boat, so preparation is key. Begin by disconnecting the power supply and removing an old pump, if present, cleaning the surface thoroughly to ensure a solid base for the new Rule pump.
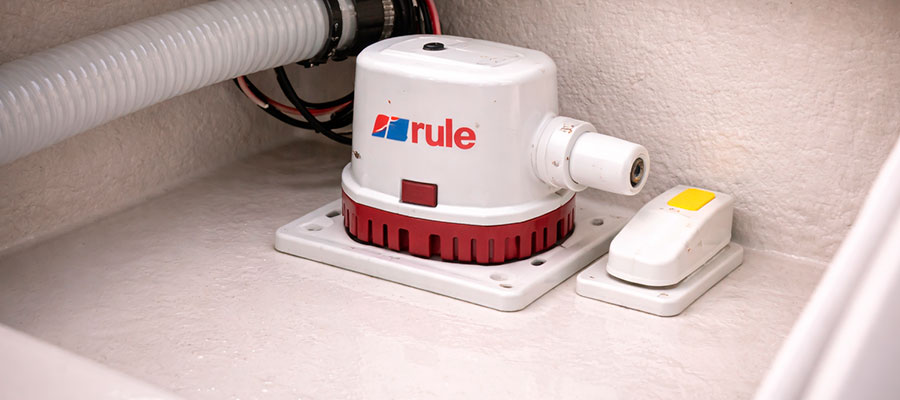
Gather your tools: a mounting pad or a piece of marine-grade fiberglass or plastic for a flat surface, a reliable adhesive sealant like 5200 or 4200, a screwdriver, and necessary hoses. The goal is to secure the pump’s mounting bracket firmly to the bottom of the bilge, ensuring the intake strainer is clear and the unit sits level for the float switch to accurately sense water level. The discharge hose then needs a secure run, often up toward the transom or through the hull above the waterline, and incorporating a check valve will prevent unwanted flow back. Taking your time with these steps means creating a system that works automatically and faithfully, season after season.
Getting Familiar with the Rule Bilge Pump System
Think of this step as a pre-departure checklist for the task ahead. Unbox your new Rule automatic pump and find a quiet spot to lay out all the components, from the pump and switch to the discharge hose and mounting hardware. It's the perfect time to look over the installation instructions and understand what each part does, giving you a clear picture of how the whole system comes together.
Key features of the Rule bilge and automatic switch models
Rule bilge pumps are designed with specific features that prioritize reliable, unattended operation. Many of their automatic models come with a built-in switch that triggers the pump when it senses water, removing the need for a separate wiring setup. For higher capacity needs, like a Rule 800 or 1100, you'll often get a rugged construction suitable for the demanding bilge environment.
The integrated design of the pump and switch streamlines installation, as everything comes pre-assembled in one sealed unit. This thoughtful engineering means you can install it and have confidence it will activate on its own. Exploring the different models allows you to match the pump's features, such as a protective strainer or a compact housing, to the unique layout of your boat's bilge area.
Understanding GPH ratings for different bilge pump capacities
The gallons per hour rating tells you the volume of water a pump can move under ideal conditions. A smaller pump like an 800 GPH model is often sufficient for incidental water, while a larger vessel might need a 1500 or higher capacity unit.
- Consider the size of your boat and the typical amount of water in the bilge area.
- Remember that real-world performance is often less than the rated gallons per hour due to hose length and vertical lift.
Common components included in a Rule bilge pump kit
| Kit Component | Primary Role |
|---|---|
| The Pump Unit | The main device that moves water from the bilge area out through the hull. |
| Integrated or Separate Float Switch | Automates operation by activating the pump when it detects a specific water level. |
| Discharge Fitting & Hose Segment | Connects the pump to the through-hull fitting, guiding water overboard. |
| Mounting Platform & Fasteners | Provides a stable, flat base to secure the pump to the bottom of the bilge. |
| Wiring Harness & Connectors | Links the pump and switch to the boat’s electrical supply with pre-assembled ends. |
Preparing the Boat for Installation
Begin by ensuring the automatic bilge pump has a clean, dry home in the bilge area, so disconnect the battery first for safety. Scrape away any old adhesive or sealant from a previous install and give the mounting spot a good scrub with some fresh water. This preparation creates the perfect bonding surface for your new pump's base, whether you plan to use epoxy or a marine adhesive.
Choosing the best spot in the bilge for proper drainage
You want the pump to sit at the very lowest point where water naturally pools. This often means placing it centrally in the bilge area, or slightly to the starboard or port side if the hull design favors one side.
- Ensure the location allows the float switch to move without any obstruction.
- Avoid spots directly under the transom or where debris from the stern might collect.
Cleaning and leveling the surface before mounting
This step might seem basic, but it's fundamental for a lasting installation. A clean, flat surface allows the mounting bracket or base to adhere solidly, preventing the new pump from coming loose due to vibration. Use a scraper and solvent to remove all old glue, wax, and grime from the bottom of the bilge until you're down to bare fiberglass or hull material. If the spot isn't perfectly level, you can create a small mounting pad with marine epoxy to create a flat foundation.
Taking these extra minutes now prevents headaches later and ensures your bilge pump mounting is as secure as the hull itself. A well-prepped surface is the secret to a professional-looking and dependable install.
Tools and materials needed for a rule bilge install
| Tool or Material | Purpose in Installation |
|---|---|
| Marine-Grade Adhesive / Sealant | Creates a waterproof bond for the mounting platform and seals through-hull fittings. |
| Additional Bilge Hose (if needed) | Extends the run from the pump to the point of discharge at the stern or side. |
| Cable Tie Set & Hose Clamps | Secures wiring and hoses neatly, preventing vibration and snags. |
| Wire Strippers & Heat Gun | Prepares and protects electrical connections from corrosion with shrink tubing. |
| Degreasing Solvent & Rag | Cleans the mounting surface for optimal adhesion of the platform or epoxy. |
Wiring and Electrical Connections
Safe wiring means starting at the power source by routing a dedicated, fused wire from the battery back to the bilge area. Use marine-grade connections and heat shrink tubing to protect every splice from the damp environment. It's wise to label these wires clearly at both ends, so there's never any confusion about which cable powers your pump and switch.
Identifying the black wire and positive leads correctly
In marine DC systems, the black wire is typically the negative or ground connection. The positive lead from your new pump is usually brown or red, and it must connect to a fused positive source.
- Always double-check the new pump's installation instructions for its specific color coding.
- Connecting the power supply incorrectly can damage the pump and switch.
Using marine-grade connectors for secure wiring
Standard automotive connectors will corrode quickly in the damp bilge area. Use tinned, heat-shrink connectors to ensure a lasting, waterproof seal on every splice. Properly sealed connections protect the circuit and prevent voltage drop to the automatic bilge pump.
- Apply heat to the shrink tubing until it seals tightly around the wire and connector.
- This practice keeps your wiring and electrical connections free from corrosion.
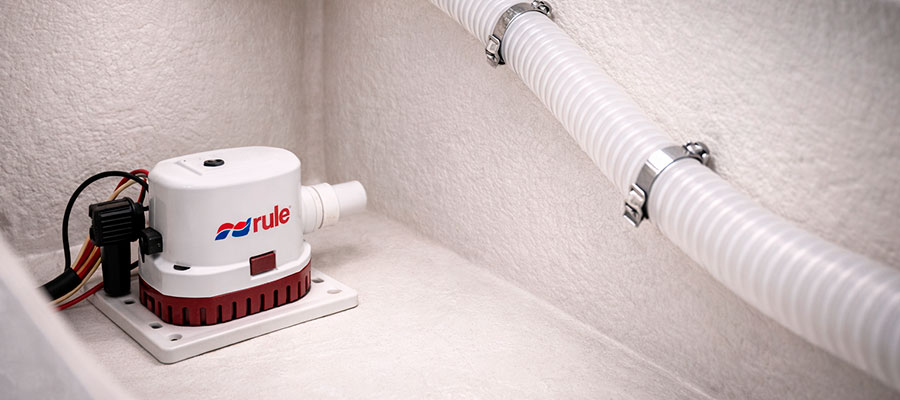
Recommended fuse size and wire gauge for safety
The correct fuse and wire gauge protect your boat’s electrical system. The fuse size is determined by the pump's amperage draw; for instance, a Rule 800 will require a smaller fuse than a 1500 GPH model. The installation instructions will specify the exact size, but a general rule is to use a fuse that matches or slightly exceeds the pump's maximum amp rating.
Using wire that's too thin can cause voltage drop, making the automatic bilge pump work harder and less efficiently. For longer wire runs from the battery to a high-capacity pump, stepping up to a heavier gauge is a smart move. This attention to electrical detail ensures your pump gets the power supply it needs without risk of overheating.
Connecting the Float or Manual Switch
This is where the system gets its intelligence. If you're using a separate float switch, follow the specific wiring diagram to connect it so it controls the power to the pump. Double-check that the float can move up and down freely without snagging on any bilge hose or wiring; its ability to sense the water level accurately is what makes everything work automatically.
How to wire a Rule bilge pump to an automatic switch
If using a separate float switch, it acts as the gatekeeper for the power going to the pump. The positive wire from the battery typically runs to the switch first, then from the switch to the pump. This setup allows the float switch to control the circuit based on the water level.
- Ensure all connections are made with the power supply disconnected.
- Follow the specific diagram for your Rule automatic pump and switch combination.
Manual override options for manual bilge operation
Even with an automatic bilge pump, having a manual switch at the helm is invaluable. This lets you activate the pump on demand to check operation or handle a sudden influx of water. Wiring this typically involves running a second positive wire from a dashboard switch directly to the pump.
- This override works independently of the float switch.
- It’s a simple addition that provides direct control of your bilge pump.
Tips for testing switch functionality before sealing connections
Never skip the wet test before you finalize the install! With all wires connected but not yet sealed, carefully pour a few buckets of fresh water into the bilge area and watch the magic happen. You should see the float switch arm rise with the water level, hear the new pump click on, and watch water flow out the discharge hose.
This is your chance to verify the automatic cycle works perfectly and that the pump is moving the expected gallons per hour. If something isn't right, it's much easier to adjust the float switch position or check wiring and electrical connections now. Passing this test gives you the green light to seal everything up with confidence.
Mounting and Securing the Pump
The actual bilge pump mounting is straightforward but needs a careful touch. Apply a generous bead of your chosen marine adhesive or epoxy to the mounting bracket's base, then press it firmly onto the prepared spot at the bottom of the bilge. Some folks like to add a mechanical backup with a screw or two, but a good bond with the right sealant is often all you need for a rock-solid hold.
Positioning the pump for optimal water flow
The pump should sit flat so its intake strainer is fully uncovered. Even a slight tilt can prevent it from moving its full rated gallons per hour. Good placement ensures it can access water efficiently as soon as the float switch activates.
- Keep the intake clear of debris and away from corners where silt collects.
- Proper positioning is key for the pump and switch to perform as designed.
Proper use of brackets or base plates during installation
The mounting bracket or plate elevates the pump slightly, allowing water to flow underneath the intake. Secure it firmly using the recommended adhesive, like a marine glue or 5200, or with screw fasteners.
- A solid mounting pad prevents vibration and ensures long-term stability.
- This step is the anchor for your entire bilge pump mounting setup.
Avoiding hose kinks and maintaining clear discharge lines
A smooth, unrestricted path for the discharge hose is vital for your pump to achieve its potential gallons per hour rating. A sharp kink or bend can drastically reduce flow, forcing the pump to labor and potentially overheat. Always use smooth-radius hose loops and secure the hose with clamps every couple of feet to prevent sagging or pinching. Installing a check valve in the line, especially if the hose has a long vertical run, can prevent water flow back into the bilge when the pump shuts off.
Taking the time to route the bilge hose neatly from the pump to the through-hull fitting pays off in maximum performance and reliability. It’s one of those details that separates a good install from a great one.
Testing and Maintenance Tips
Once everything is connected, the real moment of truth arrives. Reconnect the battery and pour a bucket of fresh water into the bilge to watch the magic happen—the float should rise, the pump should hum to life, and water should flow out through the bilge hose. For ongoing health, make a habit of listening for its cycle and visually checking the strainer every time you're aboard to ensure nothing is blocking the flow.
Checking pump performance and GPH output
You can get a rough sense of performance by timing how long it takes to empty a known volume of bilge water. While you won't match the ideal gallons per hour rating due to system resistance, a strong, consistent flow indicates a healthy pump. Listen for a steady motor sound without strain, which suggests good water flow and no blockage.
- Compare the output to the pump's rated capacity to gauge system efficiency.
- A significant drop in performance may point to a worn old pump, a clog, or wiring issues.
Routine inspection of wires, connectors, and switch
Make a habit of visually checking the bilge area each time you're on the boat. Look for any green corrosion on connectors or fraying on wires leading to the pump and switch. Manually lift the float switch arm to ensure it activates the automatic bilge pump smoothly and without sticking.
- Clean the intake strainer of any debris to maintain proper water flow.
- These quick checks help you catch small issues before they become big problems.
Troubleshooting common issues with Rule bilge pumps
When your automatic bilge pump isn't working as expected, a logical, step-by-step check can usually find the culprit. Start with the basics: ensure the battery has power and the correct fuse in the circuit is intact. Next, inspect the float switch by manually lifting the arm; if the pump runs, the issue is likely with the switch mechanism or its placement in the water level. If the pump doesn't run, use a multimeter to check for voltage at the pump's positive leads to see if power is getting through.
Listen for a humming sound, which could mean the pump is jammed or the strainer is blocked by debris. Working through these common scenarios methodically will most often get your Rule pump back in action without needing to call in a pro.