

There's a special kind of peace found in a well-kept cabin, but stale, damp air can quickly disrupt it. Managing moisture and ensuring a steady stream of fresh air below deck is a common challenge for boat owners. This is where a self-sufficient solution comes into play: installing a Marinco solar vent. This compact, solar powered fan works silently to extract stale air, helping to prevent mildew and that closed-up smell, all without drawing from your vessel's main power supply.The process centers on creating a single, clean opening in your deck or cabin top to house the unit.
You'll be using a hole saw of the correct diameter to make this cut, a step that requires care but is straightforward with the right tools. The heart of the system is the integrated fan motor and solar cell, which are neatly packaged within a stainless steel housing designed to withstand the marine environment. Proper installation is key to its function and, critically, to preventing any future water intrusion around the fitting.
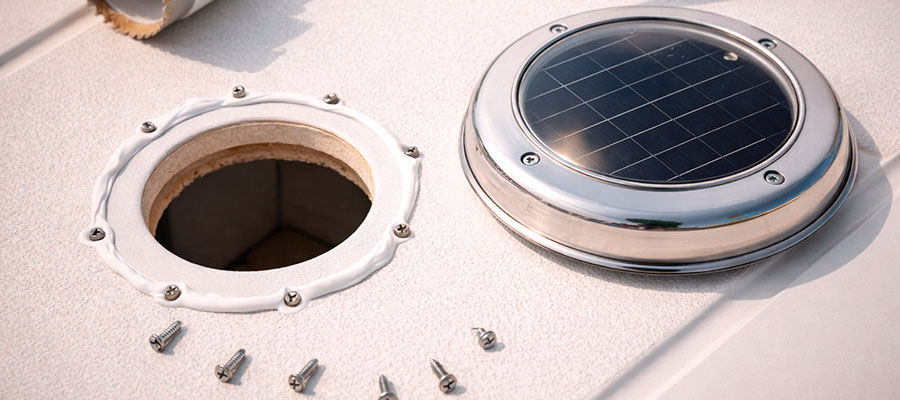
Before you pick up a drill, the most vital step is selecting the optimal location. You need a spot that receives ample sunlight for the solar array to charge effectively, while also considering the natural air flow within your boat to maximize ventilation. You'll want to avoid areas with underlying wires or structural supports. Once the perfect site is chosen, the installation involves cutting the hole, applying a generous bead of waterproof silicone sealant, setting the vent, and securing it with the provided stainless screws and trim ring. A final check of the vent cover ensures a snug, leak-free fit that will keep your cabin dry and aired for seasons to come.
Understanding Marinco Solar Vent Systems
Think of this little unit as your boat's personal, quiet breathing assistant. It uses a sun-powered motor to draw fresh air in or push stale air out, all day long, without ever needing a battery. The Nicro brand is particularly well-known for these reliable, solar powered vent fans that help keep your cabin from feeling like a damp locker. It’s a simple, elegant solution that tackles moisture where it starts.
Key features of the Marinco 4 solar vent model
This model is a real workhorse that stands out for its thoughtful engineering. Its high-efficiency solar panel gathers energy even on overcast days, ensuring the fan motor keeps running longer than you might expect. The housing is crafted from durable stainless steel, which resists the harsh marine environment beautifully.
A key feature is its dual-mode operation, letting you switch the unit between intake and exhaust solar vents with a simple manual adjustment. It’s designed for a clean, low-profile look that sits snugly on your deck or cabin top. Owners often note its surprisingly quiet hum, which gets the job done without any annoying buzz.
How a solar fan improves marine ventilation
Installing a solar vent fundamentally changes your boat's interior atmosphere by promoting consistent air movement. This steady exchange of air is key to battling the damp, musty conditions where mildew thrives.
- It actively draws out stale, humid air trapped in the cabin.
- It invites drier, fresh air from outside to circulate.
- This passive drying effect protects fabrics, gear, and the boat's structure itself.
Differences between intake and exhaust solar vents
Think of these two modes as the unit's way of either breathing in or breathing out for your boat. Setting it to exhaust pulls moisture-laden air from inside your cabin and pushes it overboard, which is perfect for general moisture control. The intake setting does the opposite, drawing fresher outside air down into the interior spaces.
- Exhaust mode: Best for general use to remove humidity and odors.
- Intake mode: Useful for bringing cool morning air below decks.
Preparing for Installation on Your Boat
Grab a cold drink and just sit in your cockpit for a while, watching how the light moves across your deck. You're looking for a sunny, flat spot clear of rigging or shadows that might block the solar cell. Before you mark anything, double-check inside the cabin for wiring or structural supports hiding right where you plan to drill. This quiet contemplation is the step that makes the rest of the job smooth.
Choosing the right location on the deck or hatch
This decision can make or break the unit's performance, so it's worth spending some time on it. You'll need to find a spot that gets generous, direct sunlight for the bulk of the day to keep the fan motor running at its peak. At the same time, consider the natural flow of air inside your boat—placing the vent where it can create a cross-breeze will amplify its effect. Avoid areas that are constantly shaded by sails, biminis, or rigging.
Also, take a look inside the cabin; you must ensure there's clear headroom and no wiring or structural members where you plan to cut. A location that balances full sun with smart interior air flow is the ultimate goal.
Checking clearance and ventilation requirements
Before you even pick up a pencil to mark your deck, pop inside the cabin and imagine the vent living there. You need to ensure there's generous empty space for its body and that nothing blocks the path of the air it will pull or push.
- Verify there are no hidden wires, pipes, or structural supports directly behind the chosen spot.
- Confirm the internal cowling won't interfere with lockers, headroom, or any moving parts.
- Ensure you can physically reach the area for future cleaning or basic maintenance checks.
Tools and materials needed for solar vent installation
| Category | Specific Items |
|---|---|
| Core Tools | Drill, hole saw (matching vent flange diameter), screwdriver (Philips head typically), caulking gun, utility knife, pencil or marker. |
| Sealing & Fastening | Marine-grade silicone or polyurethane sealant (1 tube), isopropyl alcohol & clean rags, masking tape. |
| Safety & Prep | Safety glasses, work gloves, vacuum or brush for debris, a stable platform or ladder if needed. |
Removing or Modifying the Existing Deck Plate
If you have an old, leaky vent there already, this is your chance for a clean start. Carefully pry up the old fitting, and you’ll likely find a mess of dried-up, cracked sealant underneath. Take your time to thoroughly scrape the deck clean down to the bare fiberglass, because any leftover gunk will prevent a proper new seal. A pristine surface is the only guarantee against a future water leak.
How to safely cut or enlarge a deck opening
Always start by using the correct size hole saw or template provided with the unit to mark your cutting line. Drill a pilot hole first to anchor the hole saw, and cut steadily with moderate pressure to avoid grabbing or splintering the material.
- Use sharp, appropriate cutting tools for your deck material (fiberglass, aluminum, etc.).
- Secure any loose core material around the new opening with epoxy to prevent future leaks.
Securing the dorade box or base for better airflow
If your setup includes a dorade box, its job is to boost ventilation while keeping seawater out, so securing it properly is a priority. Ensure it is mounted perfectly level so that any captured water drains correctly overboard through its weep holes. Use a generous bed of marine sealant underneath its base, just as you would with the main vent, to create a secondary waterproof barrier.
The box should be fastened with sturdy hardware, typically stainless steel screws or bolts, depending on your deck's thickness. Taking the time to align it carefully with the vent's airflow path ensures you get the full benefit of this clever passive system.
Tips for smooth mounting surface preparation
| Step | Key Action | Reason & Tip |
|---|---|---|
| 1. Degrease & Clean | Thoroughly wipe the area with isopropyl alcohol. | Removes invisible oils and residues that prevent the sealant from bonding directly to the substrate. |
| 2. Mask for Clean Lines | Apply masking tape to outline the vent base. | Creates a guideline for the hole and allows for crisp, easy cleanup of squeezed-out sealant later. |
| 3. Dry-Fit & Mark | Place the vent unit (without sealant) to confirm fit. | Lets you verify the hole's accuracy and mark exact screw locations before the final, permanent step. |
| 4. Final Wipe-Down | Give the area one more quick clean with alcohol after marking/drilling. | Eliminates dust or micro-debris created during dry-fitting, ensuring a pristine surface for adhesion. |
Mounting the Marinco Solar Vent
This is the satisfying moment when it all comes together. After running a thick bead of marine sealant around your fresh hole, you gently set the Marinco solar fan into place, feeling it nestle down. You then hand-tighten the provided stainless screws through the vent cover and into the deck, watching that perfect ring of sealant squeeze out evenly all around. That ooze is your visual confirmation that you've created a watertight bond.
Aligning the vent with the deck or hatch opening
Place the vent unit into the opening without any sealant to perform a quick alignment check. The frame should settle flush and level against the deck surface without any noticeable gaps or wobble.
- Ensure the screw holes on the flange line up cleanly with solid deck material.
- Rotate the unit to find its most stable, natural seating position.
- Check that the vent cover or cowling clears any raised deck nonskid patterns.
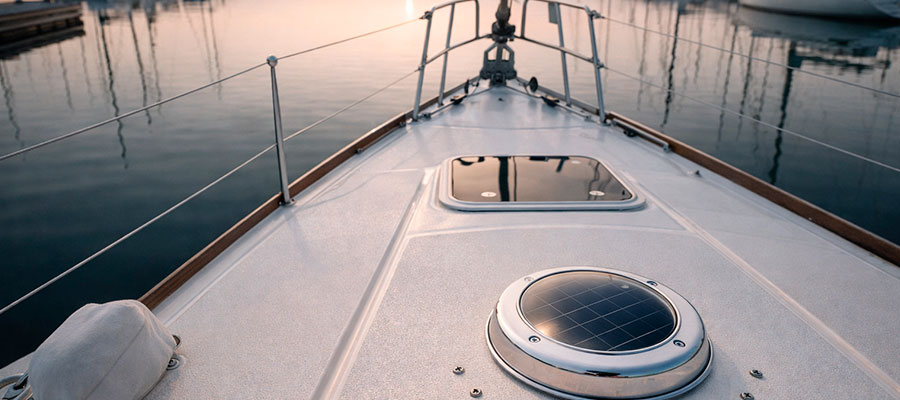
Sealing and fastening the solar vent frame securely
Apply a continuous, generous bead of marine-grade sealant (like silicone) around the entire opening. As you tighten the stainless steel mounting hardware, you should see a consistent ooze of sealant around the entire perimeter, confirming a complete seal.
- Tighten screws in a cross pattern to ensure even pressure.
- Wipe away the excess sealant with a tool or finger dipped in soapy water for a clean finish.
Wiring considerations for optional battery or fan connection
Some models offer a handy trickle-charge connection for your boat's battery or a two-speed fan option. If you use this, planning the wire run is a key step to avoid creating a tripping hazard or damaging the wire. Always route the wire through a proper conduit or sealed cable gland where it passes through the deck to maintain your waterproof seal.
Keep the connection away from areas of standing water or bilge spray, and use marine-grade, tinned wire for its superior corrosion resistance. Securing the wire with clips or ties prevents chafing that could lead to a short over time.
Testing and Adjusting Ventilation Performance
Once the sealant has cured, give the solar cell a few minutes in good light and hold your hand near the vent; you should feel a gentle but definite air flow. If it seems weak, consider whether nearby canvas or gear is casting a shadow. The beauty of installing a solar vent is that you can sometimes tweak its performance just by trimming a nearby sail or shifting a deck cushion to give it more direct sun.
Checking airflow direction (intake vs. exhaust mode)
Once the solar panel powers up, hold a lightweight thread or the back of your hand near the vent to feel the direction of the air flow. The switch between modes is usually a simple manual rotation of the internal fan housing—your manual has the specific trick.
- For intake: You should feel a gentle pull of air flowing into the vent grille.
- For exhaust: You will feel a steady stream of air being pushed out from the vent.
Testing solar fan operation under different light conditions
Observe how your vent behaves throughout the day, not just when the sun is directly overhead. Watch for the fan to maintain a slow spin in morning light or when a passing cloud casts a shadow.
- Note if the fan starts reliably in indirect light.
- Time how long it continues to run after the sun drops below the horizon.
- See if nearby sails or canvas create operational dead zones you hadn't anticipated.
Ensuring proper waterproof sealing around the vent
The sealant bead you applied during installation is your main defense, but a proper inspection a day or two later is wise. Look closely around the entire vent cover and frame for any gaps, pinholes, or areas where the sealant may have pulled away. You can perform a simple leak test by gently pouring a cup of water around the base of the vent while a helper checks inside for any drips.
If you find a flaw, the fix is straightforward: completely remove the old sealant in that area, clean the surface with solvent, and apply a fresh bead. A well-sealed installation should show no signs of water intrusion for years.
Maintenance and Long-Term Care
These units are famously low-fuss, but a tiny bit of attention goes a long way. Every few months, just wipe the solar cell clean with a soft cloth to keep it efficiently charging the motor. During winter lay-up or a long period in the slip, a piece of tape over the vent fan opening can keep spiders and dust out. Listen for changes in the hum of the motor—a change in sound is its way of telling you it might need a look.
Cleaning the solar panel and fan blades regularly
A simple wipe-down every few months keeps the system at peak performance. Use a soft cloth and mild soapy water on the solar panel to remove salt film and dirt that block sunlight.
- Gently clear any dust or lint from the fan blades to maintain balanced airflow and reduce strain on the motor.
Inspecting deck seals and mounting hardware
Make it a seasonal ritual to run your finger around the sealant bead, feeling for any softness, cracks, or separation. At the same time, give each stainless steel screw a slight check with a screwdriver to ensure they haven't loosened with vibration and temperature changes.
- Re-tighten any loose screws and plan to replace hardened or failing sealant.
Common issues boat owners face with solar vents and how to fix them
One frequent observation is a noticeable slowdown or complete stop of the fan motor on cloudy days, which is usually just a sign of low light, not a defect. If the vent stops working entirely, first give the solar panel a very thorough cleaning, as an invisible film of grime can be the culprit. Listen for new rattles or grinding sounds, which could indicate a small debris like a bug wing caught in the fan blades, easily fixed by a gentle cleaning.
Another common concern is discovering a small leak at the mounting base, which almost always traces back to a breach in the sealant that can be dried, cleaned, and patched. For persistent electrical issues, checking the optional wiring connections for corrosion is a logical next step before considering a motor replacement.

