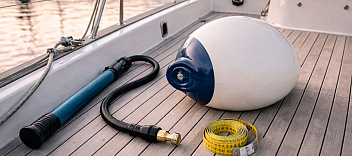
Buying a used boat is one of the smartest ways to get on the water without paying the premium price of a brand-new vessel. Whether you're looking for a fishing boat, center console, pontoon, cruiser, sailboat, or family bowrider, the used market offers thousands of opportunities to find an excellent boat at a fraction of its original cost.
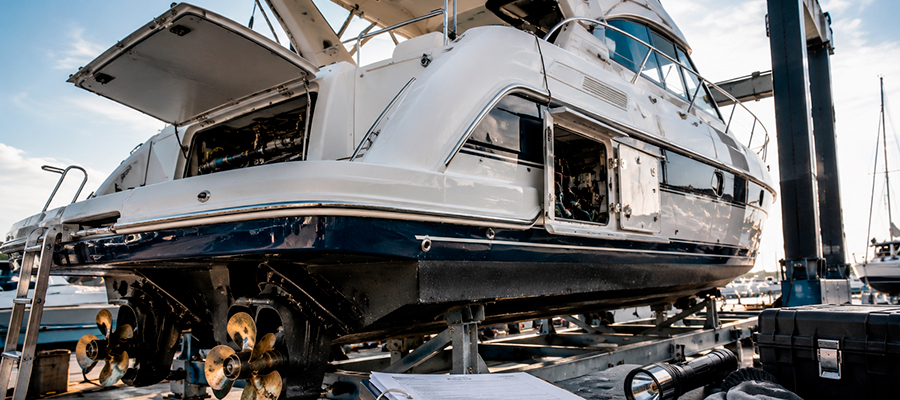
However, every used boat has a history. Some have been meticulously maintained with detailed service records, while others have spent years exposed to harsh weather, poor maintenance, or improper repairs. Unfortunately, cosmetic improvements can hide expensive structural issues that aren't immediately visible during a casual walkthrough.
That's why a systematic inspection is so important. Instead of focusing only on appearance, you should evaluate every major component of the boat—from the hull and deck to the engine, electrical system, fuel lines, and safety equipment. A thorough inspection helps you identify potential problems, estimate future maintenance costs, and negotiate a fair purchase price.
It's equally important to understand the limits of a visual inspection. Some defects remain hidden until the boat is hauled out, disassembled, or examined using specialized equipment.
A checklist like this does not replace a professional marine survey, but it helps buyers ask the right questions before hiring a surveyor.
Think of this guide as your first line of defense. By following the checklist below, you'll be able to recognize common warning signs, separate cosmetic flaws from serious structural concerns, and decide whether a particular boat deserves a closer look.
Before You Start the Inspection
A successful inspection begins before you even step aboard. The seller's willingness to answer questions, provide maintenance records, and discuss the boat's history often tells you as much as the boat itself.
Don't rush the process. Plan enough time to inspect every compartment, open every hatch, and test as many systems as possible. If the seller seems impatient or discourages a detailed inspection, treat that as a potential warning sign.
Ask for Documentation First
Before looking at the hardware, ask to see any available paperwork. Good documentation usually indicates that the owner has taken maintenance seriously.
Request copies of:
- Registration documents
- Hull Identification Number (HIN)
- Engine serial number
- Maintenance and service records
- Winterization records
- Receipts for major repairs
- Warranty information (if applicable)
- Equipment manuals
- Previous marine survey reports
- Records of engine rebuilds or replacements
A missing maintenance history doesn't necessarily mean the boat has been neglected, but it should encourage a more careful inspection.
Bring Basic Inspection Tools
Professional marine surveyors rely on specialized equipment, but buyers can still perform a surprisingly thorough preliminary inspection using a few inexpensive tools.
Bring:
- A bright LED flashlight
- Inspection mirror
- Digital camera or smartphone
- Notebook
- Gloves
- Paper towels
- Small rubber mallet
- Digital multimeter
- Moisture meter (optional but highly recommended)
These tools allow you to inspect hidden areas, verify electrical voltage, document concerns, and identify signs of moisture or corrosion that could otherwise go unnoticed.
If Possible, Inspect the Boat Both on Land and on the Water
Many problems simply don't appear while the boat is sitting on its trailer or in the marina. Ideally, inspect the vessel twice: once while it's out of the water and again during a sea trial.
A haul-out allows you to examine the hull, propeller, rudder, trim tabs, and through-hull fittings. During a sea trial, you can evaluate engine performance, steering response, vibrations, electronics, and overall handling.
If a seller refuses a sea trial without a reasonable explanation, consider that another red flag.
Hull Inspection Checklist
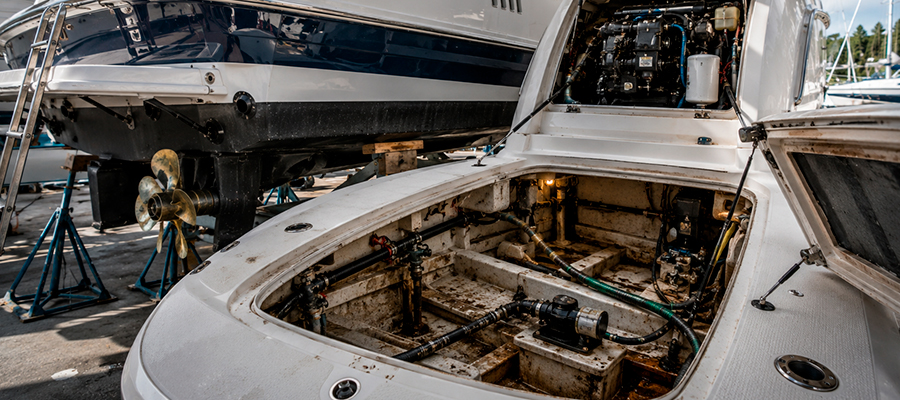
The hull is the most expensive part of the boat to repair, which is why it deserves the most attention. Cosmetic scratches and faded gelcoat are normal on older boats, but structural problems can require repairs costing thousands—or even tens of thousands—of dollars.
Never let fresh wax or polished fiberglass distract you from inspecting the underlying structure.
Exterior Hull Condition
Begin by walking around the entire boat. Look at the hull from several different angles, especially in direct sunlight, where repairs and surface irregularities are easier to spot.
Checklist
- Inspect the bow for signs of collision damage.
- Look for cracks in the gelcoat.
- Check the chines for impact damage.
- Examine the stem for repairs.
- Look for deep scratches that expose fiberglass.
- Check for mismatched gelcoat colors that may indicate previous repairs.
- Inspect below the waterline for osmotic blisters.
- Look for bubbling paint or blistering.
- Examine the keel for grounding damage.
- Check the hull for dents, distortion, or unfair surfaces.
- Inspect trim tabs for corrosion or impact damage.
- Verify that drain plugs are in good condition.
- Check the transom corners for stress cracks.
- Look for signs of water intrusion around fittings.
- Compare both sides of the hull for symmetry.
What to Watch Out For
Don't panic if you find small scratches or faded gelcoat—these are normal signs of use and are relatively inexpensive to repair. Structural damage, however, tells a very different story.
Large blister fields, extensive fiberglass repairs, or obvious signs of collision deserve closer investigation. Ask the seller what happened, request repair invoices, and pay close attention to the quality of the workmanship.
Transom Inspection
The transom supports the outboard engine or stern drive and carries enormous loads every time the boat accelerates or encounters rough water. Moisture inside a cored transom is one of the most expensive structural problems you can encounter.
Checklist
- Inspect the transom for vertical cracks.
- Check around engine mounting bolts for moisture stains.
- Push firmly on the engine to detect excessive flexing.
- Look for soft fiberglass around mounting hardware.
- Inspect splashwell corners for cracking.
- Check for water intrusion around transducers.
- Examine swim platform mounting bolts.
- Look for previous transom repairs.
Pro Tip
Ask someone to gently raise and lower the outboard while you watch the transom from inside the boat. Any noticeable flexing may indicate internal rot or delamination.
Hull Interior and Bilge
Many buyers spend all their time looking at shiny exterior surfaces while ignoring the inside of the hull. That's a mistake.
The bilge often reveals years of maintenance—or neglect.
Checklist
- Open every bilge compartment.
- Check for standing water.
- Look for excessive oil residue.
- Smell for gasoline or diesel odors.
- Inspect stringers for cracks.
- Check fiberglass tabbing for separation.
- Examine bulkheads for movement.
- Look for mold or mildew.
- Inspect limber holes for blockages.
- Verify that bilge pumps are securely mounted.
- Look for loose wiring.
- Inspect hose routing.
What to Watch Out For
A clean bilge isn't always a good sign. Sometimes sellers thoroughly clean the area immediately before listing the boat, making it difficult to spot active leaks.
Look beyond cleanliness. Fresh oil stains, fuel odors, loose wiring, deteriorated hoses, or recently painted fiberglass may indicate problems that deserve further investigation.
Through-Hull Fittings
Every opening below the waterline represents a potential leak point.
Checklist
- Inspect every through-hull fitting.
- Check seacocks for corrosion.
- Operate each seacock.
- Verify that handles move freely.
- Inspect hose clamps for rust.
- Ensure double clamps are installed where appropriate.
- Check hoses for cracking or brittleness.
- Look for water stains around fittings.
- Verify that all fittings are securely fastened.
- Check bonding wires for corrosion.
Deck Inspection Checklist
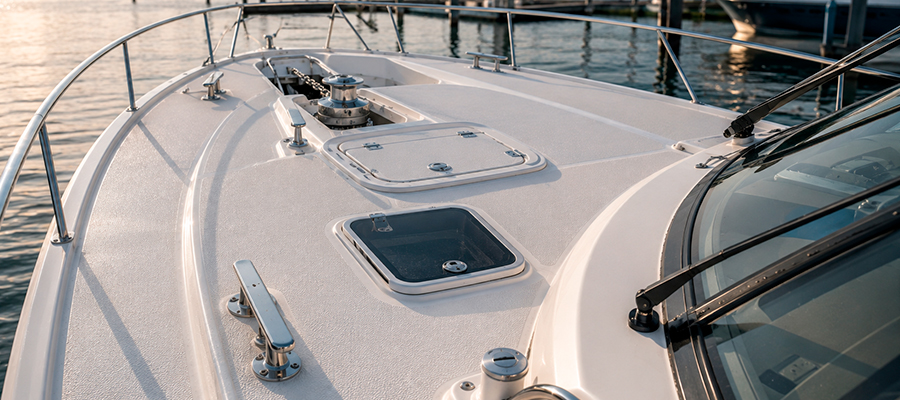
The deck is constantly exposed to sun, rain, saltwater, and foot traffic. Over time, even a small leak around a hatch or deck fitting can allow water to penetrate the core material, leading to rot or delamination.
While cosmetic wear is expected on older boats, soft spots should never be ignored. They often indicate moisture intrusion into the deck core, and repairs can become expensive if the problem has spread.
Take your time during this stage of the inspection. Walk every accessible area, operate every hatch, and physically test deck hardware instead of simply looking at it.
Walk Every Inch of the Deck
One of the simplest inspection techniques is also one of the most effective: walk slowly across the entire deck.
Pay attention to how the deck feels beneath your feet. A properly supported fiberglass deck should feel solid and consistent. Areas that flex, bounce, or feel unusually soft may indicate water intrusion into the core.
If possible, compare questionable areas with sections that clearly feel solid. The difference is often easy to recognize once you've experienced both.
Checklist
- Walk the entire foredeck.
- Walk around the helm or center console.
- Inspect the cockpit sole.
- Check the aft deck.
- Walk around seating bases.
- Feel for soft or spongy areas.
- Look for excessive flexing underfoot.
- Inspect non-skid surfaces for heavy wear.
- Look for cracks in molded deck surfaces.
- Inspect deck seams for separation.
What to Watch Out For
Soft spots don't always mean the deck is unsafe, but they almost always deserve further investigation. Water entering through poorly sealed hardware can slowly saturate the core material for years before the problem becomes visible.
Moisture damage around fuel fills, cleats, windlasses, and bow rails is especially common because these fittings experience constant movement and exposure to weather.
Hatches and Storage Compartments
Every hatch should open smoothly, close securely, and seal properly. Poorly maintained hatches can allow rainwater or spray to enter storage compartments, damaging both the boat and any equipment stored inside.
Checklist
- Open every hatch.
- Close every hatch and verify proper alignment.
- Inspect hatch seals for cracks or brittleness.
- Check hinges for corrosion.
- Test hatch latches and locking mechanisms.
- Inspect gas struts or support arms.
- Look for water stains inside compartments.
- Check storage lockers for mold or mildew.
- Inspect compartment drains.
- Verify that lockers drain completely.
Pro Tip
Freshly cleaned storage compartments may look impressive, but don't assume they're dry. Run your hand along the corners and underneath hatch openings to check for hidden moisture or signs of previous leaks.
Deck Hardware
Deck hardware is subjected to constant stress from docking, anchoring, passengers, and rough seas. Loose or poorly sealed hardware can damage the fiberglass and allow water into the deck core.
Checklist
- Pull gently on handrails.
- Inspect bow rails for movement.
- Check stern rails.
- Inspect cleats for looseness.
- Verify backing plates are secure where visible.
- Inspect rod holders.
- Check cup holders for cracks.
- Inspect grab handles.
- Look for missing fasteners.
- Check visible bolts for corrosion.
What to Watch Out For
Hardware that moves under moderate hand pressure usually indicates loose fasteners or deteriorated backing material. Even if the fitting itself appears undamaged, movement can eventually enlarge mounting holes and allow water to penetrate the deck.
Cockpit and Drainage
A properly draining cockpit is essential for safety. Water should leave the deck quickly without pooling in corners or around hatches.
Checklist
- Inspect cockpit drains.
- Check scuppers for blockages.
- Verify drain hoses are secure.
- Inspect the anchor locker drain.
- Check the swim platform.
- Inspect the boarding ladder.
- Look for cracks around platform mounts.
- Verify the platform feels solid.
- Check deck caulking around fittings.
- Inspect visible sealant for deterioration.
Pro Tip
Water almost always follows gravity. If you notice stains on the cabin ceiling or inside storage compartments, the source of the leak is usually a deck fitting directly above it—not necessarily the location where the water becomes visible.
Likewise, fresh sealant around only one fitting may indicate that the owner has already chased a persistent leak. Ask when the repair was performed and whether the underlying cause was properly addressed.
With the hull and deck inspection complete, you've already evaluated two of the most expensive structural areas on the boat. If both are in good condition, you can move on to the mechanical systems, where the engine, fuel system, steering, and electrical components will often determine the true cost of ownership.
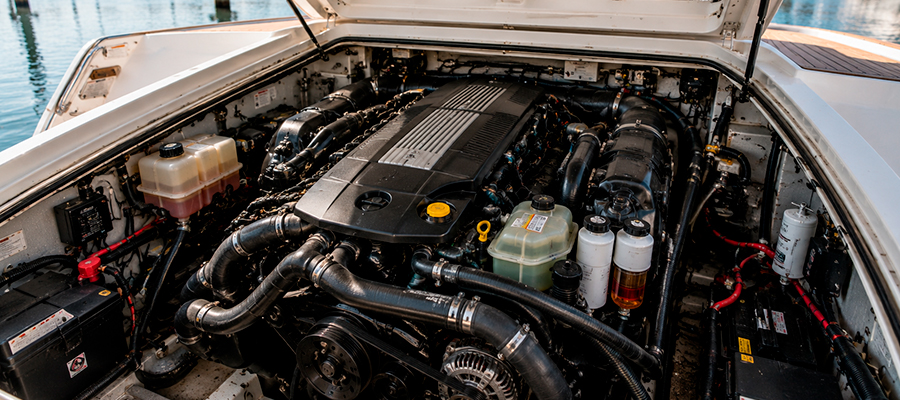
Engine Inspection Checklist
The engine is often the single most expensive component on a used boat. While cosmetic issues are usually inexpensive to fix, major engine repairs or a complete replacement can easily cost thousands—or even tens of thousands—of dollars.
Fortunately, many engine problems leave visible clues long before complete failure occurs. Oil leaks, corrosion, excessive smoke, neglected maintenance, and poor starting behavior can all indicate underlying mechanical issues. Although a professional mechanical inspection is always recommended before purchasing a high-value vessel, a careful visual inspection can help you identify obvious warning signs.
Always inspect the engine before it's started. A seller who warms the engine before your arrival may unintentionally—or intentionally—hide cold-start issues that only appear when the engine is completely cold.
Visual Engine Inspection
Begin with a slow visual inspection. Don't focus only on the engine block itself—look at everything surrounding it, including hoses, wiring, mounts, belts, and fasteners.
Engine Exterior Checklist
- Inspect the engine block for corrosion.
- Look for peeling paint that may indicate overheating.
- Check for oil leaks around seals and gaskets.
- Inspect the engine mounts for cracks or deterioration.
- Look for excessive rust on brackets and fasteners.
- Check for loose or missing bolts.
- Inspect all visible hoses for cracks or swelling.
- Check hose clamps for corrosion.
- Inspect wiring for damaged insulation.
- Look for aftermarket modifications or poorly executed repairs.
A clean engine isn't always a healthy engine. Some sellers thoroughly clean the engine compartment before listing the boat, making it more difficult to identify fresh oil leaks or coolant seepage. Look beyond cleanliness and pay attention to the condition of individual components.
Cold Start Inspection
A cold start reveals much more about an engine's health than one that has already been warmed up. Excessive cranking, rough idle, unusual smoke, or warning alarms may all indicate problems that deserve further investigation.
Cold Start Checklist
- Confirm the engine is cold before starting.
- Observe how quickly the engine starts.
- Listen for abnormal knocking noises.
- Listen for rattles during idle.
- Check that idle speed remains stable.
- Watch for excessive engine vibration.
- Verify that all warning alarms turn off after startup.
- Check the instrument panel for warning lights.
An engine that struggles to start when cold may have ignition, fuel delivery, compression, or battery problems. These issues often become less noticeable after the engine reaches operating temperature.
Oil and Fluid Inspection
Engine fluids provide valuable insight into maintenance quality. Dirty or contaminated fluids don't automatically mean the engine is worn out, but they often suggest that routine servicing has been neglected.
Oil and Fluids Checklist
- Check the engine oil level.
- Inspect the oil for a milky appearance.
- Look for metal particles on the dipstick.
- Check coolant level if applicable.
- Inspect coolant for contamination.
- Check power steering fluid if equipped.
- Inspect transmission fluid on inboard boats.
- Look for leaks beneath the engine.
Milky engine oil often indicates water contamination, while metallic particles may suggest internal engine wear. Neither issue should be ignored, as both can lead to expensive repairs.
Cooling System
Marine engines rely on efficient cooling systems to prevent overheating. Saltwater use makes corrosion a common concern, particularly on older boats.
Cooling System Checklist
- Inspect cooling hoses.
- Check hose connections for leaks.
- Inspect the raw water pump.
- Look for corrosion around the thermostat housing.
- Verify that cooling water discharges normally after startup.
- Watch engine temperature gauges during operation.
- Look for signs of previous overheating.
- Inspect the heat exchanger if accessible.
Overheating is one of the fastest ways to damage a marine engine. Even if the engine currently runs well, evidence of repeated overheating may indicate hidden internal damage.
Belts and Moving Components
Drive belts and rotating components should operate smoothly without excessive noise or visible wear.
Belts and Components Checklist
- Inspect drive belts for cracks.
- Check belt tension.
- Listen for squealing noises.
- Inspect pulleys for alignment.
- Check the alternator mounting.
- Inspect visible bearings.
Sea Trial Performance
A sea trial is the best opportunity to evaluate how the engine performs under real operating conditions. Many issues only become apparent when the boat is under load.
- Accelerate smoothly through the RPM range.
- Verify the engine reaches the manufacturer's recommended maximum RPM.
- Watch engine temperature throughout the test.
- Monitor oil pressure.
- Check charging voltage.
- Listen for unusual noises at cruising speed.
- Watch for excessive smoke.
- Check for abnormal vibration.
- Verify smooth shifting into forward and reverse.
- Test throttle response.
An engine may idle perfectly at the dock while developing serious problems under load. A sea trial helps uncover overheating, power loss, transmission issues, and excessive vibration before you commit to the purchase.
Service History
Maintenance records often tell a more complete story than the engine itself. Consistent servicing is usually a better indicator of long-term reliability than engine hours alone.
Service History Checklist
- Review maintenance records.
- Verify oil change intervals.
- Ask when the impeller was last replaced.
- Confirm fuel filters have been serviced regularly.
- Check whether spark plugs have been replaced.
- Ask about winterization procedures.
- Request receipts for major repairs.
- Verify reported engine hours.
A well-documented engine with regular maintenance records is generally a safer investment than one with unusually low hours but little evidence of proper care. Marine engines deteriorate from neglect as much as they do from heavy use.
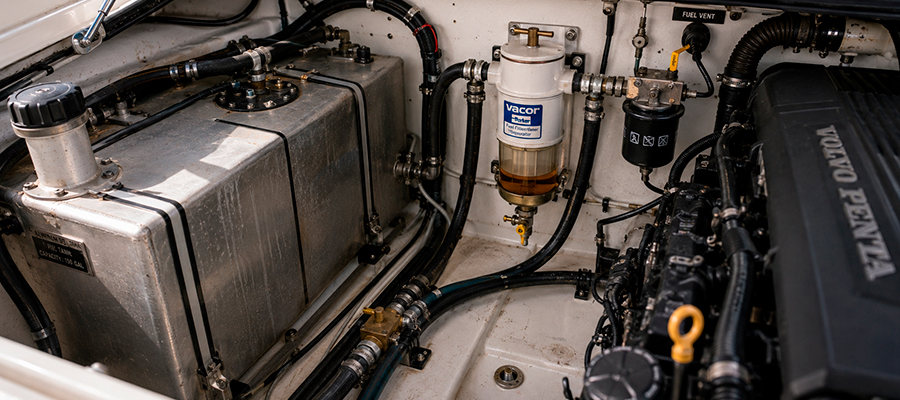
Fuel System Inspection Checklist
A reliable fuel system is essential for both performance and safety. Even a minor fuel leak can create a serious fire hazard, while contaminated fuel may cause poor engine performance or leave you stranded offshore.
Unlike cosmetic defects, fuel system problems should never be ignored. Fortunately, many issues can be identified through a careful visual inspection before the boat ever leaves the dock.
Fuel Tank Inspection
The fuel tank is one of the most difficult and expensive components to replace. Inspect every visible section carefully, paying close attention to corrosion, mounting points, and evidence of leaks.
Fuel Tank Checklist
- Inspect the fuel tank for corrosion.
- Look for dents or physical damage.
- Check tank mounting straps and brackets.
- Inspect welds for signs of cracking.
- Look for fuel stains around the tank.
- Smell for gasoline or diesel odors.
- Check for standing water around the tank.
- Inspect the fuel fill connection.
Corrosion often begins underneath mounting straps or in areas where water becomes trapped. Small leaks can be difficult to detect but may eventually require complete tank replacement.
Fuel Lines and Connections
Fuel hoses naturally deteriorate with age, especially when exposed to heat, sunlight, or ethanol-blended fuels. Damaged hoses should always be replaced before the boat is operated.
Fuel Line Checklist
- Inspect fuel hoses for cracks.
- Check hoses for stiffness or brittleness.
- Inspect all hose clamps.
- Look for fuel seepage around fittings.
- Verify hoses are properly supported.
- Check that hoses are routed away from hot engine components.
- Inspect primer bulbs for cracking if equipped.
- Test the primer bulb for proper firmness.
Even small fuel leaks create fire hazards inside an enclosed engine compartment. Replacing aging hoses is inexpensive compared to the consequences of a fuel-related fire.
Fuel Filters and Water Separator
Clean fuel is essential for modern marine engines. Water contamination is one of the most common causes of poor performance and unexpected engine shutdowns.
Fuel Filter Checklist
- Inspect the primary fuel filter.
- Check the water separator.
- Look for water inside the separator bowl.
- Ask when the filters were last replaced.
- Inspect filter housings for corrosion.
- Look for leaks around filter seals.
Water inside the fuel system can damage injectors, reduce engine performance, and eventually cause corrosion throughout the fuel system.
Fuel Ventilation
Proper ventilation prevents pressure buildup inside the fuel tank and helps reduce the accumulation of dangerous fuel vapors.
Fuel Vent Checklist
- Inspect the fuel vent for blockages.
- Check the vent screen for debris.
- Verify vent hoses are securely attached.
- Look for kinks in vent hoses.
A blocked fuel vent may cause engine performance problems by restricting fuel flow, especially during extended periods of operation.
Steering System Inspection Checklist
The steering system directly affects the boat's handling and safety. Excessive play, stiffness, or hydraulic leaks can make the vessel difficult—or even dangerous—to control.
Regardless of whether the boat uses mechanical cable steering or a hydraulic system, every component should operate smoothly throughout its full range of motion.
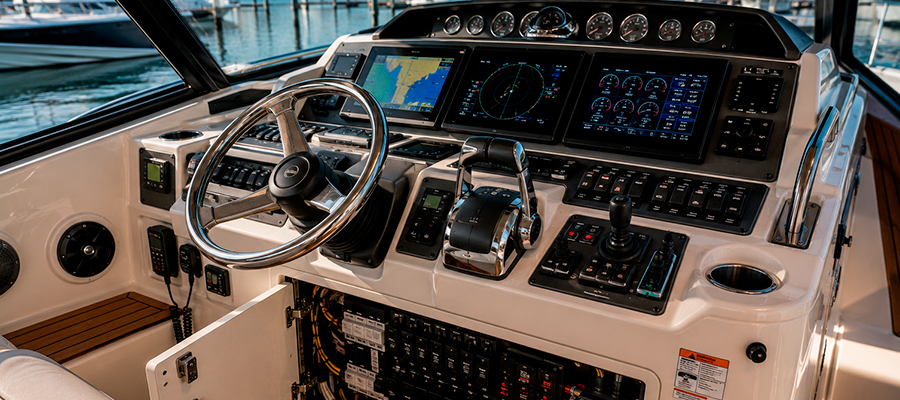
Steering Wheel and Helm
Steering Checklist
- Turn the steering wheel from lock to lock.
- Check for excessive free play.
- Listen for unusual noises while turning.
- Verify smooth steering movement.
- Inspect the steering wheel for damage.
- Check helm mounting hardware.
Excessive play often indicates worn steering components. Small steering issues can become much more noticeable at higher speeds or in rough water.
Hydraulic or Mechanical Steering
System Checklist
- Inspect hydraulic cylinders for leaks.
- Check hydraulic hoses for damage.
- Inspect cable steering for corrosion.
- Look for damaged steering boots.
- Verify steering linkage is secure.
- Inspect steering arm fasteners.
- Check for excessive movement at connection points.
- Lubricate fittings if recommended by the manufacturer.
Hydraulic leaks can gradually reduce steering performance, while worn steering cables may eventually seize or fail completely.
Outboard Steering and Trim
Outboard Steering Checklist
- Turn the outboard fully to both sides.
- Inspect the steering tube.
- Check the tilt and trim system.
- Listen for abnormal trim motor noises.
- Inspect trim rams for corrosion.
- Check hydraulic fluid leaks around trim components.
Corrosion around steering tubes and trim cylinders is common on saltwater boats. Ignoring these problems can eventually result in expensive repairs or loss of steering control.
Electrical System Inspection Checklist
The electrical system powers everything from engine starting to navigation electronics, lighting, pumps, and onboard accessories. Corrosion, poor wiring practices, or neglected maintenance can cause intermittent failures that are difficult to diagnose.
Marine electrical systems operate in one of the harshest environments possible. Moisture, vibration, and salt accelerate corrosion, making routine inspection especially important when buying a used boat.
Battery Installation
Battery Checklist
- Inspect battery cases for damage.
- Check battery terminals for corrosion.
- Verify batteries are securely fastened.
- Inspect battery cables.
- Look for damaged insulation.
- Check battery age if labeled.
- Measure battery voltage.
- Inspect battery switches.
Loose batteries can shift in rough conditions, damaging cables or creating dangerous electrical shorts. Heavy corrosion may also indicate poor maintenance or charging issues.
Wiring and Electrical Connections
Electrical Wiring Checklist
- Inspect visible wiring throughout the boat.
- Look for unsupported wiring runs.
- Check for household wire nuts or non-marine connectors.
- Inspect electrical tape repairs.
- Look for melted insulation.
- Verify wiring is properly secured.
- Check grounding connections.
- Inspect bonding wires.
Poor wiring is one of the most common issues found on used boats. Amateur electrical modifications often create long-term reliability and safety problems.
Switches, Breakers and Fuse Panel
Electrical Panel Checklist
- Test every dashboard switch.
- Inspect the fuse panel.
- Check circuit breakers.
- Verify labels are readable.
- Inspect for corrosion inside the panel.
- Check spare fuse availability.
Lighting and Accessories Checklist
- Test navigation lights.
- Test anchor lights.
- Inspect cabin lights.
- Check courtesy lighting.
- Test the horn.
- Verify bilge pumps operate correctly.
- Inspect livewell pumps if equipped.
- Test freshwater pumps if installed.
Charging System Checklist
- Verify alternator charging voltage.
- Check battery charger operation.
- Inspect shore power connections if equipped.
- Test GFCI outlets.
- Inspect shore power cord condition.
- Look for signs of overheating around electrical connections.
Electrical failures are among the most frustrating problems for boat owners because they often appear intermittently. A careful inspection before purchase can reveal corrosion, poor repairs, or overloaded circuits that may otherwise remain hidden until you're on the water.
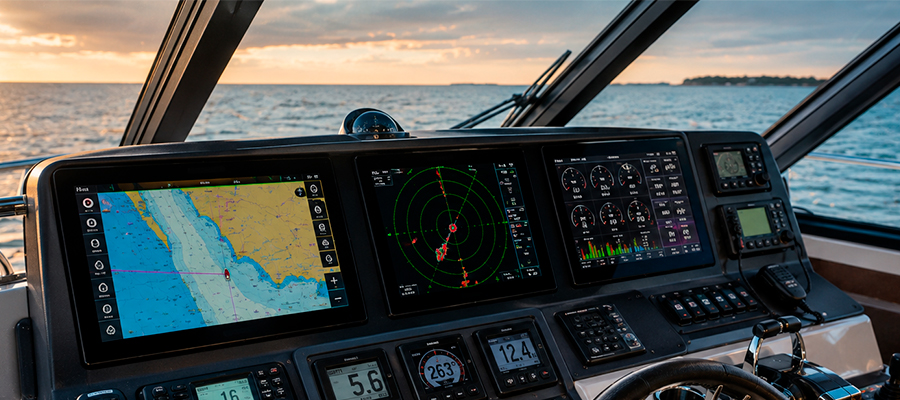
Navigation Electronics Inspection Checklist
Modern boats rely heavily on electronic equipment for navigation, communication, and safety. While electronics are generally easier to replace than structural or mechanical components, repairing an integrated navigation system can still be expensive.
During your inspection, power up every electronic device individually. Don't assume equipment works simply because it powers on—a complete functional test is always preferable.
Chartplotter and GPS
A chartplotter is often the centerpiece of a boat's navigation system. Verify that it starts correctly, acquires a GPS signal, and responds normally to user input.
Chartplotter Checklist
- Power on the chartplotter.
- Verify GPS signal reception.
- Test the touchscreen or keypad.
- Inspect the display for dead pixels.
- Check screen brightness.
- Verify chart cards are recognized.
- Confirm software operates normally.
- Inspect mounting hardware.
Navigation electronics can quickly become outdated. Before purchasing the boat, determine whether software updates are still available and whether replacement parts can still be obtained.
Communication Equipment
Reliable communication equipment is critical during emergencies, especially when boating offshore.
VHF Radio Checklist
- Power on the VHF radio.
- Test channel selection.
- Inspect the microphone.
- Verify antenna connections.
- Check DSC functionality if equipped.
- Inspect the antenna for damage.
A VHF radio is one of the most important safety devices onboard. Poor antenna connections or damaged cables can significantly reduce transmission range.
Navigation Instruments
Navigation Equipment Checklist
- Test the depth sounder.
- Verify fish finder operation if equipped.
- Inspect radar functionality.
- Check AIS operation if installed.
- Verify compass accuracy.
- Inspect autopilot controls.
- Test wind instruments on sailboats.
- Confirm engine monitoring displays operate correctly.
Faulty navigation equipment may not become obvious until poor weather or low visibility. Testing every system while inspecting the boat helps prevent expensive surprises later.
Plumbing System Inspection Checklist
The plumbing system includes freshwater delivery, sanitation equipment, pumps, hoses, and through-hull plumbing. While leaks may appear minor at first, neglected plumbing problems often lead to water damage, unpleasant odors, and expensive repairs.
Freshwater System
Freshwater Checklist
- Fill the freshwater tank if possible.
- Test the freshwater pump.
- Open every faucet.
- Check water pressure.
- Inspect visible plumbing connections.
- Look for leaks beneath sinks.
- Inspect hoses for cracking.
- Test the shower if equipped.
Leaks inside cabinets or behind panels may remain hidden for years, eventually causing mold, wood rot, or damage to electrical systems.
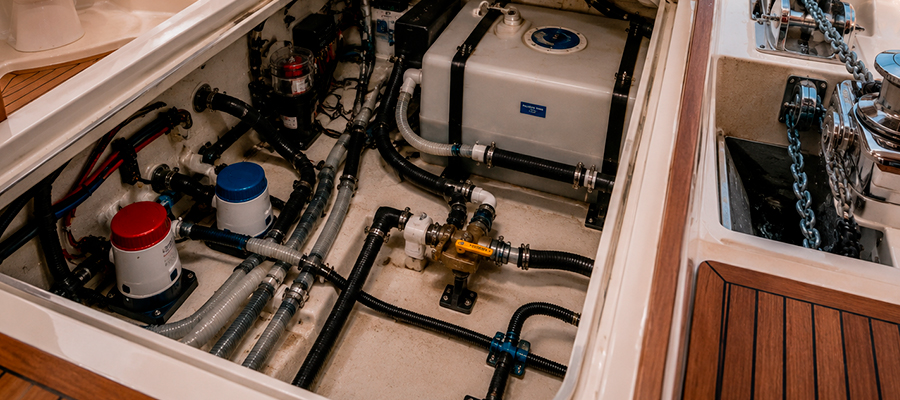
Marine Head and Holding Tank
Sanitation System Checklist
- Flush the marine toilet.
- Inspect toilet seals.
- Check the holding tank.
- Inspect sanitation hoses.
- Look for unpleasant odors.
- Test macerator pumps if installed.
- Inspect tank vent lines.
- Check overboard discharge valves where legal.
Sanitation system repairs are often unpleasant and labor-intensive. Persistent odors usually indicate aging hoses or leaking seals rather than poor cleaning.
Bilge and Water Pumps
Pump Checklist
- Test every automatic bilge pump.
- Test manual bilge pump operation.
- Inspect float switches.
- Check discharge hoses.
- Inspect hose clamps.
- Verify pumps discharge water properly.
Bilge pumps are the boat's last line of defense against flooding. A failed pump can quickly turn a minor leak into a major emergency.
Windlass Inspection Checklist
An anchor windlass experiences heavy mechanical loads and constant exposure to saltwater. Even if you don't anchor frequently, the system should operate smoothly and safely.
Windlass Operation
Windlass Checklist
- Power on the windlass.
- Test both retrieve and deploy functions.
- Inspect electrical connections.
- Check the circuit breaker.
- Inspect the gypsy for wear.
- Verify smooth operation.
- Inspect mounting bolts.
- Look for corrosion around the base.
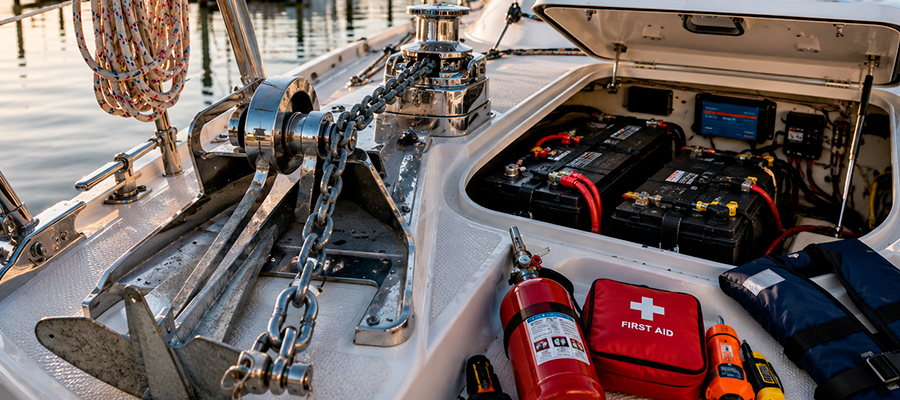
Anchor Rode
Anchor System Checklist
- Inspect the anchor chain.
- Check rope for chafing.
- Inspect shackles.
- Verify safety wire installation.
- Inspect the anchor itself.
- Check the bow roller.
A windlass failure can make anchoring difficult or impossible. Worn chain, corroded fasteners, or damaged electrical components should be addressed before relying on the system.
Battery Inspection Checklist
Although battery condition was briefly covered during the electrical inspection, batteries deserve additional attention because they directly affect engine starting and the operation of onboard electronics.
Battery Condition
Battery Checklist
- Verify battery age.
- Inspect battery labels.
- Measure resting voltage.
- Inspect charging cables.
- Check terminal tightness.
- Inspect battery trays.
- Verify hold-down straps are secure.
- Inspect battery ventilation.
Marine batteries typically last between three and six years depending on maintenance and usage. Even batteries that appear healthy may require replacement if they are approaching the end of their expected service life.
Charging System
Charging Checklist
- Verify charging voltage while the engine is running.
- Inspect onboard battery charger operation.
- Check battery isolators if installed.
- Inspect solar charging systems if equipped.
- Verify inverter operation if installed.
- Inspect charging connections for corrosion.
A weak charging system may not become obvious during a short inspection but can quickly leave you with discharged batteries after several hours on the water.
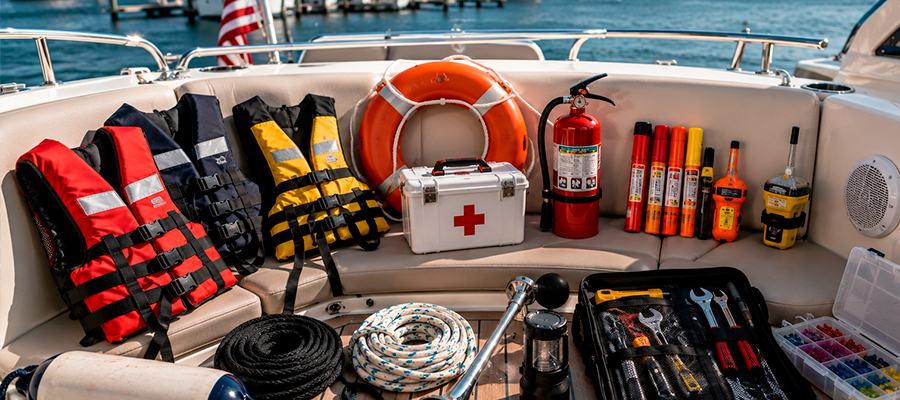
Safety Equipment Inspection Checklist
Safety equipment is often overlooked during a used boat inspection because it doesn't directly affect performance or appearance. However, missing or expired safety gear can result in fines, failed inspections, or serious consequences during an emergency.
Don't simply confirm that safety equipment is present—verify that it's complete, accessible, and within its expiration dates where applicable.
Required Safety Equipment
Safety Checklist
- Count all life jackets.
- Inspect life jackets for damage.
- Check fire extinguisher charge indicators.
- Verify fire extinguisher expiration dates.
- Inspect visual distress signals.
- Check flare expiration dates.
- Test the horn or sound signaling device.
- Inspect navigation lights.
- Verify throwable flotation devices are onboard.
- Inspect first aid kit contents.
Emergency Equipment
Emergency Equipment Checklist
- Verify anchor and rode are onboard.
- Inspect dock lines.
- Check fenders.
- Inspect emergency tiller if applicable.
- Verify emergency paddle or oar is available.
- Check EPIRB or PLB expiration dates if equipped.
- Inspect emergency tool kit.
- Verify spare fuses are onboard.
Safety equipment should never be viewed as an afterthought. Replacing expired flares or worn life jackets is inexpensive compared to the protection they provide when an emergency occurs.
Rigging Inspection Checklist (Sailboats Only)
If you're buying a sailboat, the standing and running rigging deserves the same level of attention as the engine or hull. A rigging failure can dismast a boat, create a serious safety hazard, and lead to repairs costing many thousands of dollars.
Standing rigging has a finite service life. Even if it appears to be in good condition, many marine surveyors recommend replacement after approximately 10 to 15 years, depending on usage, climate, and maintenance history.
Standing Rigging
The standing rigging supports the mast and remains under constant load. Carefully inspect every visible component from deck level, and use binoculars if necessary to examine fittings higher on the mast.
Standing Rigging Checklist
- Inspect shrouds for broken wire strands.
- Inspect stays for corrosion.
- Look for rust around swaged fittings.
- Check turnbuckles for cracks or bending.
- Verify cotter pins are properly installed.
- Inspect chainplates for corrosion.
- Look for deck cracks around chainplates.
- Inspect mast step for corrosion or movement.
- Check mast alignment.
- Inspect spreaders for damage.
Broken wire strands, cracked fittings, or corroded chainplates are not cosmetic defects—they may indicate that the rig is approaching the end of its service life and should be professionally evaluated before the boat is sailed.
Running Rigging
Running Rigging Checklist
- Inspect halyards for chafe.
- Inspect sheets for excessive wear.
- Check control lines for UV damage.
- Test all winches.
- Inspect self-tailing mechanisms.
- Verify blocks rotate freely.
- Inspect travelers and cars.
- Check rope clutches.
Replacing running rigging is usually less expensive than replacing standing rigging, but worn lines and malfunctioning winches can significantly reduce safety and sail handling performance.
Red Flags That Should Make You Walk Away
Every used boat will have flaws. Minor cosmetic defects, worn upholstery, or outdated electronics are common and often expected. However, certain problems can indicate extensive hidden damage or repair costs that far exceed the boat's value.
If you discover several of the following issues during your inspection, it's usually worth walking away and continuing your search.
- Soft or spongy decks caused by water intrusion.
- Large structural cracks in the hull or transom.
- Evidence of major collision repairs without documentation.
- Severe osmotic blistering over large hull areas.
- Water-contaminated engine oil.
- Heavy engine corrosion or multiple fluid leaks.
- Fuel odors inside enclosed compartments.
- Poorly executed electrical modifications.
- Extensive corrosion on critical steering components.
- Missing ownership or maintenance records.
- Signs that the boat has been submerged.
- The seller refuses a professional inspection or sea trial.
One serious issue doesn't automatically make a boat a bad purchase, especially if it's reflected in the price. However, multiple major defects often indicate years of deferred maintenance and can quickly turn an affordable boat into an expensive restoration project.
Questions to Ask the Seller
A careful inspection should always be accompanied by a detailed conversation with the seller. Their answers can help you verify the boat's history and identify potential concerns that aren't immediately visible.
Questions Checklist
- Why are you selling the boat?
- How long have you owned it?
- How many previous owners has it had?
- Has the boat ever been involved in an accident?
- Has it ever sunk or partially flooded?
- Where has the boat been stored?
- Has it primarily been used in freshwater or saltwater?
- Are maintenance records available?
- When was the engine last serviced?
- When was the impeller last replaced?
- Have any major repairs been performed?
- Are there any known issues that still need attention?
- When was the boat last hauled out?
- Can the boat be sea trialed before purchase?
- Are all manuals, keys, and accessories included?
Should You Get a Professional Marine Survey?
Even the most thorough personal inspection has limitations. Some structural defects, moisture intrusion, engine problems, and electrical issues require specialized equipment and years of experience to identify correctly.
A checklist like this does not replace a professional marine survey, but it helps buyers ask the right questions before hiring a surveyor.
If you're purchasing a higher-value boat, financing the purchase, obtaining insurance, or simply want greater confidence in your decision, hiring an accredited marine surveyor is one of the smartest investments you can make.
A professional survey typically includes:
- A structural hull inspection.
- Moisture meter testing.
- Evaluation of the deck and transom.
- Inspection of the propulsion system.
- Electrical system assessment.
- Safety equipment verification.
- A written report with recommendations and estimated repair priorities.
Final Thoughts
Buying a used boat is one of the biggest investments many boaters make, and even experienced owners can overlook expensive problems during a walkthrough. A structured inspection checklist helps you evaluate the vessel objectively, identify obvious warning signs, and ask informed questions before making an offer.
However, no buyer's checklist can uncover every hidden issue. Structural moisture, internal engine wear, previous repairs, electrical faults, and other critical defects often require specialized equipment and years of hands-on experience to identify correctly.
If you're serious about purchasing a used boat—or simply want peace of mind before committing thousands of dollars—it's worth having the vessel inspected by an experienced marine professional.
NAME has helped buyers evaluate used boats by identifying potential problems, estimating repair costs, and providing an unbiased assessment of a vessel's overall condition. A professional inspection can save you from unexpected expenses and give you confidence that you're making the right investment.
Whether you're buying your first fishing boat, a family cruiser, or your dream sailboat, combining the inspection checklist in this guide with an expert evaluation is the safest way to purchase with confidence and spend more time enjoying the water instead of dealing with costly surprises.