

Whale pumps are reliable and widely used devices for moving water and waste in boats, caravans, and motorhomes. Over time, however, even the most durable models can experience issues such as reduced flow, strange noises, or complete failure. Understanding how these systems work and how to troubleshoot them properly can save you both time and money. In this guide, we’ll walk through the key steps to diagnose common problems, replace worn parts, and restore your Whale pump to full working order safely and efficiently.
Understanding Whale Pumps
Every water pump helps move fresh water through the system. It keeps the crane running and supports the galley pump. Sailors often discuss repair tips on a boating forum. Some use a hand pump, others prefer an electronic model. A bilge pump clears unwanted water from the bilge area. Good valves and plugs prevent leaks and air entry. A working hose connection protects the body of the compressor. Regular care avoids buying a new pump too soon.
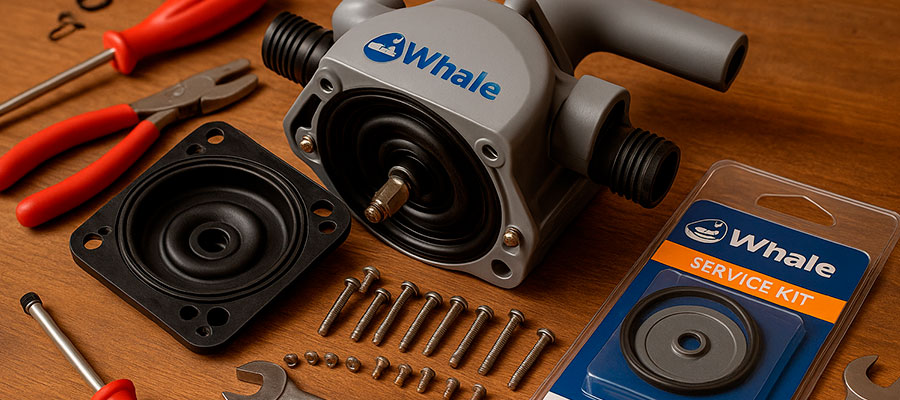
What is a Whale pump
This type of compressor moves fresh water inside small water systems. It can be a manual pump or powered by a 12v fuse. The inlet and outlet control how water flows through it.
It pushes clean water to every tap with minimal effort.
A submersible pump sits inside a water tank for easy use. Some prefer the v mk6 for sailing and salt water. When parts leak, a repair kit or service kit helps. A worn housing or valve needs fast attention and care. With a spare pump ready, problems never stop your trip.
Types of Whale pumps: Whale Gusher and others
| Type | Key Features | Use Case | Benefits |
|---|---|---|---|
| Whale Gusher | Manual diaphragm pump made for heavy-duty work. | Boats and liferafts. | No power needed, easy to repair. |
| Whale Submersible | Small electric unit placed in the tank. | Caravans, compact boats. | Quiet, quick to install. |
| Whale Smartflo | Automatic pressure control system. | Yachts, motorhomes. | Smooth flow, energy-saving. |
| Whale Gulper | Diaphragm waste pump without filters. | Showers, galley drains. | Handles debris, low maintenance. |
| Whale Watermaster | Combined pump and connector system. | Touring caravans. | Simple setup, steady water feed. |
Common problems with Whale pumps
Sometimes the compressor stopped because of a blown fuse. Air may enter through a loose hose or cracked seal. A bad regulator often makes the pressure switch fail. When the compressor stopped, check the float switch carefully. Old pipe or taps may also cause a small leakage.
Frequent issues:
- Blocked inlet or outlet passage.
- Damaged pipe near the body of the pump.
- Weak seal inside the housing area.
- Electrical fault inside the pressure switch.
- Worn valve needing a new service kit.
Tools and Materials Needed for Repair
Before any repair, prepare all tools and spare parts first. You will need screwdrivers, pliers, and a small wrench. Keep a repair kit nearby for quick part changes. A soft cloth helps clean the body of the pump. Always check the mk number printed on the label. It ensures parts match your whale v compressor correctly. Some owners use a little oil for stuck screws. Early maintenance prevents the pump from stopping during use.
Parts for rebuilding a Whale pump
When a unit stopped working, the right parts are essential. Always match your model before buying any repair pieces. Using a rebuild kit saves time and money during service. Check all seals and moving parts before adding a new one. If needed, replace the pump completely for better results.
Main parts to prepare:
- Diaphragm and gaskets from the rebuild kit.
- Screws and clips that hold the mk housing.
- Small filter to keep debris out.
- Rubber rings for sealing tight joints.
- Pressure unit for the whale v pump.
Tools required for installation and repair
Good tools make the repair faster and much safer. Each mk version may need different screw sizes and tips. A service kit fits better with matching screwdrivers and pliers. When you replace the compressor, use the right wrench size. Always test the new one before full tightening.
Useful tools include:
- Flat and cross screwdrivers.
- Adjustable wrench with smooth grip.
- Needle pliers for narrow spaces.
- Container for removed screws.
- Small brush for cleaning parts.
Safety considerations before repair
Always think of safety before touching any electrical device. Disconnect power before handling the whale v pump housing. Dry the area well to prevent short circuits or slips. Keep gloves on to avoid cuts and dirt exposure.
Never replace the pump while the power remains active.
If the pump stopped working, check cables for moisture. Make sure your hands stay dry during the process. Do not test the new one until all screws are tight. Keep mk parts in a dry box away from water. A safe workspace keeps both you and the pump protected.
Diagnosing Issues in a Whale Pump
Start by checking if water still flows normally through the system. Listen closely for strange noises during operation or low flow sounds. Air bubbles often mean a loose connection or cracked part inside. Many users share similar issues on sailing and boating forums. Always inspect connections and gaskets for wear or damage. Dirty filters can block water and reduce movement strength. If parts feel warm, something may be working too hard. Careful diagnosis saves time before starting any deeper repair.
Signs your Whale pump needs repair
Unusual sounds or reduced water pressure often mean a problem. Water leaking from joints suggests loose screws or cracks inside. Continuous running can show that pressure is not balanced. If water flow drops suddenly, check connections right away. Early signs help prevent full system failure later.
Typical warning signs include:
- Irregular or weak water output.
- Dripping around the connection area.
- Strange humming from inside the unit.
- Air coming through the outlet.
- Handle movement feels harder than usual.
Common failures in Whale Gusher pumps
Older manual units sometimes lose strength during regular use. Cracked diaphragms often cause poor water movement. Dirt or sand inside can block internal channels easily. If water drains slowly, something may be stuck inside. Regular checks help detect issues before they grow worse.
Frequent problems found:
- Worn diaphragm material or torn parts.
- Blocked filter preventing steady water flow.
- Loose screws near the handle section.
- Air trapped in internal passages.
- Rust on connecting metal pieces.
How to inspect the pump before rebuilding
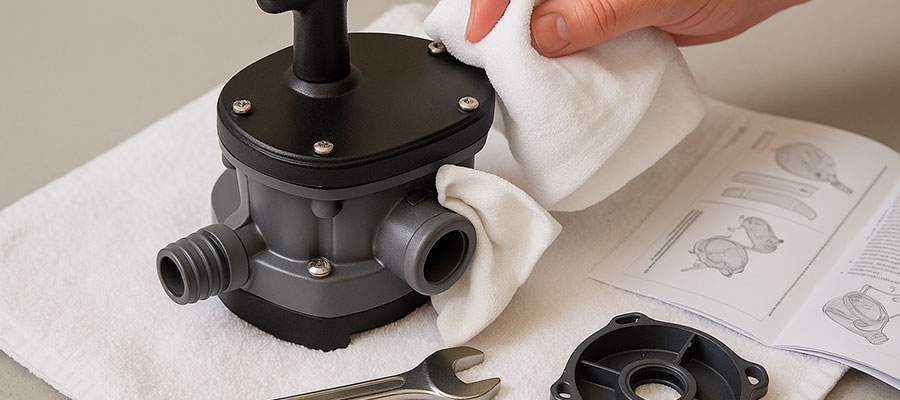
Begin by removing the unit carefully from its base position. Place it on a clean, dry surface before checking inside. Examine screws and joints for cracks or rust signs. Wipe every part gently with a soft dry cloth.
Never start repair until every surface is fully dry.
Rotate moving parts slowly to feel for stiffness or rough spots. Look for dirt or mineral buildup around internal sections. Keep all screws and small parts in one clean container. If any part seems fragile, set it aside for replacement. Taking time during inspection ensures smoother repair and longer use.
Step-by-Step Guide to Rebuilding a Whale Pump
Fixing a water unit is easier when done methodically and calmly. Start by preparing all tools and cleaning the surrounding area. Keep a small container ready for screws and small parts. Disconnect power or switches before touching any section of the unit. Always take pictures during the process to remember each step. Gentle handling prevents cracks or broken connections inside the system. Test each part visually for dirt or corrosion signs. Working patiently ensures your water system returns to normal function.
Removing the Whale pump for repair
Turn off all water sources before starting any removal steps. Use a soft cloth to dry the area around it. Mark each connection to avoid confusion during assembly. Loosen screws carefully without forcing them out. Keep all parts in order for easier reattachment later.
Steps to follow:
- Disconnect the main water line first.
- Unscrew the unit from its base mount.
- Gently lift it away without twisting pipes.
- Dry all surfaces to prevent slipping.
- Store removed parts in a clean box.
Disassembling the pump
Lay the unit flat on a dry, soft surface. Use proper tools for removing screws and fasteners safely. Note where each part belongs for reassembly accuracy. Do not rush while separating components inside the unit. Handle every section gently to avoid permanent damage. Clean each piece with a damp cloth before checking for cracks.
Key disassembly steps:
- Remove the top cover gently.
- Lift out inner moving sections.
- Check all screws for rust or damage.
- Wipe parts dry before setting aside.
- Inspect connectors for wear or weakness.
- Keep everything in order for reassembly.
Reassembling and testing the pump
Begin reassembly by following your earlier notes or photos. Align all sections carefully for a secure fit. Tighten screws evenly but never overforce them. After finishing, reconnect the unit to the system. Always test with clean water before full operation.
Testing process:
- Turn on water slowly and watch for flow consistency.
- Listen for unusual sounds or vibration.
- Check all joints for stability.
- Let water run for several minutes.
- Observe pressure and overall performance.
Installation Tips for Whale Pumps
Correct setup ensures your water system runs safely and efficiently. Always plan before mounting any water-moving unit or component. Check all pipes and joints for cracks or dirt buildup. Dry the work area to avoid moisture during fitting. Keep tools and spare parts within easy reach. Tight connections help prevent air entering the system later. Use gentle force when tightening to protect plastic threads. Careful preparation always leads to a smoother working system.
Preparing the installation site
Select a dry and level area for best performance. Clear away any dust or leftover debris before starting. Mark mounting holes using a pencil or tape marker. Ensure nearby pipes have enough space for movement. Keep the surrounding area free from sharp edges or tools.
Preparation checklist:
- Clean the surface completely before setup.
- Confirm access to water lines and drainage.
- Measure distances between all connection points.
- Keep tools organized for quick use.
- Make sure lighting is bright and steady.
Installing a Whale Gusher pump
Place the unit carefully on the marked surface or board. Align screw holes with precision before tightening anything. Attach water lines slowly to avoid cross-threading connections. Tighten each screw evenly for balanced pressure inside. Finish by checking every joint for proper alignment.
Key setup actions:
- Position the unit in an accessible area.
- Use the correct screws for mounting.
- Keep all lines straight and untwisted.
- Wipe connections dry before securing them.
- Label lines for easy maintenance later.
Testing after installation
Before testing, double-check every fitting and screw position. Make sure all lines are secure and properly attached. Fill the water system slowly to remove trapped air. Watch the flow and listen for irregular noises.
Never run the unit dry during the first test.
Let the system build pressure naturally and observe carefully. If water movement seems weak, recheck all joints. Run water for several minutes to confirm stable operation. Take notes on sound and flow for future reference. Regular testing helps prevent early failures and saves repair time.
Maintenance and Prevention
Good maintenance keeps any water-moving unit working longer and safer. Clean it regularly to remove dirt, sand, or small debris. Always check screws and joints for rust or movement. Dry the outer parts after every long trip or use. Replace worn pieces before they cause bigger system damage. Gentle cleaning helps avoid pressure loss or reduced water flow. Listen for any strange sounds that suggest friction inside. Consistent care prevents costly problems later on.
Regular maintenance for Whale pumps
Inspect your water unit monthly for signs of wear. Wipe all visible areas with a soft dry cloth. Make sure no moisture remains around connectors or joints. Check moving sections for stiffness or slow response.
A few minutes of care can extend the unit’s lifetime.
If you notice corrosion, clean it using a mild solution. Keep screws tight but never overforce them. Record each inspection date for easier future tracking. Regular attention ensures smooth and steady performance.
Avoiding common pump problems
Small issues grow fast if ignored for too long. Always keep the surrounding area clean and dry. Use filtered water when possible to reduce mineral buildup. Replace damaged parts as soon as they show wear. Routine checks stop bigger failures before they begin.
Common mistakes to avoid:
- Running the unit without water.
- Leaving parts wet after use.
- Ignoring vibration or strange noises.
- Forgetting to tighten small screws.
- Using harsh chemicals for cleaning.
When to replace versus rebuild
Knowing when to act saves both time and effort later. Inspect the unit carefully before making any decision. If damage looks minor, a quick part swap may help. For deeper cracks, consider full replacement instead of repair.
Severe internal wear often means the system is beyond fixing.
Always compare the cost of parts with buying another model. Long-term savings sometimes come from installing a fresh device. Keep old components as spares if they still work. Make every choice based on performance, not just convenience. Careful judgment keeps your water setup reliable for years.

