

Navigating rough seas requires dependable equipment, and bow thrusters are vital for tight maneuvers. If your Side Power Bow Thruster needs repair or replacement, safe removal is key. This guide outlines the steps, focusing on safety and tools. Follow it to avoid issues and return to smooth voyages quickly.
Understanding Side Power Bow Thrusters
Sidepower systems enhance vessel maneuverability. They use thruster motor for precise control. Electric motor powers the setup efficiently. Carbon brushes ensure smooth operation. Solenoid activates the mechanism. Fuse protects against overloads. Terminal connections link to battery. Torque settings optimize performance.
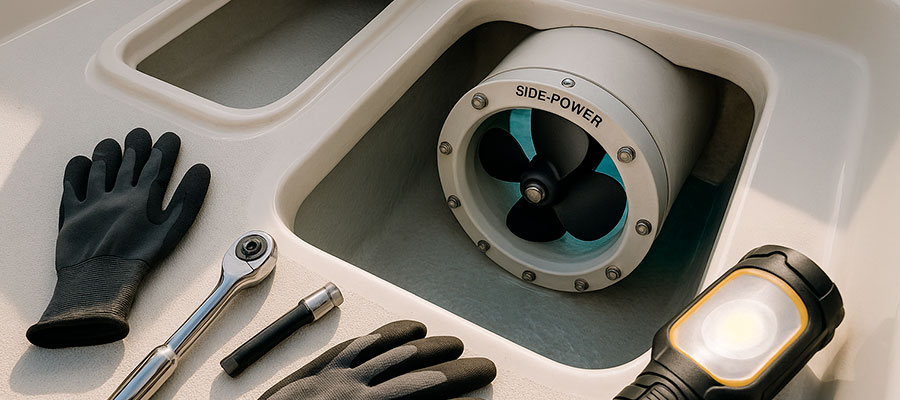
What is a bow thruster and how it works
These devices aid in sideways movement.
Prop hub rotates via electric motor. Blade design pushes water laterally. Switch controls direction and speed. Joystick offers intuitive handling. Cable transmits power signals. Shaft connects components securely. Brush reduces friction. Anode prevents corrosion buildup.
Differences between bow thrusters and stern thrusters
| Feature | Bow Thruster | Stern Thruster |
|---|---|---|
| Positioning on Vessel | Embedded at the forward section of the ship, enabling lateral propulsion to sway the prow sideways. | Positioned at the aft end of the craft, facilitating sideways motion to maneuver the rearward part. |
| Primary Maneuvering Role | Assists in pivoting the front of the boat during docking maneuvers, particularly when approaching piers at gentle velocities. | Aids in controlling the stern during reverse navigation, enhancing stability in confined waterways. |
| Directional Thrust | Generates force perpendicular to the hull to shift the nose left or right, countering wind or current influences. | Produces lateral push to adjust the tail of the vessel, aiding in precise backing or turning sequences. |
| Common Installation Scenarios | Frequently employed on larger yachts and commercial vessels for enhanced port-side handling in tight berths. | Often integrated into ferryboats and tugboats to improve astern operations and reduce reliance on towing. |
| Operational Efficiency | Most effective at low speeds, providing crucial support when main engines are idling or in neutral gear. | Optimizes performance during reverse thrusts, allowing smoother transitions in docking and undocking phases. |
| Complementary Systems | Pairs well with rudder steering for overall directional control, especially in crowded harbors. | Complements bow thrusters on extensive ships, offering full 360-degree maneuverability without external aid. |
| Maintenance Considerations | Requires periodic inspection of forward tunnels to prevent blockages from marine debris accumulation. | Demands checks on aft compartments for sediment buildup, ensuring unobstructed thrust channels. |
| Energy Consumption Patterns | Draws power proportionally to usage, with peaks during sharp lateral shifts at the vessel's head. | Utilizes energy bursts for stern adjustments, often synchronized with propeller reversals for efficiency. |
Purpose of side-power systems in marine vessels
Sidepower improves docking in tight spaces. It aids in avoiding obstacles. Thruster motor enhances stability. Electric motor supports low-speed turns. Sailboat owners benefit greatly.
- Precise control during maneuvers.
- Reduced reliance on main propulsion.
- Enhanced safety in harbors.
- Support for bow and stern thruster setups.
- Easier navigation in strong currents.
Preparing for Removal
Gather all needed items beforehand. Inspect the area carefully. Ensure workspace is clear. Wear protective clothing. Have assistance ready. Check weather conditions. Plan the sequence of steps. Review potential risks.
Reviewing the thruster manual and safety instructions
Read the guide thoroughly first. Note key warnings. Understand operational basics.
Identify emergency procedures.
Check for updates online. Discuss with forum experts. Highlight critical torque values. Mark important thread sizes. Confirm seal integrity.
Required tools for bow thruster removal
Allen wrench handles most fasteners. Screw drivers assist with connections. Bolt extractors manage tight fits. Seal tools protect components. Antifouling brushes clean surfaces.
- Allen for precision work.
- Screw for panel access.
- Bolt for secure removal.
- Seal for waterproofing.
- Antifouling for maintenance.
Checking the control panel and power supply
Verify main switch functionality. Test cable connections. Inspect fuse conditions. Monitor carbon dust levels. Ensure zinc anode replacement. Record all findings for reference.
- Switch operates smoothly.
- Cable shows no wear.
- Fuse remains intact.
- Dust gets cleaned.
- Anode protects effectively.
Step-by-Step Thruster Removal Process
Shut off main power first. Clear space around the unit. Remove access panels carefully. Disconnect all power links. Loosen mounting points gently. Pull the device forward. Remove the motor smoothly. Check for any leftovers.
Disconnecting the thruster control panel and wiring
Power off the system first. Identify connection points. Use insulated tools. Loosen fasteners gradually. Label wires for reinstall.
Avoid short circuits.
Inspect for wear. Secure loose ends. Confirm isolation.
Removing the tunnel and motor assembly
Access the housing area. Detach mounting brackets. Lift assembly carefully. Support weight evenly. Check for debris. Store in dry location. Avoid dropping components.
- Brackets release first.
- Housing lifts steadily.
- Weight balances out.
- Debris clears away.
- Assembly stores safely.
Detaching the propeller and related parts
Hold the bowthruster steady. Loosen front fittings first. Twist parts free slowly. Pull components apart gently. Clean exposed areas now. Inspect for hidden flaws. Reassemble if testing. Secure loose bits safely.
- Fittings loosened easily.
- Parts twisted smoothly.
- Components pulled carefully.
- Areas cleaned well.
- Flaws spotted quickly.
- Testing done promptly.
- Bits secured tightly.
- Bowthruster prepped fully.
Handling the Removed Bow Thruster
Lift the bowthruster with care. Set it on padded surface. Cover to block dust. Label each section clearly. Wipe off excess water. Store in cool spot. Avoid stacking heavy items. Check balance before moving.
Inspecting parts for wear and damage
Examine the bowthruster frame. Look for tiny cracks. Feel surfaces for roughness.
Test joints by hand.
Note any discoloration. Compare sizes to originals. Shine light on hidden spots. Mark spots needing attention. Decide next steps wisely.
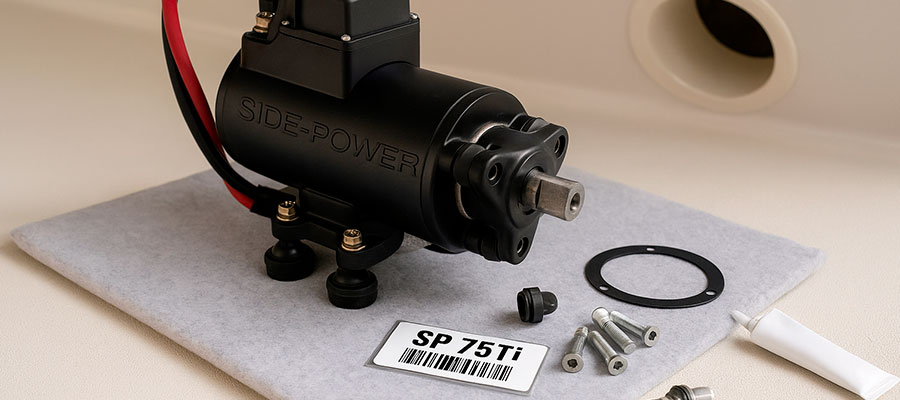
Cleaning and storing the removed assembly
Rinse components in water. Dry with clean towels. Apply lubricant sparingly. Place in storage box. Keep away from heat. Mark with labels. Check periodically. Secure side-power bow thruster pieces.
- Water washes debris.
- Towels absorb moisture.
- Lubricant reduces friction.
- Box protects items.
- Heat avoided.
- Labels identify parts.
- Checks ensure condition.
- Pieces stay organized.
Identifying parts for repair or replacement
Examine each piece. Note visible issues. Measure dimensions. Compare to standards. Decide on actions. Order new ones. Test after install. Replace worn side-power bow thruster items.
- Pieces inspected closely.
- Issues recorded.
- Dimensions verified.
- Standards matched.
- Actions planned.
- Ones sourced.
- Install tested.
- Items updated.
Reinstallation Considerations
Think about boat size first. Check manufacturer guidelines. Ensure tools are ready. Plan for team help. Budget for new parts. Verify power requirements. Test water conditions. Document all steps.
Preparing for installation of a new bow thruster
Gather all necessary tools. Clear the work area. Inspect the new unit.
Read safety instructions.
Prepare mounting surfaces. Check electrical connections. Measure alignment points. Wear protective gear. Confirm compatibility with sleipner models.
Aligning the tunnel and motor correctly
Position the tunnel securely. Insert the motor carefully. Adjust for straight alignment. Use level tools. Tighten bolts evenly. Double-check measurements. Ensure no obstructions.
- Tunnel fits snugly.
- Motor slides in smoothly.
- Alignment stays true.
- Bolts secure firmly.
- Measurements match specs.
- Obstructions removed completely.
- Unit locks into place.
Testing the thruster after reinstallation
Power up the system. Engage the bowthruster forward. Listen for smooth hum. Check port side motion. Reverse and observe again. Feel for steady pull. Monitor heat buildup. Shut down for review.
- System powers cleanly.
- Forward engages well.
- Hum sounds normal.
- Port moves right.
- Reverse works fine.
- Pull feels strong.
- Heat stays low.
- Review notes issues.
Troubleshooting Common Issues
Start by checking power supply. Look for loose connections. Inspect for water ingress. Test with a multimeter. Listen for grinding sounds. Feel for excessive heat. Verify settings on display. Consult imtra manuals if needed.
Problems during removal and how to resolve them
If stuck, apply penetrating oil. Use proper tools gently.
Avoid forcing components.
Check for corrosion buildup. Clean threads before retrying. Align parts precisely. Seek expert advice. Document challenges. Test after each step.
Issues with control panel disconnection
Unplug wires one by one. Label each connection. Avoid bending wires. Check for damage. Secure loose ends. Test continuity. Reconnect carefully. Consult imtra for specific guidance.
- Wires handled delicately.
- Connections marked clearly.
- Bending prevented.
- Damage noted.
- Ends wrapped safely.
- Continuity verified.
- Reconnection done methodically
Motor and propeller maintenance tips
Lubricate moving parts regularly. Clean propeller hub often. Inspect for wear. Balance the unit. Tighten fasteners. Monitor for vibrations. Schedule professional servicing.
- Parts oiled smoothly.
- Hub rinsed thoroughly.
- Wear checked monthly.
- Unit balanced evenly.
- Fasteners secured tightly.
- Vibrations watched closely.
- Servicing planned annually.

