A VDO fuel gauge converts the fuel amount in a tank into an electrical signal displayed on the dashboard. Over time, wear in the sender unit or changes in resistance can cause the readings to become inaccurate. Calibration restores the correct relationship between resistance (in ohms) and wire position. Using the sender’s potentiometer and a multimeter to check voltage and resistance, the gauge can be adjusted to show accurate levels from “Empty” to “Full.”
Understanding the Basics of a VDO Fuel Gauge
A fuel level sensor translates motion inside the tank into data. The sending mechanism works with a small meter on the panel. A float arm moves with the surface of the liquid gas. When the tank is full, the system sends a stronger signal. This action changes how the meter shows the fuel quantity. The sensor uses a variable resistor to modify electrical flow. Most systems depend on a steady 12v power connection. If everything is installed correctly, readings stay consistent and smooth.
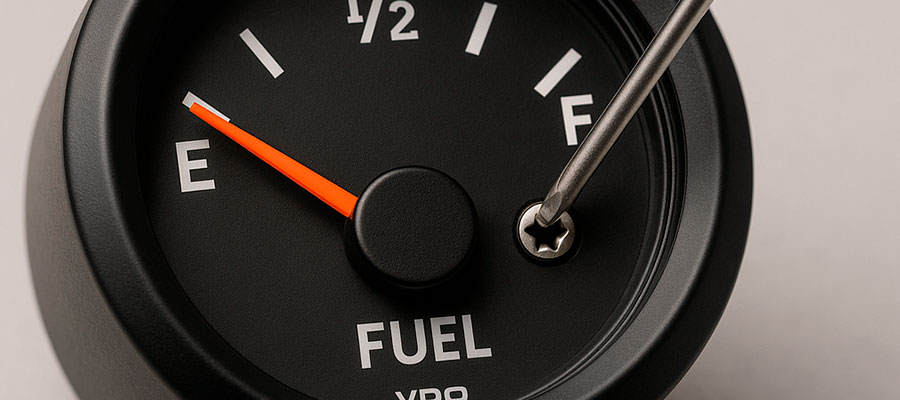
What a fuel gauge does in your vehicle
Every car has a sending unit inside the fuel tank. It helps drivers know the real amount of fuel remaining. When the float arm moves, the tank sender changes output values. The gauge reads these values and turns them into visual indication. A modern setup often includes:
- A fuel tank sender with a moving float arm.
- A small panel meter showing fuel changes in real time.
- A stable 12v circuit powering the entire system.
- A built-in store zone to warn when fuel is low.
- A variable element ensuring smoother motion across levels.
Key features of a VDO gauge
Each unit balances accuracy with simplicity for daily driving. The design supports the factory fuel level sender standards. Electrical parts handle 0 ohm to high ohm ranges easily. A new sender can connect without major rewiring or reset. Main traits include:
- Durable casing that resists vibration and heat.
- Smooth meter movement under changing road conditions.
- Compatibility with most float arm sensor designs.
- Clear panel markings for easy reading when tank is full.
- Reliable indication when the level drops near reserve.
Why calibration is critical for accurate readings
Over time, senders and sensors may lose original precision. A small drift can change how the guage reads actual fuel. That difference grows larger as parts age or wear down.
Accurate adjustment keeps every examine close to real conditions.
Inconsistent readings might suggest an issue inside the fuel tank sender. Sometimes a new sender is installed but not adjusted correctly. Forum discussions often mention 0 ohm errors after replacements. When this happens, a careful reset returns the proper indication. Consistent checking helps ensure the panel meter stays trustworthy always.
Tools Needed for Fuel Gauge Calibration
A digital multimeter helps verify how the guage reads current flow. An adjustable power supply ensures a steady 12v circuit during testing. Test wires connect the sending mechanism securely to the meter. A potentiometer simulates a variable element in the sender for adjustment. Small screwdrivers allow fine tuning without damaging the device. A stable stand keeps the guage in position while testing. Protective gloves prevent contact with live 12v connections. A notebook records readings for future reference and comparison.
Essential tools for VDO gauge calibration
| Tool | Purpose / Description |
|---|---|
| Digital Multimeter | Used to measure voltage and resistance precisely, helping verify the sender’s ohm range and the gauge’s electrical response. |
| Adjustable Power Supply | Provides a stable voltage source that replicates the vehicle’s electrical system during testing and tuning. |
| Fuel Sender Unit (Bench Setup) | Simulates real fuel amount changes by adjusting its float or resistance arm, allowing accurate calibration outside the tank. |
| Potentiometer (Test Resistor) | Acts as a controllable resistance substitute to check how the gauge needle reacts to different ohmic values. |
| Calibration Template or Chart | A printed or digital reference sheet that lists correct resistance points for “Empty,” “Half,” and “Full” readings. |
| Insulated Test Wires | Safe, flexible leads for connecting the gauge, sender, and power source without causing short circuits. |
| Small Screwdriver Set | Required for fine mechanical adjustments on the gauge housing or tuning screws without damaging components. |
| Mounting Bracket or Stand | Holds the gauge securely during testing to prevent movement that could distort wire readings. |
| Protective Gloves and Eye Shield | Safety gear to avoid contact with sharp terminals or accidental sparks when working with live electrical circuits. |
| Notebook or Digital Logger | Used to record resistance values, voltage readings, and needle positions for precise comparison during calibration. |
Safety precautions before calibration
Always disconnect the battery before starting any electrical adjustments. Ensure wires are insulated to prevent accidental short circuits. Wear gloves to avoid shocks when handling the sender. Check that the working area is free of gas or sparks. Key precautions include:
- Keep fire extinguishers nearby in case gas ignites.
- Avoid metal tools touching live terminals.
- Work in a well-ventilated space to prevent gas buildup.
- Never fill the tank while testing electrical components.
- Follow forum or manufacturer guidance for safe adjustments.
Preparing the fuel gauge for adjustment
Begin by verifying that the guage reads zero when hollow. Connect the sender and multimeter to a stable 12v source. Slowly move the variable resistor to simulate half full level.
Ensuring the guage reads each position correctly is essential.
Check all connections are installed correctly to prevent false readings. Adjustments should be minor to avoid overshooting the target values. Confirm the guage reads full after the tank is full.
Step-by-Step Guide to VDO Fuel Gauge Calibration
Start by gathering all necessary tools for testing guages. Ensure the sensor is installed and connected to the 12v source. Verify that the guage reads correctly at hollow and semi-full. Slowly adjust the sender until the guage reads accurately. Record each reading for future reference and comparison. Make small changes to avoid overshooting the desired values. Double-check connections before finalizing the adjustment process.
How to start the gauge calibration process
Begin by confirming the guage reads zero with no fuel. Connect the sensor to a stable 12v supply. Check all wiring is installed and functioning properly. Move the sending unit to simulate a semi-full level.
Ensure the guage reads each position exactly before continuing.
Observe how the guage reacts to slight changes in volt. Keep all readings consistent across multiple tests. Prepare to adjust slowly for precise results.
Adjusting the VDO fuel gauge for accuracy
Measure the guage reads at empty, semi-full, and full. Adjust the sender carefully if readings do not match targets. Use a small screwdriver to change minor settings. Confirm the guage reads accurately at each test point. Repeat adjustments until the readings stay consistent over time. Check that the guage reads smoothly without jumps. Finalize the settings and secure all connections for safety.
Common mistakes during fuel gauge calibration
Incorrect wiring often leads to false guage reads. Over-adjusting the sender can damage the sensor or guage. Not testing at half full causes uneven readings. Key mistakes include:
- Ignoring minor volt fluctuations during adjustment.
- Forgetting to check consistency across multiple readings.
- Skipping proper installation verification before starting.
- Rushing the process and making large adjustments quickly.
Troubleshooting Fuel Gauge Calibration Issues
Start by checking whether the guage reads consistently across levels. Inspect wiring connections for loose or corroded points. Use a multimeter to verify the 12v circuit is stable. Confirm the sending unit produces expected changes when fuel moves. Compare the guage reads with known amounts of fuel in the tank. Look for jumps or lag in meter response during testing. Small mechanical issues can cause the guage reads to fluctuate. Regular checks prevent long-term errors and ensure reliable monitoring.
Signs of incorrect gauge calibration
A guage reads full even when the tank is low. Fluctuating readings occur while the vehicle is moving. The guage reads hollow despite adequate fuel. Unexpected jumps appear when the fuel level changes slightly. Key signs include:
- Guage reads higher than actual fuel amount.
- Meter lags during fuel consumption.
- Erratic movement near empty or full levels.
- Guage reads inconsistently across multiple tests.
- Fuel warnings trigger prematurely or late.
How to fix errors in a VDO gauge
Check the guage reads at empty and full points. Tighten any loose connections affecting electrical continuity. Clean corroded terminals to restore proper meter response. Reset the sender to match the expected guage reads. Retest the guage across multiple fuel levels. Steps to fix include:
- Adjust wiring connections carefully.
- Replace damaged leads or connectors.
- Verify readings with a stable 12v source.
- Confirm smooth and consistent guage reads.
- Recheck after each minor change.
When a faulty fuel gauge needs replacement
Sometimes the guage reads incorrectly despite proper adjustments. Internal wear can prevent accurate readings over time. Corrosion inside the sender may block current flow. Electrical short circuits can damage the meter permanently. Extreme fluctuations indicate the guage reads cannot be trusted. Replacing the guage restores reliable monitoring of fuel levels. Always verify the new sender and guage reads match expected values.
Testing the VDO Gauge After Calibration
Check that the guage reads accurately at each known level. Fill the tank partially to verify intermediate readings. Observe how the guage reads when moving from full to reserve. Compare all measurements to expected values in a reference chart. Make sure readings are smooth without jumps or sudden changes. Repeat the test multiple times to ensure stability. Record results for future reference and monitoring purposes.
Running checks after fuel gauge calibration
Begin with the tank nearly full to observe guage reads. Slowly consume fuel while monitoring the meter frequently. Ensure that readings decrease gradually and predictably with usage.
Accurate observation during each stage confirms successful tuning.
Check mid-level readings carefully for consistency across several runs. Refill and monitor how the guage reads during filling. Note any sudden jumps or inconsistencies for further inspection. Verify store readings to confirm low-level performance. Repeat tests under different driving conditions to ensure reliability.
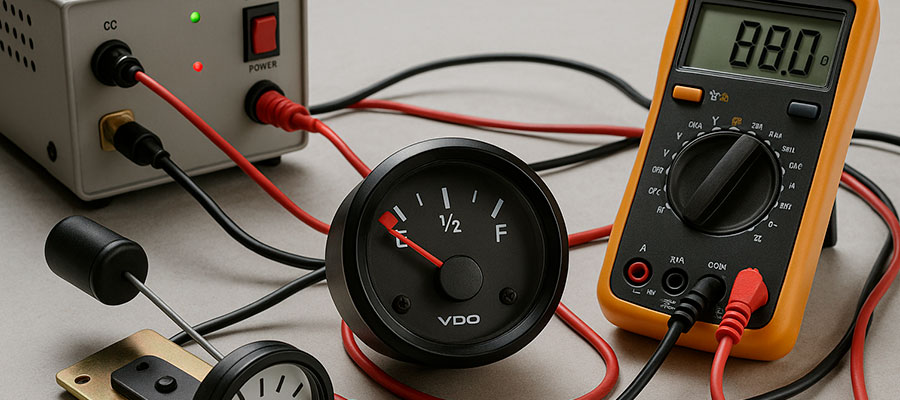
How to confirm accurate fuel gauge readings
Measure guage reads at several points from full to reserve. Compare recorded values with expected results from reference chart. Check that readings remain stable while stationary and moving. Observe gradual changes to ensure consistency at every level. Steps to confirm include:
- Test with known fuel amounts.
- Monitor guage reads over short intervals.
- Recheck readings after vehicle rest periods.
- Ensure smooth changes without sudden spikes.
- Record results to track ongoing accuracy.
Road test to verify calibration success
Drive the vehicle while monitoring the guage reads continuously. Observe how the guage reacts during acceleration and braking. Confirm that readings decrease proportionally with fuel consumption. Check store behavior to ensure low fuel warning accuracy. Essential road test steps include:
- Start with the tank nearly full.
- Monitor readings every few miles.
- Compare against expected depletion rates.
- Note any sudden jumps or irregular behavior.
- Repeat under different speeds and traffic conditions.
Maintaining Long-Term Accuracy of a Fuel Gauge
Regular checks help ensure the guage reads consistently over time. Keep connections clean to prevent unexpected reading errors. Observe the guage reads during normal driving frequently. Avoid sudden jolts that may misalign the sending unit. Minor fluctuations are normal but should not be frequent. Document all observations to detect gradual deviations early. Proper care extends the life and accuracy of the guage.
Regular inspection of the VDO fuel gauge
Inspect the guage reads after every long trip. Check for any erratic movements or sudden jumps. Ensure all connections remain secure and free of corrosion.
Consistent monitoring can prevent major errors before they occur.
Observe the meter during fuel fill to verify changes. Look for slow or lagging readings during consumption. Verify low-level behavior near store carefully. Record all findings for comparison with previous inspections.
Tips for extending calibration intervals
Monitor guage reads consistently to catch early deviations. Avoid exposing the system to excessive heat or vibration. Keep connections clean and dry for stable readings. Always use proper 12v supply during checks. Key tips include:
- Schedule regular inspections to detect minor errors.
- Track readings in a small log for trends.
- Prevent sudden jolts during driving or fuel fill.
- Maintain a clean and dry installation environment.
- Address small deviations immediately to prevent larger errors.
Preventing issues with future fuel gauge calibration
Check the guage reads periodically under different conditions. Keep all wiring secure and free of corrosion. Avoid rough handling of the sending unit during fills. Regularly test low and mid-level positions for consistency. Document readings to notice gradual changes early. Correct minor deviations before they affect overall performance. Careful attention ensures long-term reliability of the guage reads.