

Rebuilding a Raritan toilet might sound like an odd way to spend an afternoon on your boat, but anyone who has dealt with a stubborn head knows how satisfying it feels when everything finally works the way it should. Whether you’re restoring an older raritan phii, upgrading a tired ph ii, or giving a newer marine elegance or raritan compact unit some overdue care, the process is far less intimidating once you understand what each part does.
Many raritan heads follow the same basic layout—piston, housing, rubber seals, macerator, and the bowl and seat—and most of the steps are clearly shown in the manual or the small drawing tucked into the instruction packet.
Boaters in any forum will tell you that a good repair often feels like a reset button for your whole marine sanitation setup. From adding a little vinegar rinse, to pouring water into the bowl during testing, to slipping in a fresh replacement seal kit, each step brings the unit a bit closer to a better experience. No advanced skills or fancy installation tricks are required—just patience, a few basic tools, and the reminder that you can fix this.
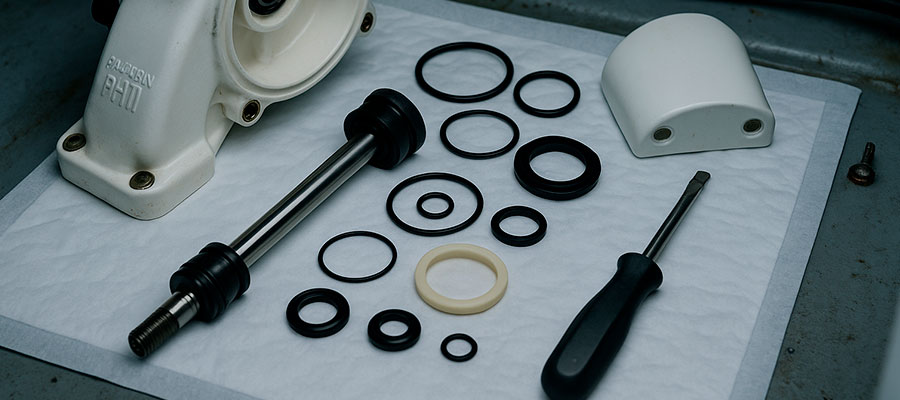
Assessing Your Raritan Toilet's Condition
Before opening anything up, take a slow look at how your raritan ph flushes, how the piston feels during pumping, and whether the seat or bowl shows signs of leaks or stiffness. Sometimes the system feels slightly off even if it still works, which is often your cue that something inside needs attention. If you’re working with an older phii marine model or an electric version, the feedback from the handle or switch can tell you a lot. In the end, remember that small details reveal issues.
Identifying Signs That Rebuilding is Needed
Sometimes a marine toilet starts telling its own story long before you open a single screw. You may notice the handle feeling sticky, the bowl draining slowly, or a faint backflow that wasn’t there last season. Small hints like a soft pump stroke or water creeping back into the bowl often point to worn seals or a tired joker valve. If you’ve been relying on quick fixes for months, the system may now be asking for a full rebuild.
Even a reliable PH or PHII model eventually needs fresh internal parts to stay dependable. Paying attention to changes in flushing sound or water movement makes diagnosis far easier. In the end, symptoms never lie.
Determining the Specific Model: PH, PHII, or Elegance
Before you buy anything, you need to know exactly which version you’re working with. The easiest clues are often right on the pump housing or bowl shape.
Model indicators include:
- Handle style or pump height
- Bowl size and base footprint
- Labeling near the pump
- The design of the flush lever or switch
Sourcing the Correct Rebuild Kit
Once you confirm the model, finding the right kit becomes much simpler. Most kits include seals, valves, and gaskets designed specifically for PH, PHII, or Elegance systems.
Common kit components:
- Joker valve
- Pump seals
- Base gasket
- Water control valve
- Replacement O-rings
Preparing for the Rebuild Process
Getting ready feels easier when you set aside a clean, quiet space and gather everything you’ll need. Whether your toilet is manual or electric, the goal is simply to start calmly.
Helpful mindset notes: thinking ahead reduces stress, gentle pacing helps keep the workspace neat, and your hands will thank you for slowing down.
Gathering Necessary Tools and Workspace
Setting up your workspace can make the rebuild feel far more relaxed. Choose a clean, open spot where you can lay parts out in order without bumping them. Keep a small towel nearby for moisture and a bright light to see worn surfaces clearly. Even simple hand tools—screwdrivers, pliers, and a soft brush—go a long way. If you’re working dockside, make sure the boat is steady enough for small parts not to roll away. A shallow tray can help keep everything organized as you disassemble the toilet. Above all, remember that setup shapes the job.
Safety Precautions and Sanitation Measures
| Measure | Description |
|---|---|
| Wear basic protective gear | Light gloves and simple eye covering keep hands and face clear of splashes or stray debris during the rebuild. |
| Ventilate the workspace | A bit of fresh air helps keep odors down and makes the job feel less confined. |
| Shut off water flow | Turning off the supply prevents unexpected trickles while you’re working on the unit. |
| Keep disinfectant nearby | A quick spray or wipe keeps tools and surfaces fresh as you move through each step. |
| Separate clean and used parts | Setting aside a “clean zone” avoids mixing freshly washed pieces with those still waiting for attention. |
Disconnecting Water Supply and Holding Tank
Cutting off the water supply prevents any surprise flow during teardown. The holding tank line should also be closed so the bowl stays dry.
Basic shutdown steps:
- Close the intake valve
- Shut the outlet valve
- Drain any remaining water
- Keep towels nearby for drips
Disassembly and Component Inspection
Once you begin taking things apart, you’ll notice right away which pieces still feel solid and which parts, like the piston or seals, seem tired. Give each section of your phii marine or raritan ph a moment of real attention so you understand what you’re putting back together.What to look for: worn rubber edges, cracked housings, stiffness in moving parts, or signs of dried buildup.
Step-by-Step Teardown Procedure
Breaking the toilet down piece by piece lets you see the whole picture. Slow, steady disassembly also helps you notice which parts feel loose or overly worn.
Main teardown stages:
- Remove the pump assembly
- Detach bowl connections
- Lift the base unit
- Separate the valve sections
Cleaning and Examining Each Part
| Step | Explanation |
|---|---|
| Rinse pieces with warm water | Warm water loosens residue without stressing rubber or plastic surfaces. |
| Brush tight corners gently | A soft brush helps you clear out buildup hiding in small channels or pump edges. |
| Inspect surfaces under good light | Strong lighting reveals tiny cracks or thinning spots that might be missed otherwise. |
| Check moving parts for smooth action | Any stiffness in handles, pistons, or flappers hints at wear that needs addressing. |
| Dry components before reassembly | Allowing each piece to dry fully helps you spot leaks later and keeps the system tidy. |
Identifying Worn Joker Valves and Seals
When joker valves and seals start to fail, the toilet usually gives small but telling hints long before a full breakdown. You might notice water slowly backing into the bowl after a flush, or the pump feeling softer as the piston stroke loses firmness. Take the rubber pieces out and bend them gently; if they crease, flatten, or show tiny cracks, they’re ready for replacement. A seal that no longer springs back to shape will let pressure slip where it shouldn’t, and that makes every flush feel weaker.
Even an electric model reveals wear the same way: odd noises or sluggish action during the cycle. Replacing tired joker valves and seals often restores confident flushing and reduces leakage around the seat area, so don’t ignore those subtle hints. Overall, worn rubber shows clearly.
Replacing Critical Wear Components
Swapping out the pieces that wear down first—seals, gaskets, or a sluggish piston—can completely change how the toilet feels to use. Even an older phii marine model can perform like new once its tired components are refreshed.Common replacement spots: seal rings, piston washers, seat gasket, and pump flappers.
Installing New Pump Assembly Parts
Setting the new pump pieces into place feels surprisingly satisfying once you’ve cleaned the housing. Proper alignment ensures each stroke feels smooth and seals seat correctly.
You will typically replace:
- Pump piston
- Shaft O-ring
- Pump top gasket
- Pump base seal
Rebuilding Flush and Water Control Valves
These valves guide every bit of flow, so giving them fresh components restores consistency. Once rebuilt, the flush cycle usually feels sharper and more predictable.
Key valve elements to check:
- Water inlet valve
- Flush valve gasket
- Spring-loaded components
- Valve cover seating
Updating Hose Connections and Fittings
Hoses and fittings endure a lot of movement and salt exposure on a boat, so refreshing these connections is a smart step during any rebuild. Old flexible hose can become brittle and collapse slightly, which reduces flow, while clamps that have relaxed allow micro-leaks that attract grime. Swapping out hoses gives you the chance to shorten unnecessary loops and replace sections with gentler bends that resist kinking.
When you fit new clamps, tighten them firmly but don’t over-compress the hose — a snug fit is what you want. Also inspect the hose ends where they meet plastic or metal fittings, because those junctions often show early wear or corrosion. If you run a phii marine or raritan ph model, matching the hose ID to the original spec keeps the system balanced and quiet. In practice, fresh hoses make a difference.
Reassembly and System Testing
Putting everything back together usually feels much smoother than taking it apart, especially once you’ve seen how each piece fits naturally. Test your raritan ph gently, whether it’s manual or electric, and listen for the kind of movement you expect.
What to test: steady pumping, no leaks at seals, smooth water movement, and a secure seat position.
Proper Sequencing for Rebuilding Components
Following the right order keeps the system from fighting against itself as you reassemble. Each piece works best when installed after the one that supports it.
Recommended sequence:
- Base gasket first
- Pump assembly next
- Valves and fittings after
- Hoses and clamps last
Reconnecting to Fresh Water and Holding Tank
Once everything is secured, you can slowly reconnect the lines. Turning valves on gradually helps you spot any small leaks before they grow.
Reconnection checklist:
- Intake valve open
- Discharge valve open
-
Hoses confirm secure
- Watching for first drips
Testing Flush Mechanism and Leak Checks
Testing is the moment of truth: a few calm flush cycles tell you whether seals seat properly and whether the pump primes as it should. Start with low-volume checks, running enough water into the bowl to simulate a normal flush, and listen to the piston motion and any sounds coming from the housing. Watch the base and all hose junctions while the system cycles; small weeps often appear only during active pressure.
If you have an electric version, also cycle the switch a few times to confirm consistent power response without surges or sputtering. Try a couple of complete cycles and then inspect again — some leaks only show after the system has run and warmed slightly. If everything stays dry and the flush feels firm, you’ve likely succeeded; if not, tighten or reseat the components that showed movement. Remember, testing proves the work.
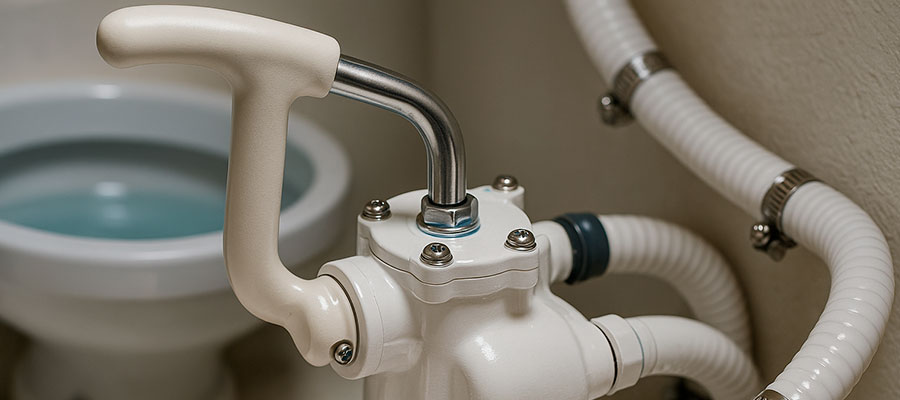
Maintenance Tips for Long-Term Performance
Keeping the system healthy is mostly about small habits—an occasional flush check, a feel for the piston motion, and a quick glance at the seat and fittings. Even a simple monthly test on a phii marine unit helps you notice changes before they grow.Try adding habits like: gentle cleaning, early seal replacement, and mild lubrication of moving parts.
Establishing a Regular Cleaning Schedule
A little upkeep goes a long way in preventing future issues. Monthly rinses and quick inspections help you stay ahead of wear before it becomes noticeable.
Good cleaning habits:
- Use mild cleaners
- Rinse lines occasionally
- Check seals monthly
- Keep the bowl clear of buildup
Preventing Common Marine Toilet Issues
Most recurring problems come from simple neglect or tiny leaks that go unnoticed. Staying tuned to how the toilet sounds and feels can prevent bigger hassles.
Small habits that help:
- Flush with enough water
- Inspect hoses seasonally
- Replace seals early
- Avoid harsh chemicals
When to Consider Professional Service
If repeated adjustments don’t restore predictable flushing, or if odors and leaks persist despite fresh parts, a technician can diagnose deeper faults you might not see. Complex electrical issues on an electric model or hidden cracks in the housing are examples where pro tools and experience help. A pro can also pressure-test the whole system and confirm that rebuilt valves hold under conditions that are harder to simulate at the dock.
If you’ve rebuilt a phii marine or raritan ph and still notice uneven performance, bringing in an expert can save time and prevent repeated part purchases. In those cases, ask for a professional diagnosis.

