There's a special kind of chill that settles into a van at dawn, a cold that seems to seep right from the steel frame into your bones. If you're tired of pulling on frozen boots and watching your breath cloud the inside the van air, it might be time to install a Webasto diesel heater. This isn't just another modification for your van build; it's a game-changer. Whether you're working on a Ford Transit or any other home-on-wheels, the goal is the same: to swap that cold air for a steady, comforting stream of hot air.
The journey from a chilly metal box to a warm sanctuary hinges on a well-executed install process. It's a project that involves careful planning, from running the fuel line and securing the bracket to connecting the intricate wiring harness and ensuring the hot exhaust is safely managed.
While the task may seem complex, countless threads on any diesel forum prove it's an achievable mission for a dedicated DIYer.Your comfort is worth the effort. This guide will walk you through the key steps, helping you avoid common pitfalls like air bubbles in the fuel system and ensuring your Webasto Air Top 2000 becomes a reliable source of warmth for all your adventures.
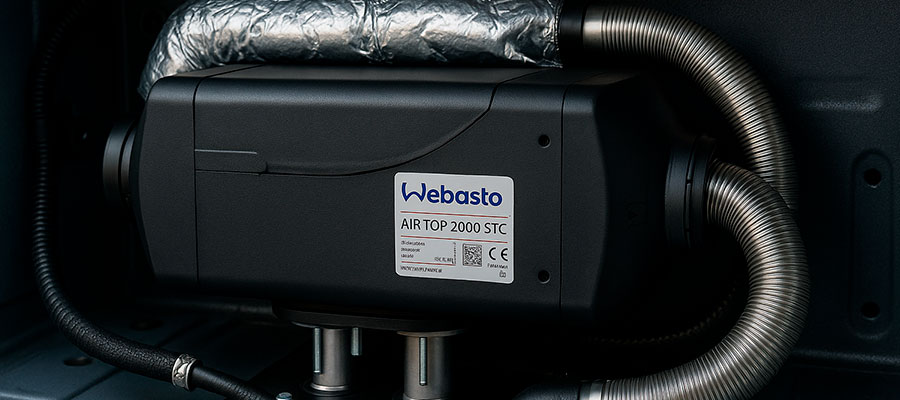
Preparing for Webasto Diesel Heater Installation
Before you even pick up a tool, the real work begins with planning. Spend time mapping out where every component will live inside your vehicle, considering easy access for any future troubleshooting. A thoughtful plan prevents future problems and ensures you have all the right parts, like the specific wiring harness for your 2000 STC, before you start. This upfront effort turns a potentially chaotic project into a smooth, manageable process.
Choosing the right Webasto heater for your camper
Selecting the perfect heater for your mobile home goes beyond just picking a brand. You need to decide between a model that blows hot air directly into your space or a webasto thermo that circulates warm coolant through a radiator, much like a miniature version of your car's heating system. For smaller vans, a compact air heater like the Thermo Top might be ideal, while larger rigs might benefit from the extensive reach of a coolant heater system.
Consider your van's insulation, typical climate, and whether you need to heat a wet room or just the living area. The right heater matches your needs and ensures you invest in a system you'll be happy with for years to come. Researching models like the Webasto Thermo Top and comparing them to alternatives like Espar can provide valuable insights. Ultimately, this careful selection process is the first step toward countless cozy mornings on the road.
Tools and parts needed before mounting the diesel heater
| Category | Specific Items | Role in the Installation |
|---|---|---|
| Core Components | Heater Unit, Dedicated Mounting Bracket, Sealing Gasket | Forms the primary assembly, creating a solid, vibration-resistant foundation for the entire system. |
| Fuel System | Fuel Hose, Clamp Set, Tank Saddle Valve or T-Fitting | Establishes a secure and leak-free pathway to draw fuel from the vehicle's main or auxiliary tank. |
| Air & Exhaust | Combustion Air Intake Ducting, Exhaust Pipe Section, Silicone Sealant | Manages the critical airflow for combustion and safely vents exhaust gases outside the living area. |
| Electrical Kit | Pre-wired Loom, In-line Fuse, Cable Terminals, Wire Loom Protector | Delivers power safely from the battery and protects the circuitry from shorts and electrical wear. |
| Essential Tools | Cordless Drill & Metal Step Bit, Crimping Tool, Socket & Wrench Set | Enables precise hole drilling, secure electrical connections, and tightening of all fasteners. |
Safety tips when working with fuel tank and wiring
Working with diesel and electricity demands your full attention and respect. Always disconnect the vehicle's battery before touching any wiring to prevent shorts or sparks.
Essential precautions include:
- Ensuring the area is well-ventilated to avoid fume buildup.
- Double-checking all fuel line connections for leaks before powering the system.
- Using the correct gauge of wire and proper fuses for all electrical circuits.
- Keeping all wiring and the fuel pump well away from hot exhaust components.
Safety first is not just a slogan; it's the only way to approach this part of the installation.
Mounting the Webasto Diesel Heater
Finding the perfect home for your heater unit is a balance of practicality and safety. You'll want to secure it with its dedicated bracket in a spot that's both sturdy and well-ventilated, away from any flying road debris or moisture. Secure mounting ensures quiet operation, so when you finally fire it up, all you hear is the gentle hum of warmth, not an annoying rattle. Just remember to leave enough clearance around it for airflow and to connect the hoses later.
Best locations for mounting the heater in a camper
| Proposed Location | Key Advantages | Points to Consider |
|---|---|---|
| Under the Passenger Seat | Excellent space utilization, concealed from view, and typically offers straightforward under-floor access for routing the exhaust. | Ensure sufficient clearance for air intake and that seat mechanisms cannot interfere with the unit or its hoses. |
| In a Rear Corner Compartment | Isolates operational noise from the living area, keeps the unit out of the way, and often provides ample room for service access. | May require longer runs for fuel lines and wiring, and you must verify the heat output can effectively circulate to the front of the van. |
| Within a Dedicated Interior Cabinet | Contains the unit neatly, muffles sound effectively, and allows for creative integration with your cabinetry design. | Absolute necessity for significant ventilation to prevent overheating; requires custom fabrication of vented panels or doors. |
| Beneath the Vehicle Chassis | Preserves all interior space and completely eliminates any risk of fumes or noise entering the camper's living zone. | The unit must be specifically rated for exterior use; requires robust protection from road debris, water, and salt spray. |
How to secure the diesel heater for stable combustion
A firmly mounted heater is the foundation for smooth and reliable operation, as excessive vibration can disrupt the delicate combustion process. Use the manufacturer's specific bracket and robust fasteners to attach the unit to a solid part of the vehicle's chassis or floor.
Key steps for a stable install:
- Securing the unit on a level plane to ensure proper fuel burning.
- Allowing sufficient clearance around the heater for airflow and service access.
-
Installing rubber isolators or anti-vibration pads between the bracket and the mounting surface.
A solid mount ensures smooth operation and helps prevent a host of potential performance issues down the line.
Positioning the intake and exhaust for safe operation
The way you route the intake and exhaust pipes is arguably the most critical safety step in the entire installation. The hot exhaust pipe must terminate well away from any flammable materials, fuel lines, or the vehicle's own air conditioning intakes to prevent any risk of fire or fume ingress. Similarly, the combustion air intake needs a clean source of air, free from dust, water spray, or the very exhaust gases it's trying to avoid. A good rule is to place the exhaust outlet downstream and pointing away from the intake, leveraging the vehicle's airflow to disperse gases.
Correct pipe routing protects your safety by ensuring that the byproducts of combustion are effectively and permanently expelled outside your living space. Always use high-quality, heat-resistant materials for the entire exhaust run and seal every penetration through the floor with a proper grommet and high-temp sealant. Taking your time here is not just recommended; it is absolutely essential for your peace of mind.
Wiring and Electrical Setup for Webasto Heater
This is where you bring your heater to life by connecting its nervous system. Follow the wiring diagram meticulously, making sure connections to the thermostat and control unit are snug and corrosion-free. Good electrical connections are vital, as a poor ground or a pinched wire can lead to frustrating issues that are hard to diagnose later. Taking your time here to route the wires neatly and protect them with loom will pay off with years of reliable service.
Step-by-step wiring connections for the diesel heater
Before touching any wires, pour a cup of coffee and have a long look at the wiring diagram that came with your specific heater—it’s the roadmap that will keep you from getting lost. Run the main power cables straight to your battery posts, and never skip installing a fuse on the positive line; it’s a small component that acts as a guardian for your entire electrical system.
Essential steps for a solid connection:
- Neatly route the main wiring harness, using zip-ties to secure it well away from hot surfaces or parts that can move or vibrate.
- Plug the temperature sensor into its dedicated slot on the control unit until you hear a confirming click.
- Match the remote control wires precisely to their counterparts, following the color-coding or labels to the letter.
- Scrape away any paint or rust from the chassis to create a pristine, bare metal contact point for your ground wire.
Installing the controller for easy heater operation
Mount the controller in a spot that's easily accessible from your main living or sleeping area, but not where it could be accidentally bumped or damaged. A clean and simple connection to the main wiring harness is all that's needed to give you command over your comfort.
Points for perfect placement:
- Choosing a location with clear visibility for the display, especially at night.
- Ensuring the wiring to the controller is tucked away neatly for a professional look.
- Testing all buttons and functions after installation to confirm correct operation.
Your comfort is just a button press away with a well-installed and intuitive control interface.
Common wiring mistakes and how to avoid them
Many installation headaches stem from simple electrical errors that are easily avoided with a bit of foresight. One of the most common slip-ups is using wires that are too thin for the current, which can lead to voltage drop and the heater not starting properly. Another frequent issue is a poor ground connection; this isn't just about connecting to metal, but to a clean, unpainted spot on the chassis to ensure a reliable circuit. Good wiring is the heater's nervous system, so always use the correct crimping tool for terminals instead of just twisting wires together, which can loosen with vibration.
Failing to protect wires with a conduit or loom where they pass through metal panels can lead to shorts, turning your new heater into a permanent fixture. Taking the time to label each wire during the connection process will save you immense frustration during troubleshooting. A methodical approach to the electrical work ensures your heater gets the clean, stable power it needs for a long life.
Fuel System Installation: Pump and Tank Connection
This step is all about creating a reliable lifeline from your fuel source to the heater. When you tap into the auxiliary fuel line or tank, ensure every connection is perfectly tight to prevent any leaks or air from getting in. A clean fuel supply is essential for smooth combustion, so take care to route the hose away from heat and sharp edges. Getting this right means your heater will start reliably and burn efficiently every single time.

Mounting the fuel pump close to the fuel tank
The fuel pump should be positioned as near to the fuel tank as the installation instructions allow. This setup makes it easier for the pump to pull diesel from the tank efficiently.
Key considerations for placement:
- Mounting the pump on a bracket using rubber grommets to dampen its characteristic ticking sound.
- Ensuring the pump is oriented according to the manual, as its internal mechanism often requires a specific angle.
- Keeping it away from excessive heat sources like the exhaust to prevent vapor locks.
A short fuel path prevents starting issues and contributes to the overall reliability of your heating system.
Connecting the diesel heater to the fuel tank securely
A secure fuel connection is your primary defense against leaks and the air bubbles that can prevent your heater from igniting. The most reliable method is to use a proper dedicated tank pickup or a well-engineered T-fitting that seals perfectly.
Steps for a leak-free connection:
- Using hose clamps rated for diesel fuel to secure the fuel line on both the tank and heater ends.
- Snugging all connections firmly but carefully to avoid stripping the threads.
-
Routing the fuel line away from sharp edges and heat sources along its entire path.
A leak-free system ensures reliable ignition and safe operation every time you press the start button.
Ensuring stable fuel supply for clean combustion
For your heater to burn cleanly and efficiently, it requires a steady, uninterrupted flow of diesel without any air pockets. Any kinks or sharp bends in the fuel hose can restrict this flow and starve the combustion chamber. Clean fuel means a clean burn, so always install an in-line fuel filter to catch any debris or water that might be in the tank before it reaches the delicate pump and burner assembly.
Exhaust and Air Intake Configuration
Think of this as giving your heater a set of healthy lungs to breathe and a safe way to exhale. The intake needs a clean source of air, while the exhaust pipe must be routed to vent gases completely outside, away from any openings. Proper venting protects your safety by ensuring carbon monoxide and other combustion byproducts are directed away from the living space without any chance of leaking back in.
Proper routing of the exhaust system for a Webasto heater
The exhaust pipe must be routed with a consistent downward slope away from the heater to allow moisture and condensation to drain freely. It is critical to maintain a safe clearance between the hot exhaust pipe and any other vehicle components, especially fuel lines and wiring looms.
Essential routing rules:
- Using only the high-temperature hose and fittings supplied with the heater kit.
- Securing the pipe with sturdy brackets every few feet to prevent movement and stress.
- Ensuring the final exhaust outlet points away from the vehicle and any potential air intakes.
A well-routed exhaust protects your van from heat damage and ensures dangerous gases are vented safely to the outside.
Setting up the intake to support efficient combustion
The combustion air intake needs an unobstructed path to draw in clean, fresh air for the burner to function correctly. A clogged or restricted intake will lead to poor combustion, soot buildup, and can trigger fault codes on the controller.
Key setup points:
- Positioning the intake inlet in a sheltered location to avoid direct water ingress.
- Using a dedicated pre-filter if you are installing in a particularly dusty environment.
-
Keeping the intake run as short and straight as possible to minimize airflow resistance.
Clean air is essential for efficient burning and maximizes the heat output while minimizing maintenance.
Safety checks after installing exhaust and intake pipes
Once all the pipes are in place, a thorough final inspection is non-negotiable for your safety. Start the heater and carefully run your hand along the entire length of the exhaust pipe, feeling for any escaping gases that would indicate a loose connection. A final inspection guarantees safe operation, so also verify that neither the intake nor exhaust pipes are touching any plastic trim or wiring that could melt over time.
Listen for any unusual whistling or rumbling sounds that might suggest an obstruction or leak in the system. Use a bright flashlight to look for any telltale black soot marks around fittings, which are a clear sign of an exhaust leak. This diligent post-installation check is what gives you the confidence to sleep soundly with the heater running.
Final Testing and Adjustment of Diesel Heater
The moment of truth has arrived, but don't just turn the key and hope for the best. Do a final visual check of all connections, then start the heater and listen for its characteristic smooth ignition sequence. A test run confirms everything works; you should feel hot air flowing and see a clean, odorless exhaust, indicating a successful installation. If something seems off, this is the time to consult the manual for basic troubleshooting before hitting the road.
Running the Webasto heater for the first time in your camper
For the initial startup, make sure your van is in a well-ventilated area just in case there's any minor smoke from manufacturing residues. Turn the controller on and select the lowest heat setting, then listen for the distinct sequence of the fuel pump priming and the burner igniting. A successful first fire is a great reward and you should feel warm air flowing from the outlet within a few minutes.
Don't be alarmed by a slight smell or a wisp of smoke during this very first cycle, as this is often normal. Let the heater complete a full cycle and pay close attention to ensure it shuts down correctly. This first run is a celebration of your hard work and the beginning of many cozy adventures.
Checking combustion quality and adjusting fuel pump settings
A well-tuned heater will produce a clean, odorless exhaust with no visible black smoke. If you notice excessive soot or smell unburned fuel, it may indicate an issue with the air-to-fuel ratio that needs addressing.
Signs of optimal combustion:
- A clear exhaust with only a faint, warm vapor visible in very cold weather.
- The heater runs quietly and cycles on and off smoothly.
- No error codes appear on the controller or associated app.
Clean combustion protects your heater's interior from soot buildup and ensures you are getting the maximum heat from your fuel.
Verifying controller functions and heater performance
Take the time to test every single feature on your remote control or main control panel to ensure it works as expected. Cycle through different temperature settings and fan speeds to confirm the heater responds correctly and delivers the corresponding amount of hot air. Thorough testing builds long-term confidence in your system and helps you become familiar with its normal sounds and behaviors, making it easier to spot any future issues.