
Properly inflated boat fenders play crucial role in safeguarding your vessel from damage when docking or rafting alongside other boats. Polyform fenders, recognized for their exceptional strength and premium marine-grade build quality, provide reliable cushioning between boats and hard surfaces. However, to get the best performance and longest lifespan out of your fenders, they must be inflated correctly. Overinflation can cause the material to stretch and weaken, while underinflation reduces their ability to absorb impact. In this guide, we’ll walk you through the correct process of inflating Polyform fenders, the tools you’ll need, and a few expert tips to ensure your fenders stay in top shape season after season.

Understanding Polyform Fenders
Protecting your boat begins with understanding how marine fenders function. These cushions absorb shock between the hull and a dock or another vessel. Most high-quality models are crafted from flexible vinyl that resists wear and pressure. Their design allows air control for better cushioning and stability in rough water. Whether using a small pedal pump or a compressor, the correct setup matters, and always set your gauge before filling. Proper filling extends service life and prevents unnecessary stress on the material.
What is a polyform fender and its purpose
A boat fender acts as a soft barrier that protects the hull from impact. It prevents scratches and dents caused by contact with piers, docks, or other boats. To adjust firmness, an adapter connects to a pump through the inflation valve.
The most important step is achieving the right air pressure.
You can pump to complete this task, then tighten the valve screw once done. Many boaters test the pressure by gentle hand pressure or refer to the manufacturer’s swelling chart. If a gauge isn’t available, checking the circumference is a good way to verify that the proper inflation. Overinflating may stretch the vinyl, while too little air reduces protection. Correct care and moderate pressure keep your gear functional for many seasons.
Types of polyform fenders and buoys
| Type | Description | Recommended Use |
|---|---|---|
| A-Series Buoys | Heavy-duty, round buoys with a solid reputation for strength and reliability. Designed to handle strong waves, towing loads, and mooring in rough conditions. | Perfect for commercial vessels, large yachts, and offshore mooring setups. |
| F-Series Fenders | Classic cylindrical fenders with reinforced ribs for extra durability. Built to resist high pressure and heavy contact with docks or other boats. | Ideal for fishing boats, workboats, and long-term dockside protection. |
| G-Series Fenders | Economical yet sturdy fenders made for smaller boats. Lightweight and easy to handle, they provide dependable side protection. | Great for leisure boats, tenders, and small sailboats. |
| HTM-Series Fenders | Designed with a central rope tube for flexible vertical or horizontal mounting. Their smooth surface and slim profile make them both stylish and practical. | Suited for sport boats, yachts, and docking in tight spaces. |
| NF-Series Fenders | Sleek, high-end fenders that combine modern design with heavy-duty performance. Their elongated shape ensures excellent hull coverage. | Best choice for luxury yachts and vessels requiring aesthetic appeal with functionality. |
| WS-Series Water Ski Buoys | Compact, brightly colored buoys engineered for visibility and accuracy in water sport setups. Resistant to fading and deformation. | Commonly used for marking slalom courses, race lanes, and training zones. |
| CC-Series Buoys | Cone-shaped marker buoys offering superior stability and visibility in open water. Built to withstand constant exposure and changing weather. | Excellent for navigation marking, mooring, and general marine signaling. |
Benefits of using polyform fenders on vessels
Keeping fenders properly filled ensures reliable protection for your hull. A compact hand pump makes swelling simple anywhere on the dock. They adapt easily to different boat sizes and docking situations. Each one balances air volume with the weight of the vessel. Helpful video guides from Polyform US show every step in action.
Main benefits:
- Quick swelling using a basic connector and pump.
- Dependable cushioning even missing a pressure sensor.
- Long service life with minimal maintenance.
- Adjustable pressure for various docking conditions.
- Trusted performance proven in real marine environments.
Preparing for Inflation
Before beginning, ensure your workspace is tidy and safe. Keep all polyform products close at hand to prevent interruptions. Verify that your compressor pump operates efficiently and is free of leaks. Review the pressure chart to determine the right level for your fender or float. Be sure the correct nozzle or connector is ready for use. If you’re new to the process, watching short guides from the world on YouTube can be very helpful. Keep in mind that each polyform boat model may require slightly different air pressure. Proper planning will make the process and reduce the risk of mistakes during setup.
Checking the valve and nozzle of the polyform fender.
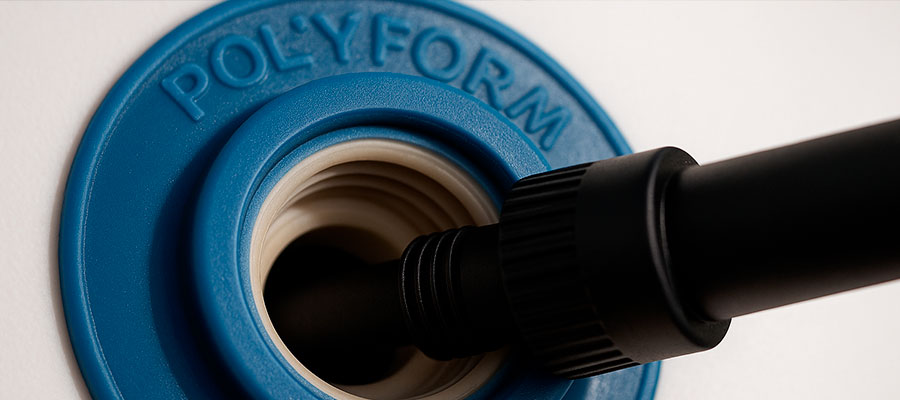
Locate the valve at the top of your fender or buoy. Carefully check for any fractures, impurities, or damage to the valve region. Make sure the opening is clear before attaching any device. The nozzle should fit securely without forcing it.
Before inflating the tire, ensure the vent stem can be comfortably depressed.
Attach the pump nozzle and confirm it sits straight. Insert the nozzle slowly to avoid scratching to the surface. When finished, ensure the plastic bolt seals firmly and shows no air loss. Routine inspections prolong the lifespan of your buoys and boat fenders, ensuring they remain safe and reliable for use.
Required tools: hand pump, adaptor, and inflation guide
You’ll only need a few tools to do this correctly. Use a hand or foot operated pump or small air compressor for steady airflow. Match the adaptor in the hole to your specific model. Having an swelling guide nearby helps track correct pressure. Once ready, gently remove the pump after reaching the right firmness.
Recommended items:
- Reliable pump to inflate or portable compressor
- Compatible inflation adapter in the valve
- Printed inflation chart for proper pressure
- Spare plastic screw in case of wear
- Safety tips before inflating polyform fenders
Safety should always come first during air filling. Never rush or skip cheking. Avoid adding air without a pression sensor to prevent overfilling. Know the weight of the boat before starting any filling. Improper handling may cause damage to the valve.
Safety reminders:
- Work on a stable, flat surface
- Use protective gloves and eye cover
- Before adding air, compare the pressure chart
- Cease operation if the valve develops a leak or produces abnormal noises
- Keep children away during the process
Step-by-Step Inflation Process
Begin by ensuring the boat is free from dirt and stable. Attach the inflator device carefully to the air opening. Add air to the float or fender gradually, checking its firmness with light pressure. Stop periodically to check the circumference of the particular product. Make certain you can depress the top slightly to confirm proper softness. Avoid overfilling because excessive air may stretch the material. Completing these steps carefully ensures long-lasting performance of your polyform buoys.
How to connect a hand pump to the valve
Start by matching the connector to the opening securely. Make certain it sits evenly and threads easily. Verify for any dirt or obstruction before attaching. Slowly begin inflating the chamber. Monitor pressure to avoid over-tightening. Remove the device gently once the correct firmness is reached.
Steps to follow:
- Select the correct inflator for your model
- Align connector with the air opening
- Thread or fit it without forcing
- Verify the top can depress lightly
- Begin slow, controlled pumping
- Detach carefully after reaching desired firmness
Using the correct nozzle and adaptor for inflation
Choose a nozzle designed to match your float or fender model. Ensure it is clean and free from debris. The connector should fit snugly without tilting or slipping. Attach the device firmly, avoid excessive tightening.
The key is to maintain steady pression without rushing.
Begin adding air slowly, watching for uneven expansion. Check the circumference of the particular product against the recommended chart measure. Finish by securing the screw or cap to avert air leakage.
Inflating polyform fenders to the suggested pressure.
Choose a pump suitable for the float or bumper size. Stop regularly to contrast it with the recommended pressure chart. Avoid adding air without a control and measuring device to prevent overfilling. Carefully seal the top after achieving proper firmness.
Checklist:
- Confirm pump fits your model
- Monitor air chamber carefully
- Compare circumference with the guide
- Light hand pressure confirms correct softness
Managing Deflation and Storage
Deflating your boat protection devices requires care and patience. Always start in a clean, dry area. Slowly release the air while checking the surface. Ensure the opening is fully cleared to avoid trapped air. Fold the unit gently to maintain shape. Check for small punctures or wear during the process. Proper deflation prepares your equipment for safe long-term storage.
How to properly deflate a polyform fender
Open the air passage completely and start releasing the pressure. Use a pump in reverse if needed to remove remaining air. Fold or roll the device carefully. Avoid sharp bends that could damage material.
Steps to follow:
- Ensure surface is clean and dry
- Gradually release all trapped air
- Fold gently along natural creases
- Store in a protective bag or container
Cleaning and storing deflated fenders
Rinse each device with fresh water to remove salt or dirt. Wipe it dry before folding to prevent mold. Check seams and surfaces for small punctures. Roll or fold loosely for compact storage. Keep away from direct sunlight to maintain material strength.
Storage checklist:
- Clean thoroughly with fresh water
- Wipe completely dry
- Inspect for any damage
- Fold or roll loosely
- Store in a cool, shaded area
Avoiding damage during storage of polyform fenders
Never stack heavy items on top of deflated units. Keep them away from sharp edges and rough surfaces. Avoid leaving them near heat sources or sunlight.
Proper folding reduces stress and prevents cracking over time.
Check regularly for moisture or mold development. Store in a breathable container to maintain airflow. Avoid compressing for long periods, which can deform material. Taking these precautions ensures your equipment remains ready for use.
Maintenance of Polyform Fenders
Regular care is essential to preserve performance and safety. Clean each unit with fresh water after every session of buoy inflation. Check the surface for scratches or minor abrasions that may affect polyform swelling. Protect the material from prolonged exposure to sunlight and strong chemicals, as these can cause it to degrade. Before using a polyform hand pump, make sure that the air passages are free from obstructions and functioning properly. Store the units in a shaded, dry area to maintain their buoyancy. Handle each float or fender carefully to prevent accidental punctures. Regular upkeep significantly enhances the longevity of polyform floats.
Checking valve integrity and buoyancy
Before proceeding with filling, carefully examine the opening for any signs of cracks or weak spots. To ensure the unit's buoyancy is correct, conduct a water test. Verify that the air passage can be depressed and check for any leaks. Utilize a polyform foot pump to confirm the air retention capabilities. Finally, compare the measurement with the chart to ensure the desired firmness is achieved.
Checklist for inspection:
- Examine the opening for cracks or damage
- Confirm float or fender floats evenly
- Verify the seal after filling
- Check for slow air leaks during storage
- Ensure that the firmness corresponds with the recommended chart measurements.
Regular inspections for wear and tear
Perform frequent checks, especially after extended use. Look for surface abrasions and scratches along seams.
The key is to catch issues early before polyform inflation is compromised.
Check air passages for blockages or minor deformities. Inspect for soft spots or uneven firmness that may affect buoyancy. Ensure the overall shape matches the chart measurement. Watch for fading or material weakening from sun exposure. Take notes on recurring problems to track wear patterns. Timely inspections prevent unexpected damage and maintain reliable float swelling.
How to repair polyform fenders and buoys effectively
Patch small punctures to avoid air loss. Avoid sharp tools near the surface during repairs. Clean the area before applying repair materials recommended for polyform floats. Tast the unit in water using a polyform foot pump after repairing.
Repair checklist:
- Identify puncture or damage spot
- Clean and dry the area fully
- Apply recommended patch or sealant
- Verify air retention and buoyancy
Troubleshooting Inflation Issues
Begin by inspecting the air passage for any blockages or dirt. Confirm that the pumping device is correctly installed and threads smoothly. Gradually fill fender or buoy while carefully monitoring its firmness. Compare it with the inflation chart to confirm the correct level. Avoid rushing, as overfilling can harm the material. Ensure that the nozzle matches the connector for a secure connection. Stop occasionally to make certain you can depress the passage. Take the following actions prevents common problems and ensures reliable fender inflation.
Common problems during inflation and solutions
Air leaks may occur if the device isn’t seated correctly. Overfilling can stretch the material and reduce lifespan. Uneven firmness indicates improper filling technique. Difficulty attaching the nozzle to the adapter can block air flow. Air loss during storage may signal unnoticed damage.
Solutions checklist:
- Verify the snugness of the connection before beginning to inject the contents
- Follow recommended pressure chart carefully
- Avoid over-tightening the connector
- Inspect for fractures or areas of structural compromise
- Inspect after each use
Valve malfunction and methods for correcting issues
A malfunctioning air passage can prevent proper filling. Inspect the interior of the opening for any accumulation of dirt or foreign particles. Ensure the adapter is properly threaded and securely attached. The key is to clean and test before attempting repair. Minor leaks can be sealed with recommended patches. Watch for persistent air loss during storage. Carefully tighten connections without over-stressing the material. Test the buoy or fender in water after repair.
Repair checklist:
- Clean the passage thoroughly
- Inspect for cracks or obstructions
- Thread connector carefully to avoid damage
- Apply recommended sealing patch if needed
- Test unit in water after repair
When to replace a polyform fender
Replace the unit if it shows persistent leaks or damage. Severe surface abrasions can reduce air retention and reliability. Overstretched material from repeated overfilling indicates replacement is necessary.
Regular checks help determine the right time to replace it.
Sun-faded or brittle areas may compromise performance. Check the circumference against the chart for consistency. If the unit fails to float evenly, replacement is needed. Keep old equipment for backup if possible. Timely replacement ensures safety and proper buoyancy during every use.

