

Keeping your Lewmar hatches in good shape isn’t just about looks—it’s about preserving comfort and safety on your boat or sailboat. Over time, the acrylic lens can craze from UV exposure, rubber seals may dry out, and old sealant around the hatch frame can lose its grip. A little maintenance now and then can make a huge difference in how watertight and smooth your deck hatch feels every time you open it.
Whether you’re planning a full hatch replacement or just giving your lewmar ocean hatch a deep clean, it’s a DIY project you can handle with the right approach. From loosening a stubborn screw to using the right cleaner, every step helps extend the life of your hardware and sealant.
Some sailors even share step-by-step tips on the world on YouTube, showing how to remove the hatch, apply butyl tape or silicone, and replace the lens without a hitch.Cleaning your Lewmar hatch isn’t just maintenance—it’s how you keep the ocean out and your cabin bright. So grab your tape, drill, and a bit of patience; we’ll walk through how to clean, reseal, and protect your hatch so it looks and performs like new again.

Understanding Lewmar Hatches
Lewmar hatches are designed to bring light and airflow into your cabin while keeping seawater out, even during a rough sail. They combine durable stainless hardware with smooth-opening hinges that make them both practical and stylish. Knowing how your hatch works helps you spot wear early, whether it’s a loose hinge or a seal that needs attention. A little awareness goes a long way in preventing leaks and keeping your boat feeling fresh.
What is a Lewmar hatch
A Lewmar hatch is a window-like opening installed on the deck or cabin top of a boat or sailboat, designed to bring fresh air and light below deck. These hatches use durable stainless hardware and smooth-opening hinges to handle constant exposure to salt and sun. They seal tightly to keep cabins dry while offering easy ventilation on long trips.
Each hatch is built with an acrylic lens and strong rubber gaskets for leak protection. The design blends strength with simplicity, perfect for both cruising and racing vessels. You can choose models for different deck layouts and sailing styles. A Lewmar hatch keeps comfort and protection balanced.
Types of Lewmar hatches
| Hatch Type | Description | Best Use | Key Features |
|---|---|---|---|
| Lewmar Ocean Hatch | Built for offshore conditions with a strong frame and dependable seal. | Long-distance cruising or bluewater sailing. | Heavy-duty handles, robust hinges, UV-resistant acrylic. |
| Low Profile Hatch | Slim and stylish design that blends with modern deck lines. | Coastal sailing or racing yachts. | Lightweight frame, flush fit, sleek look. |
| Medium Profile Hatch | Balanced design for both strength and ventilation. | Versatile for most cruising sailboats. | Reinforced corners, smooth opening action. |
| Flush Hatch | Designed for a completely flat surface on the deck. | High-performance or minimalist-style vessels. | Hidden hinge design, watertight re-bedding setup. |
| Commercial Hatch | Built for workboats and service vessels needing extra durability. | Heavy-use or professional applications. | Stainless fittings, thicker acrylic lens, reinforced seals. |
Importance of maintaining hatches
Keeping your hatch in good condition prevents leaks and saves you from costly repairs later. Here’s what proper maintenance helps with:
- Prevents corrosion on stainless fittings
- Extends the life of rubber seals
- Keeps acrylic clear and bright
- Ensures smooth hinge operation
- Reduces the need for seal replacement
Preparing to Clean Lewmar Hatches
Before you start cleaning, make sure the hatch is fully closed and secured, then gently open it to check for any loose hinge screws or damaged seals. Gather soft cloths, mild soap, and a non-abrasive cleaner to protect the acrylic surface. Preparation is the quiet secret to a perfect clean, especially if you plan to follow up with re-bedding or seal work. Taking a few minutes to inspect now can save you hours later.
Tools needed for hatch cleaning
You don’t need special tools to clean a Lewmar hatch, but the right ones make a difference. Here’s what you’ll want before you start:
- Soft sponge or microfiber cloth
- Mild marine cleaner
- Bucket of warm water
- Screwdriver for hinge checks
- Non-abrasive polish
- Silicone or butyl lubricant
Safety precautions before cleaning
Before starting, make sure the deck hatch is secure and you’re standing on a dry, stable surface. Disconnect any electrical equipment nearby to avoid shocks. Use gloves and eye protection when working with cleaning products. Stay away from strong chemicals that can damage rubber seals or acrylic surfaces.
Work in the shade to prevent soap from drying too fast. Keep tools within reach to avoid losing balance while on deck. Safety starts before the first drop of cleaner.
Removing hatch fittings
When removing fittings, stay gentle and patient to avoid scratching the hatch frame. You’ll need:
- Screwdriver (manual preferred)
- Plastic scraper to lift sealant
- Cloth to protect surfaces
- Small container for screws
- Marine butyl tape for re-bedding
Step-by-Step Cleaning Process
Start by rinsing off salt and dirt, then use a soft sponge with gentle soap to wash the frame and acrylic lens. Avoid harsh chemicals that could damage the rubber seals or dull the finish. Clean slowly and carefully to protect the hatch’s integrity, paying close attention to corners and the stainless fittings. When you’re done, rinse again and dry with a microfiber cloth for a clear, streak-free shine.
Cleaning the hatch surface
Rinse off salt and debris using clean water before applying soap. Move the cloth in circles to lift grime without scratching the acrylic. Avoid paper towels or rough pads, which can dull the finish. Once clean, rinse thoroughly and dry with a microfiber towel. Look for tiny cracks or craze marks while drying. A well-cleaned surface reveals what needs repair. Gentle cleaning preserves clarity and strength.
Cleaning hatch seals and gaskets
Seal care is key to keeping your cabin dry. Use these simple tools:
- Soft sponge
- Warm, soapy water
- Silicone-based conditioner
- Small brush for corners
Removing stubborn dirt without damage
Dirt often hides near hinges or frame edges where sponges can’t reach. Use a soft cloth soaked in mild soap and work slowly. A plastic scraper can lift old sealant without scratching the metal. For salt stains, use diluted vinegar and rinse thoroughly. Always test products on a small hidden spot first. Be patient and avoid harsh scrubbing. Slow cleaning prevents permanent surface damage.
Fixing Common Issues During Cleaning
Sometimes cleaning reveals more than you expect—like a loose hinge, worn rubber, or an uneven seal. Don’t panic; these are easy to handle with a few tools and some patience. Small problems often show up during cleaning, giving you the perfect time to do a quick seal replacement or tighten a fitting. Addressing these right away keeps your hatch smooth and watertight for the next trip.
How to fix scratches on hatches
Flashlight or sunlight reflection 7 Seamless, crystal-clear restoration of the lens.
| Step | Action | Tools & Materials | Key Tip | Expected Result |
|---|---|---|---|---|
| Clean the hatch thoroughly to remove salt, dust, and oils. | Mild soap, microfiber cloth, warm water | Clean in circular motions and rinse well. | A spotless surface ready for repair. | |
| 2 | Identify the depth of each scratch under good lighting. | Flashlight or sunlight reflection | Deep scratches feel rough when touched. | Helps you decide if sanding is needed. |
| 3 | Lightly sand shallow scratches using fine-grit paper. | 1000–2000 grit wet sandpaper, water spray | Keep the surface wet to prevent heat buildup. | The scratch surface becomes smooth and even. |
| 4 | Buff the sanded area with a polishing compound. | Marine acrylic polish, soft pad, drill buffer | Apply gentle pressure and keep the buffer moving. | The hatch surface regains its clear shine. |
| 5 | Wipe off residue and inspect under sunlight. | Clean microfiber towel | Avoid paper towels—they can re-scratch the surface. | Any remaining marks will be easy to spot. |
| 6 | Apply a UV-protective sealant or polish coat. | UV-protective wax or sealant | Reapply every few months for lasting clarity. | The hatch resists future sun damage and haze. |
| 7 | For deep gouges, fill with clear resin and repeat polishing. | Acrylic repair resin, applicator stick | Let it fully cure before sanding. | Seamless, crystal-clear restoration of the lens. |
Replacing worn hatch seals
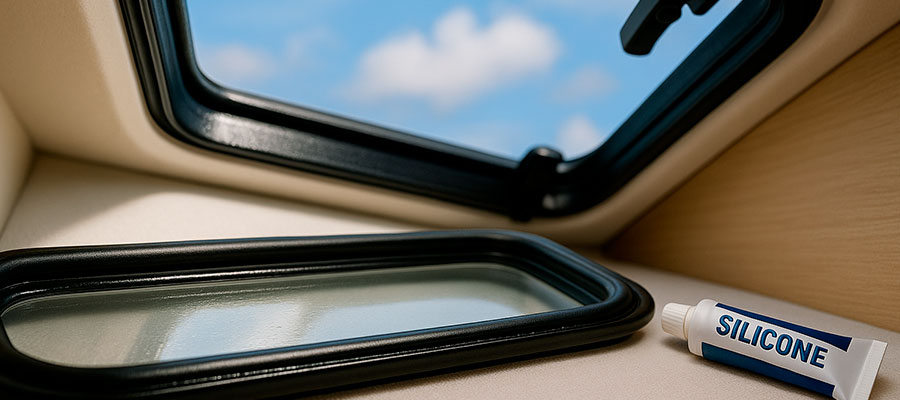
If your hatch leaks or squeaks, it might need a seal replacement. Here’s what to prepare:
- New rubber seals
- Marine adhesive
- Mild cleaner
- Plastic tool to press seals
Adjusting hatch alignment after cleaning
If your hatch feels tight or uneven after cleaning, check the hinges. Open and close it slowly to find pressure spots. Adjust screws gently—don’t overtighten or you might warp the frame. Make sure the handle latches smoothly and the rubber seals sit evenly. If it’s still off, re-check how the hatch sits on its re-bedding. Test for smooth motion and even sealing. Proper alignment ensures a perfect watertight fit.
Maintaining Lewmar Hatches After Cleaning
After you’ve cleaned your hatch, keep it working smoothly with light lubrication on the hinges and regular checks for seal wear. Saltwater and sunlight can take their toll, so make hatch care part of your seasonal sail routine. Consistent care means fewer surprises later, and it extends the life of both your frame and stainless parts. A few minutes of attention after each trip can make your hatch last for years.
Regular cleaning schedule for hatches
Consistency keeps your hatch in good shape. Follow this easy rhythm:
- Light wipe-down after each sail
- Deep clean every month
- Full inspection every 3 months
- Seasonal re-bedding check
Protecting hatch surfaces from UV damage
Sun exposure slowly fades acrylic and weakens sealant. Rinse off salt and apply UV polish after every cleaning session. Keep your boat covered or use hatch covers when docked. Avoid harsh chemicals that strip protection. Choose marine-safe coatings designed for acrylic and stainless parts. Over time, you’ll notice the difference in clarity and flexibility. UV care keeps your hatch young longer.
Lubricating hatch seals for longevity
Lubrication prevents cracking and sticking while keeping seals soft. Use:
- Silicone grease or marine conditioner
- Soft cloth or brush
- Avoid petroleum-based products
Troubleshooting Hatch Problems
If your hatch still leaks or sticks after cleaning, you might need to look at the re-bedding or consider a full seal replacement. Check the stainless screws and frame alignment before assuming the worst—it’s often a simple fix. Most hatch problems start small and grow slowly, so catching them early keeps your deck dry and your sailing days stress-free. Patience and a careful eye are your best tools for keeping everything in top shape.
Identifying leaks in Lewmar hatches
If you spot damp areas or drips, test for leaks by spraying water over the closed hatch. Watch the hatch frame for moisture or bubbles along the edges. Cracked corners, worn rubber, or loose screws are common causes. If leaks persist, use butyl or silicone to reseal the fittings. Document problem areas for future checks. Clean and dry before applying any new sealant. Early detection stops leaks before damage spreads.
How to fix loose hatch fittings
Loose fittings can create noise and water gaps while sailing. To tighten them, follow these steps:
- Tighten stainless screws gently
- Apply marine adhesive if threads slip
- Replace washers as needed
- Remove old sealant before reinstalling
When to call a professional for hatch repair
Sometimes, despite all the cleaning and DIY work, your hatch still leaks or sticks. That’s when an expert can help with alignment, re-bedding, or lens repair. Professionals have tools and experience to fix things without damaging the frame. They can also test the watertight seal more precisely. It might cost a bit more, but it ensures long-term reliability. Calling a pro saves time and frustration.

