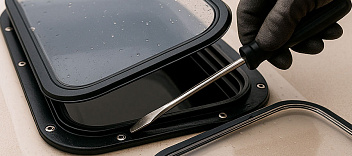
Maintaining a safe and efficient boating environment often hinges on less obvious yet crucial systems, such as ensuring your bilge remains free of unwanted water accumulation. The reliable automatic bilge pump stands out as an essential component for modern vessels, offering peace of mind by automatically activating when water levels rise. Wiring this pump correctly is paramount to avoid electrical failures, short circuits, or inadequate performance that could compromise your boat's integrity. In this guide, we'll explore the step-by-step process of installing and connecting this device, drawing on expert advice tailored for both novices and seasoned mariners. Understanding the fundamentals of marine electrical systems can empower you to handle this task with confidence, ultimately enhancing the longevity and safety of your watercraft. Let's dive into the details to transform potential perils into preventative solutions.
Understanding Your Rule Bilge Pump Components
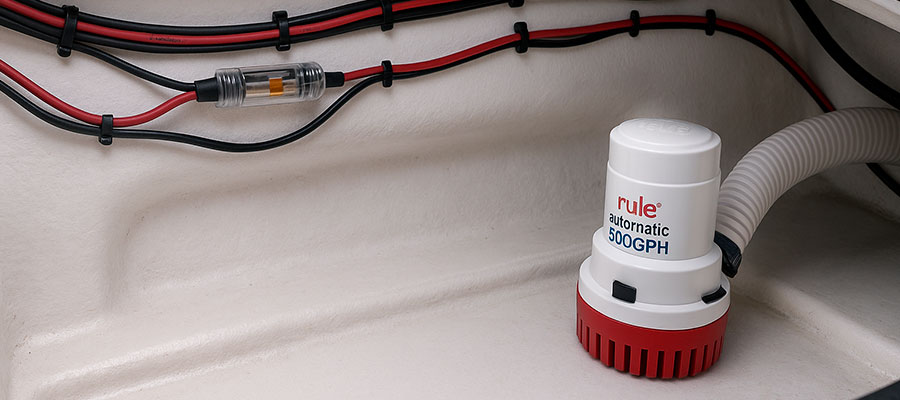
First, get to know the core parts that make up your drainage device. It helps to identify each piece before starting any setup process. Look for the main unit that handles the liquid removal task. You'll see indicators for the power level, like units per hour. Also, spot the small sensor that reacts to rising moisture levels. This sensor works quietly in the background without much fuss. Consider how the power connects, often through a pair or trio of strands. Sometimes, old units need replacement with fresh ones from the manufacturer. Remember, the key is matching these to your boat's specific needs. Always double-check compatibility to avoid any hiccups later on.
The Automatic Switch and Manual Override
Many boaters wonder how to manage their drainage systems effectively. The built-in detector kicks in when liquid reaches a certain height. This prevents unwanted buildup in the hull area. You can control it remotely if needed for peace of mind. Sometimes, operators prefer hands-on control during tricky situations.
The key is balancing both modes for reliable performance in various conditions.
Users often test the system when conditions are calm. Feedback from online discussions can provide useful tips. Keep an eye on how often it activates to optimize usage. Lastly, proper settings ensure it responds promptly without overworking.
Decoding the Wiring: Two Wires and Their Functions
Figuring out the strand setup can be tricky for newcomers. Most setups involve a simple pair of leads for basic function. Color coding helps distinguish roles in the connection. The dark-colored ones usually handle the main power role. Always reference the specific product specs for accuracy. Now, let's break it down further.
- Dark leads carry the electrical charge to activate the unit.
- Light-marked leads manage the sensing trigger for automated mode.
- Double-check stripe patterns, as they indicate different duties.
- Ensure junctions are secure to avoid disruptions.
- Test connections before full operation to confirm reliability.
- Consult specific guides matching your model for best results.
Importance of the Waterproof Connector
Why focus on sealed links in your drainage setup? They protect against moisture intrusion during use. Boat environments demand durable parts that last. These seals keep things running smoothly in wet conditions. Regular checks prevent failures over time. Now, here's a quick rundown.
- Sealed connectors block liquid from reaching internal parts.
- They endure exposure to salt and waves without issue.
- Proper crimping ensures tight, reliable joins.
- Use high-quality materials rated for marine applications.
- Inspect regularly for wear to extend equipment life.
Planning Your Electrical System
Assess your boat's power needs before diving into any setup. Consider factors like voltage levels to match your equipment. Think about where you'll draw energy from on board. Map out how components connect to avoid overloading issues. Check for adequate flow rates to handle tasks efficiently. Identify spots for switches to control operations remotely. Plan for backup controls if automation fails sometimes. Ensure paths are clear for liquid removal routes. Review model specifics, such as output capacities. Double-check all elements for safe, reliable use.
Choosing the Correct Wire Gauge and Fuse
| Pump Current Draw (Amps) | Recommended Wire Gauge | Fuse Rating (Amps) | Maximum Cable Length | Additional Notes |
|---|---|---|---|---|
| 1-5 | 18-gauge (for marine tinned copper) | 7.5 | Up to 10 meters | Ideal for low-power drainage tasks; ensure cable insulation is weatherproof to resist splash exposure. |
| 6-10 | 16-gauge (for flexible stranded cores) | 12.5 | Up to 15 meters | Suits standard evacuation scenarios; consult amperage charts for boats over 20 feet to prevent voltage drops. |
| 11-15 | 14-gauge (with corrosion-resistant sheathing) | 18.75 | Up to 20 meters | Provides robust capacity for medium-heavy loads; use a higher fuse margin for intermittent start-ups. |
| 16-20 | 12-gauge (heavy-duty tinned variant) | 25 | Up to 30 meters | Essential for high-output systems; pair with marine-rated terminals to endure vibrations. |
| 21+ | 10-gauge (extra-thick insulated) | 31.25 or more | Up to 50 meters | Tailored for demanding pumps in large crafts; always verify with electrical codes for offshore safety. |
Selecting an Optimal Mounting Location
Choosing the right spot for your unit can prevent many problems. Think about areas prone to moisture accumulation in the hull. Ensure the position allows easy access for checks and adjustments. Avoid places where vibrations might cause issues over time. Pick sites that keep the device close to potential liquid sources. Look for locations that protect it from extreme movements. Here are some tips to help decide.
- Mount at the lowest point to draw in accumulating fluid effectively.
- Position away from high-traffic zones to reduce accidental damage.
- Ensure ventilation around the area for cooling during continuous use.
- Orient so that inlet faces downward for split-second response.
- Select spots with solid surfaces for secure fastening securely.
- Avoid overheated compartments to maintain peak performance.
Reading and Interpreting the Wiring Diagram
Start by grabbing the guide that comes with your product. Look at symbols showing power pathways for clear understanding. Identify the strands by their color marks for différent functions. Note where positive and negative leads connect. Understand how a pair or trio of leads work in tandem. Visualize the layout to spot potential short circuits. Match colors to the old setup if replacing. Always prioritize safety during the process.
Paying close attention to color codes prevents costly mistakes.
Think about consulting online communities for extra insights. Verify connections look right before plugging in anything. Test step-by-step to ensure everything flows smoothly. Double-check ratings like amperage for your model's needs.
Connecting to Power Source
Start by locating your boat's main energy supply. Ensure the setup matches the typical 12v requirement. Think about using a nearby control element for simple access. Check the output rate, like rule 500 gph, to fit your needs. Connect through the helm switch for remote options. Add a bilge pump switch if you prefer extra layers. Place it so you can turn on the pump easily. Always test connections before putting the new pump in use.
Running Wires Directly to the Battery
Getting power from the battery is straight forward for most setups. Plan the path to avoid sharp bends or kinks. Use flexible strands that handle moisture well. Attach both ends securely for steady flow. Think about adding a manual switch for backup. This method works well for many boats. Forum discussions often confirm its reliability. It keeps things simple without extra complications.
Trusting direct links reduces risks in rough seas.
Avoid overloading by checking currents first. Position to prevent accidental disconnects.
Proper Fuse Installation for Safety
Adding a fuse guards against electrical mishaps on your vessel. Choose one that fits the amperage of your device. Position it near the power link for quick action. This prevents overdraw from damaging components. Ensure it's rated for marine environments. Now, here are key steps to follow.
- Select a fuse matching your model's draw closely.
- Crimp leads on both sides firmly.
- Install within easy reach for checks.
- Test continuity with a meter before use.
- Replace if damaged to maintain protection.
- Confirm it's inline with the main feed.
Creating Secure and Waterproof Terminals
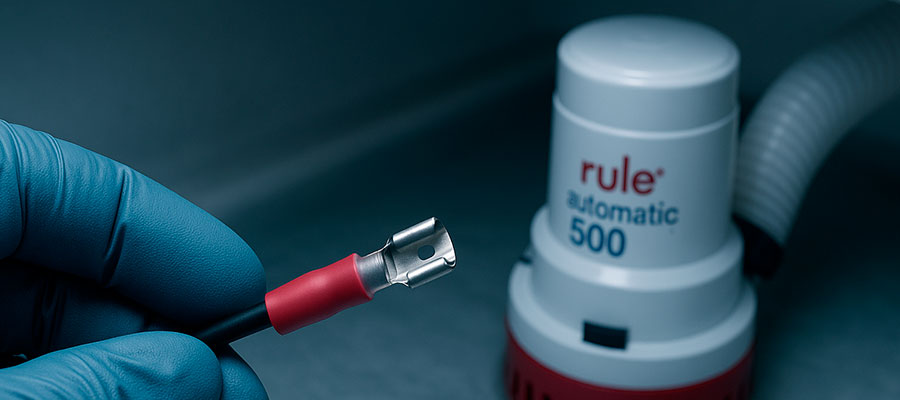
Terminate connections where moisture might cause issues. Start with clean, stripped strand ends ready for joining. Use materials that resist corrosion from salt. Build up layers if needed for strength. Think about adding heat-shrink for extra sealing. Place these away from standing fluids. Double-check all joins for tightness. This setup protects your bilge pump wiring long-term. Consider helical wraps for added durability. Test under pressure to simulate real conditions. Regularly inspect for wear to keep everything dry.
Integrating the Automatic Switch
Begin by positioning the bilge float near the pump base. This setup helps detect rising bilge water levels. Ensure it's not too close to obstructions in the hull. Wire a bilge pump using three wires or 2 wires as needed. Connect the brown wire to the positive side firmly. Use the black wires for grounding connections securely. Make sure the white stripe indicates the correct polarity. Test the switch at the helm for remote control. A battery switch provides an extra layer of safety. This prevents the boat from sinking during unattended moments. Finally, route all connections away from moving parts.
How the Float Switch Activates the Pump
The bilge float rises with accumulating bilge water in the boat. When levels reach enough water, it triggers a response. This protects against potential sinking by automatic action. Inside, the mechanism uses a simple tipping design. Switch contacts close when the float lifts sufficiently. This starts the pump cycle to remove excess fluids. Here's a breakdown of the key features.
- The float is buoyant and responds to liquid pressure quickly.
- Contact points connect via 2 wires or three wires directly.
- It cycles on when water reaches the activation height.
- Off occurs as levels drop below the threshold naturally.
- Manual operation overrides if needed during checks.
- Colors like brown wire aid in proper orientation.
Wiring for Fully Automatic Operation
Wiring for auto mode makes everything run smoothly onboard. Start with the battery terminal as your main power point. Link up the switch at the helm for control options. Use 2 wires for basic setups or three wires for more features. Connect brown wire to the hot terminal securely. Add a brown with white stripe if replacing an old pump. Position the bilge float to sense changes effectively. This prevents manual operation from being needed constantly. Check all joins to avoid shorts during movement.
Ensuring the bilge float wires correctly keeps failures at bay.
Adds a layer of reliability in rough conditions. Test response times to confirm quick cycles.
Testing the Auto and Manual Functions
Check the bilge pump wiring for any loose ends first. Simulate enough water to trigger the bilge float response. Watch the pump cycle start and stop as levels change. Use manual operation through the switch at the helm. Monitor battery terminal voltage during runs. This helps spot drains or drops early. Simulate waves to test stability. Here's how to verify everything step by step.
- Fill with water until auto mode activates swiftly.
- Confirm pump turns off when fluid lowers enough.
- Flip to manual switch for override checks.
- Inspect cycle times to ensure no hangs up.
- Check battery switch isolation from main power.
- Repeat tests under varying boat from sinking scenarios.
Final Installation and Sealing
After routing the cables, ensure all components are in place. Tighten any loose parts to prevent movement. Apply a suitable sealant around entry points. This step keeps moisture out effectively. Double-check for any gaps during this phase. Let the sealant cure fully before testing. This completes the pump setup process. Finally, label all connections for future reference.
Mounting the Pump Securely in the Bilge
Choose a flat area in the bilge for stable placement. Clean the surface before attaching the pump. Use screws or clamps for a firm hold. Keep it low to suck up fluids easily. Avoid spots near rotating equipment. Align it to point downward naturally. Some models include rubber feet for vibration dampening. Connect the hoses after securing it well.
A solid mount prevents slippage during rough waves.
Test for stability by shaking the boat gently. Adjust if needed for optimal performance.
Waterproofing All Electrical Connections
Prepare connections by cleaning them thoroughly first. Use tape or sleeves designed for marine conditions. Build layers to block any liquid entry. Position covers over exposed areas carefully. This method enhances long-term durability.
- Apply compound around join points generously.
- Wrap with insulating tape multiple times.
- Shrink tubing to lock in place firmly.
- Seal entry holes with putty securely.
- Inspect for drips under pressure.
Ensuring Proper Discharge Hose Attachment
Select a hose size that matches the pump output. Clean the fitting ends before joining. Push the hose on until it sits snugly. Use clamps to hold it in position firmly. Route the line to exit above the waterline. Test for leaks by running water through it. Ensure no kinks that might block flow. Check attachments periodically for wear.
- Cut hose to needed length accurately.
- Lubricate ends for easier insertion.
- Tighten clamps with a tool evenly.
- Avoid sharp turns in routing.
- Monitor output during operation.
Testing and Troubleshooting
Begin by checking pump manually when water accumulates. Ensure it kicks in without issues. Verify all components connect securely. Test response time during mock floods. Listen for unusual sounds while running. Confirm no leaks in hoses. Check panel for any error indicators. Power off and inspect visually. Clean any visible debris afterward. Replace worn parts immediately.
Verifying Pump Operation After Installation
First, fill bilge with water slowly. Watch for automatic kick-in. Note how quickly it drains. Run in dry mode briefly. Measure output volume accurately. Simulate wave motions gently. Record times for each phase. Ensure nothing overheats.
Proper verification confirms safety at sea.
Test power draw meters. Reassess after several cycles.
Diagnosing Common Wiring Issues
Issues with wiring can halt pump effectiveness. Examine connections for loose fits. Use a multimeter to check continuity. Probe for shorts or breaks in lines. Trace paths from panel to device. Document findings before fixes. This helps pinpoint problems fast.
- Test 3 wire setups individually.
- Swap panels to isolate faults.
- Inspect for corrosion buildup.
- Verify voltage at key points.
- Compare with original diagrams.
- Consult expert if persistent.
Maintaining Your Bilge Pump System
Keep the bilge area clean regularly. Wipe down components every trip. Check hoses for cracks periodically. Operate pump manually monthly. Lubricate moving parts as needed. Store in dry place when removed. Calibrate sensors after major usage. Replace filters to prevent clogs. Monitor performance logs diligently. Schedule professional checks yearly. Clean sensors to avoid false cues. Ensure all seals stay intact. Test under load conditions. Document maintenance dates carefully. Rotate backup units if available. Avoid overloading the system routinely. Secure loose hardware promptly. Perform quick runs post-cleaning. Use compatible cleaners safely. Extend lifespan with routine care.