Flojet pumps revolutionize fluid transfer with their innovative diaphragm design. These versatile devices excel in demanding environments like recreational vehicles. Reliable performance ensures consistent flow without frequent maintenance needs. Advanced materials resist corrosion, extending the pump's operational lifespan. Users appreciate the quiet operation ideal for residential settings. Customizable pressure settings adapt to diverse application requirements. Overall, Flojet technology sets a benchmark for portable pumping solutions.
Understanding Your Flojet Pump's Pressure System
Flojet pumps handle water flow in various setups. They connect via hose to your water system. Check the manual for specific psi ratings. Faucets rely on steady pump pressure for smooth operation. The valve controls flow direction effectively. Bypass options prevent overuse during high demand. Accumulator tank stores reserve for consistent delivery. City water integration requires careful plumb setup.
The Role of the Pressure Switch in Pump Operation
The switch activates when pump pressure drops low. It signals the pump to start drawing water.
Cut-off pressure stops the unit to save energy.
This cycle maintains flojet pressure without constant running. Users adjust the pressure via the switch knob. Clockwise turns increase the pressure as needed. Similar manual process applies to most models.
How a Pressure Tank Affects Water Delivery
A water tank buffers fluctuations in your setup. It ensures steady flow from the pump. Accumulator tank reduces pump cycling frequency. This leads to quieter operation overall. Filter placement upstream protects the system. Check for leaks regularly to avoid issues.
- Accumulator tank smooths out water delivery.
- It minimizes pump starts and stops.
- Water tank capacity varies by model size.
- Bypass valve helps in maintenance checks.
- Hose connections must be secure always.
Identifying Signs That an Adjustment is Needed
Water pump pressure feels inconsistent at faucets. Pump comes on too frequently without reason. Remove the cover to inspect internal components. Check for leaks around connections carefully. Water system performance drops during peak use. Increase the pressure gradually if output lags.
- Faucet flow weakens unexpectedly.
- Pump cycles more than usual.
- Hose vibrations indicate imbalance.
- Filter clogs reduce efficiency.
- Manual suggests recalibrating psi levels.
Locating the Pressure Adjustment Mechanism
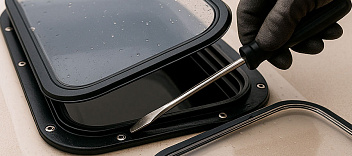
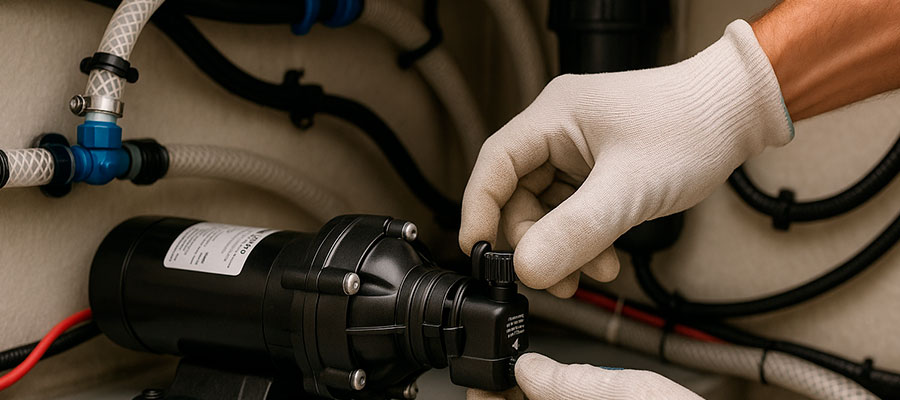
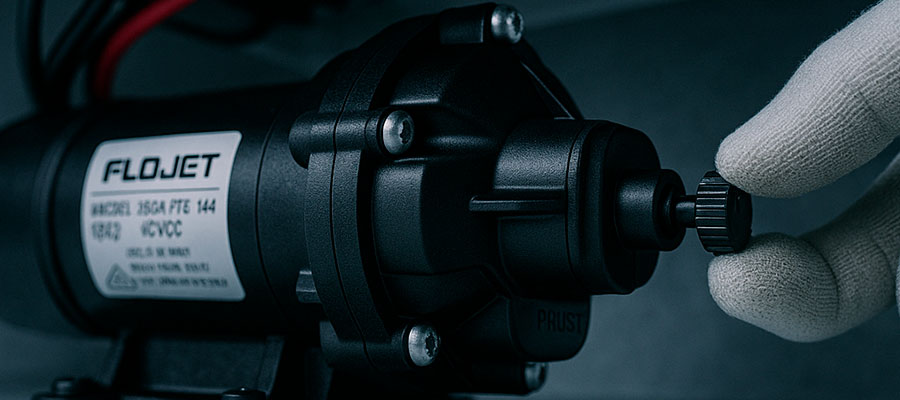
Look under the main body of your device. Check near the wiring connections carefully. Open the access panel with a flat tool. Spot the small knob or dial there. It sits close to the motor housing. Turn it gently to test movement. Refer to online forum discussions for model tips.
Finding the Pressure Switch on Your Specific Model
Examine the side panel first. Push aside any protective covers.
Identify the round component with wires.
It might have a label nearby. Compare with images from user forums. Probe lightly to confirm it's the switch. Avoid forcing if unsure.
Understanding the Different Types of Adjustment Screws
Various controls help fine-tune your setup. Preset knobs set initial activation points. Range selectors define upper limits easily. Fine-tune dials allow precise modifications. Cut-off controls stop operation automatically. Start-up mechanisms begin flow on demand. Choose based on your specific needs.
- Preset knobs for basic starts.
- Range selectors for broad ranges.
- Fine-tune dials for accuracy.
- Cut-off controls for safety stops.
- Start-up mechanisms for quick activation.
- Custom options for unique setups.
Safety Precautions Before Making Any Changes
Disconnect power before starting work. Wear gloves to protect hands. Work in a well-lit area. Avoid rushing the process. Check water pressure levels first. Consult forum experts if needed.
- Unplug the unit completely.
- Use insulated tools only.
- Drain system if possible.
- Note original settings down.
- Test after changes slowly.
- Seek help for complex issues.
Step-by-Step Pressure Adjustment Process
Start by unplugging your device for safety. Locate the small knob on the unit. Gently turn it clockwise to boost output. Check psi readings with a gauge. Test flow at a nearby tap. If needed, rotate counterclockwise for reduction. Repeat until desired level is achieved.
Tools Required for a Precise Adjustment
| Tool Name | Description | Usage Tips |
|---|---|---|
| Precision Screwdriver Set | A collection of slender, magnetized implements with varied tip configurations designed for meticulous turning of miniature fasteners. | Grip firmly to avert slippage, selecting the exact bit size to match the pump's adjustment screw for seamless calibration. |
| Digital Pressure Gauge | An electronic device equipped with a sensor array that quantifies fluid force in real-time, displaying readings on a backlit screen. | Attach to the pump outlet securely, ensuring zero leaks, and observe fluctuations during incremental tweaks for optimal accuracy. |
| Insulated Multimeter | A handheld gadget integrating voltmeter and ohmmeter functions, shielded against electrical hazards with ergonomic casing. | Probe the pump's wiring cautiously to verify power integrity before and after modifications, preventing unintended circuit disruptions. |
| Torque Wrench | A calibrated lever tool with an adjustable dial that applies controlled rotational force, complete with audible click feedback. | Set the torque limit per manufacturer specs to tighten connections without inducing undue stress on pump components. |
| Protective Gloves | Durable, non-slip hand coverings made from synthetic fibers, offering resistance to oils and abrasions. | Wear during handling to shield skin from sharp edges or residual fluids, maintaining hygiene and focus on the task. |
Turning the Screw to Increase or Decrease Pressure
Gently rotate the knob for changes. Clockwise movements raise output levels. Counterclockwise turns lower the flow. Test small shifts to avoid issues. Monitor effects on your system. Repeat tweaks until satisfied.
- Rotate slowly for precision.
- Check readings after each turn.
- Avoid overdoing in one go.
- Use tools if needed carefully.
- Note any unusual responses.
- Reset if problems arise.
The Relationship Between Cut-In and Cut-Out Settings
Cut-in starts the unit at low psi. Cut-out halts it at peak levels. This prevents constant running cycles. Gap between them ensures smooth operation. Adjust cut-in first for baseline. Then set cut-out to match needs.
- Cut-in activates when psi falls.
- Cut-out stops at upper limit.
- Wider gap reduces frequent starts.
- Narrower one increases efficiency.
- Balance prevents overuse issues.
- Fine-tune based on usage patterns.
Optimizing Performance for Your Application
Tailor your setup to match daily demands. Consider the number of users involved. Boost output for high-usage scenarios. Reduce settings for minimal needs. Monitor energy consumption closely. Adjust based on water volume required. Test under real conditions regularly. Fine-tune for quiet, efficient operation.
Ideal Pressure Settings for RV and Marine Use
For RVs, aim for steady flow during travel. Ensure compatibility with onboard systems.
In marine environments, prioritize corrosion resistance.
Balance for varying sea conditions. Start with moderate levels to conserve battery. Increase slightly for showers or sinks. Lower for storage periods. Regularly recalibrate after trips.
Balancing Pressure with the 12V Power Supply
Match your device's output to battery capacity. Avoid overloading the electrical system. Use a voltmeter to check stability. Gradually raise levels while monitoring amps. Lower if voltage drops occur. Ensure wires are rated properly. Test during peak draw periods.
- Check battery charge before tweaks.
- Use fuses for safety nets.
- Monitor temperature during runs.
- Opt for deep-cycle batteries.
- Balance with solar inputs.
- Avoid sudden power surges.
- Recalibrate after battery swaps.
Preventing Short Cycling for Pump Longevity
Space out activation and deactivation points. This reduces wear on components. Set wider gaps for smoother runs. Inspect connections for stability. Avoid rapid on-off sequences. Use buffers to even flow. Regularly audit system health.
- Increase intervals between starts.
- Add dampeners for consistency.
- Monitor run times closely.
- Clean filters to aid flow.
- Use timers for control.
- Check seals for integrity.
- Update firmware if available.
Troubleshooting Common Pressure Issues
Check connections for loose spots first. Listen for unusual sounds during runs. Measure output with a simple gauge. Clean parts if buildup appears. Test power supply stability always. Adjust settings in small steps. Inspect wiring for wear signs. Consult diagrams for your model.
Diagnosing Rapid Cycling Problems
Watch how often it starts and stops.
Note patterns during peak usage.
Feel for vibrations in the unit. Examine electrical contacts closely. Record run times over days. Compare with typical operation norms. Look for air in the lines. Test under different load conditions.
What to Do When Pressure Drops Suddenly
Stop using water immediately. Inspect visible pipes for blockages. Check power source for interruptions. Reset the unit by unplugging briefly. Monitor readings after restart. Clear any debris from intakes. Adjust thresholds if needed carefully.
- Unplug and wait a minute.
- Flush lines with clean water.
- Verify voltage remains steady.
- Tighten all fittings securely.
- Run diagnostics on the controller.
- Add stabilizers for consistency.
- Seek expert advice if persistent.
Addressing Inconsistent Water Flow
Balance input and output levels evenly. Ensure even distribution across outlets. Prime the system fully before use. Monitor for air pockets inside. Stabilize electrical supply during operation. Adjust flow controls gradually. Test across various usage scenarios.
- Prime tubes thoroughly each time.
- Equalize loads on circuits.
- Use buffers to smooth variations.
- Check seals for proper closure.
- Regulate power input steadily.
- Log patterns for trends.
- Upgrade components if outdated.
Maintaining Your Adjusted System
Keep your setup clean and dust-free regularly. Wipe down surfaces after each use. Store in a dry spot when idle. Check connections for tightness monthly. Lubricate moving parts as needed. Avoid exposing to extreme temperatures. Test functionality before long trips. Update components if signs of wear show. Follow basic care routines diligently.
Periodic Checks to Ensure Consistent Pressure
Inspect the unit every few weeks. Listen for odd noises during operation.
Measure output levels with a gauge.
Clean intake areas from debris. Verify power sources remain stable. Check for vibrations in the system. Record performance data over time. Adjust thresholds based on findings. Repeat checks seasonally for best results.
When to Consider Replacing the Pressure Switch
Watch for frequent starts and stops. Notice if output fluctuates wildly. Feel unusual heat from the unit. Hear clicking sounds more often. Observe reduced efficiency in tasks. Experience inconsistent flow patterns. Decide on swap if issues persist.
- Look for visible damage on parts.
- Test response times under load.
- Compare readings with baseline norms.
- Check seals for cracks or gaps.
- Monitor energy use for spikes.
- Ensure compatibility with your setup.
- Consult guides for model specifics.
Long-Term Care for Your Flojet Water Pump
Store it properly during off-seasons. Flush lines after extended downtime. Use quality inputs for better longevity. Protect from moisture and corrosion. Schedule professional inspections yearly. Update firmware when available. Dispose of old parts safely.
- Clean filters monthly for clarity.
- Balance loads evenly across usage.
- Add buffers to reduce strain.
- Inspect wiring for fraying signs.
- Prime before each activation.
- Log maintenance history.
- Upgrade accessories as needed.