

A healthy water pump is the key to a cool-running Johnson or Evinrude outboard. Symptoms like a sluggish telltale stream or an engine gauge climbing into the red signal that this part needs attention. While it requires care, swapping out the pump is a doable project for a methodical boat owner.
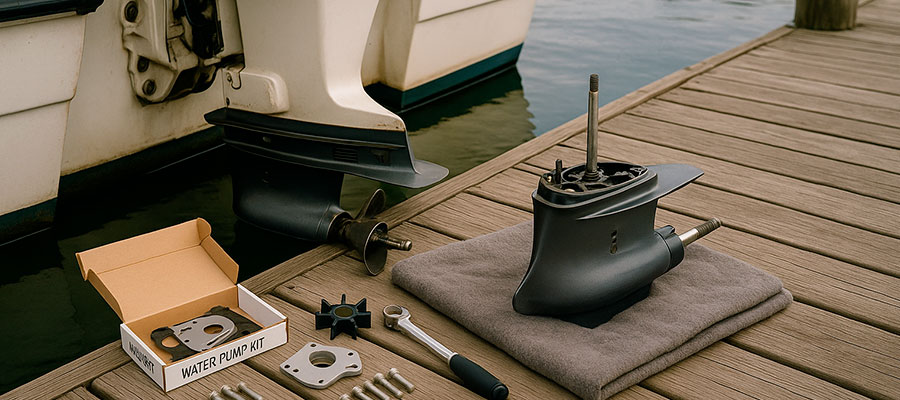
You will need a complete pump service kit, which contains the impeller, housing, and gaskets. Also have on hand a quality gasket sealant, marine-grade grease, and standard tools like screwdrivers and a socket set. The job involves disconnecting the shift linkage, dropping the lower unit, and then accessing the old pump. After a thorough cleaning of the mating surfaces, the new components can be installed with a thin film of sealant to block leaks.
Understanding the Johnson Outboard Water Pump
This pump is the lifeline for your outboard's temperature control, constantly moving water from the lake through the engine's internal passages. Its operation hinges on a rubber impeller whose blades flex to push water along. This simple yet effective design is what protects your engine from seizing under load. Recognizing how this system functions allows you to spot a decline in performance before it leads to an expensive overheating incident.
What is a Johnson water pump and how it works
Acting as the engine's circulatory system, the pump pulls in cool water and forces it around critical components. The heart of this assembly is the flexible impeller, which spins to create a steady flow. As its vanes gradually wear out, they lose their ability to move a sufficient volume of water, causing engine temperature to rise. Installing a fresh impeller before this point is a fundamental aspect of routine outboard maintenance.
Differences between Johnson and Evinrude water pumps
While Johnson and Evinrude outboards often share a common design lineage, their water pump parts can have model-specific variations. These nuances are most evident when examining a repair kit for a particular engine.
Potential differences include:
- The outer profile and internal measurements of the pump casing.
- The configuration of the metal key that drives the impeller.
- Variations in the driveshaft's length and spline geometry across different power outputs.
- Incremental updates to seal materials and gasket shapes over a model's production run.
Signs your outboard motor needs a water pump replacement
Your outboard provides clear indicators when its cooling capacity is diminishing. Be alert for these symptoms:
- A telltale stream that is inconsistent or has ceased entirely.
- A greater than normal volume of steam emerging with the exhaust.
- The engine frequently goes into a safety mode due to high operating temperature.
- An audible whine or grating sound rising from the lower part of the motor.
Preparing for Water Pump Replacement
Assembling the exact kit and necessary tools in advance is the first step toward a smooth repair process. Always start by verifying your engine's model number to procure the appropriate parts. With the new kit, sealant, grease, and tools organized, you can work without interruption. A patient and orderly workflow proves especially beneficial when realigning the driveshaft and water passage during reassembly.
Tools and parts needed for a Johnson water pump rebuild
| Item | Description | Purpose / Notes |
|---|---|---|
| Screwdriver set | Flat and Phillips types | Used for removing screws on the pump housing and gearcase cover. |
| Socket wrench | With marine-grade sockets | Helps loosen bolts securing the lower unit and pump housing. |
| Gasket sealing compound | Water-resistant formula | Ensures a tight seal between the gasket and metal surfaces. |
| Marine grease | High-temperature resistant | Applied to the driveshaft and splines to prevent corrosion. |
| New impeller | Correct size for model number | Replaces the worn blades that circulate cooling water. |
| Impeller key | Small metal insert | Locks the impeller in position on the shaft. |
| Water pump housing | Replacement or cleaned original | Houses the impeller and directs water flow through the system. |
| Gaskets and seals | Included in most rebuild kits | Prevent leaks and maintain pressure within the pump. |
| Outboard water pump kit | Johnson or replacement Evinrude | Complete set of parts tailored for specific 2-stroke engines. |
| Clean rags | Lint-free cloth | Used for wiping surfaces and keeping grit out of the assembly. |
| Torque wrench | Adjustable measurement tool | Tightens bolts evenly to manufacturer specifications. |
Choosing the correct water pump kit for your motor
Selecting the right kit hinges on accurately identifying your outboard's model number. Every Johnson and Evinrude engine, from low-horsepower models to larger V6s, is paired with a specific pump assembly. Using the precisely matched kit prevents potential issues with fit and function. A complete kit typically contains a new impeller, all required gaskets, and a seal for the driveshaft.
It is also necessary to match the kit to your motor's year and horsepower, as designs differ between 2-stroke and 4-stroke engines. Confirming this match upfront avoids reassembly challenges. Opt for marine-specified components to ensure resilience in all water conditions.
Safety measures before starting pump replacement
Before you begin taking apart the gearcase, confirm your work area is both secure and systematically organized. A tidy space significantly reduces the chance of mishaps.
Key safety preparations:
- Detach both the battery connections and the fuel supply line.
- Place the boat or motor stand on a solid, level foundation.
- Use safety glasses and a pair of durable gloves.
- Arrange all required sockets and screwdrivers for easy access.
- Tag or bag each component upon removal to remember its installation point.
Step-by-Step Water Pump Replacement Process
Start by disconnecting the shift mechanism and carefully lowering the gear housing to reach the water pump. After opening the unit, take out the old impeller, give all sealing surfaces a comprehensive cleaning, and install the new part from your kit. Precise realignment of the driveshaft during reassembly is fundamental for a successful outcome. Complete the job by tightening the housing fasteners in a uniform pattern and performing a flow test once the lower unit is reinstalled.
Removing the housing and impeller
Reaching the impeller involves detaching the main pump body from the central driveshaft. A patient and careful technique protects the soft seals and precision surfaces.
Steps for disassembly:
- Remove the fasteners and carefully lift the housing off.
- Slide the used impeller from its position on the shaft.
- Clear out any sediment or crusted material from the chamber.
- Examine the wear plate and all internal seals for grooves or deterioration.
Installing the water pump impeller kit
Once the area is clean, fitting the new impeller is a simple task. Apply a film of water-resistant grease to the driveshaft before sliding the new impeller into position. Rotate the impeller in its intended direction of travel as you push it down to curve the vanes properly. A firm, steady pressure will seat it completely.
Confirm the impeller key is properly located and all gaskets are aligned. Refit the pump housing and tighten its bolts in a crossing sequence. Reattach the water tube, checking that its seal is fully engaged. Manually spinning the driveshaft verifies free movement before you proceed.
Reassembling the Johnson outboard motor
With the new pump installed, the focus shifts to reinstalling the gearcase. Realigning the shift mechanism and driveshaft requires a careful touch. Ensure every bolt is returned to its original point. A precise reassembly is the final step to restoring dependable cooling operation.
After the lower unit is bolted in place and the shift linkage is reconnected, manually turn the propeller to check for binding. Look over the gearcase seams for any sealant gaps and address them if found. A meticulous approach to reassembly ensures your cooling system will perform as intended.
Specifics for Different Johnson Outboard Motors
Johnson outboards vary in their design, making the model number your essential guide for finding the right components. Lower-horsepower two-stroke models often employ a more space-efficient pump assembly, while high-performance engines require more robust, durable parts. Recognizing these engine-specific characteristics directs you to the proper components and reassembly technique.
Replacing water pump on a 115 HP Johnson outboard
The 115 HP Johnson, a powerful and dependable workhorse, follows the fundamental water pump service procedure but utilizes larger, heavier-duty components. The gearcase on this model has substantial weight, so using a support strap or a jack is highly recommended for safe removal. After extracting the worn impeller, a meticulous cleaning of the entire pump cavity is the next logical step.
Always install the fresh seals and gaskets supplied in your kit before putting the assembly back together. Snug the housing bolts in a crossing sequence to prevent warping the housing. For a final verification, operate the engine with a water supply to observe a strong, consistent telltale stream.
Johnson V4 and HP outboard pump replacement tips
For V4 and higher HP motors, the water pump housing design allows more flow and higher cooling pressure. The steps remain similar but demand greater precision.
Tips to remember:
- Grease the drive shaft lightly before reassembly
- Always check the impeller key position
- Replace the seal if there’s any visible wear
- Confirm that each screw is torqued evenly
OMC Johnson and Evinrude differences in pump repair
OMC designed both Johnson and Evinrude systems, but some pump kits use different part layouts. Always compare diagrams for both before ordering.
Main differences include:
- Variations in shaft lengths
- Slightly changed gasket patterns
- Different screw sizes used in older models
- Updated pump housing materials for newer Evinrude motors
Maintenance Tips for Johnson Water Pumps
Consistent upkeep is fundamental for smooth boat operation and protecting your engine from excessive heat. Rinsing the system after use in saltwater and ensuring the water pump housing is free of sand and grit can significantly prolong its service life. These clean routines are what maintain unimpeded coolant flow. A brief examination every several trips helps identify early wear on the driveshaft or the rubber impeller, preventing more serious issues. Attentive care for your cooling system represents a wise long-term strategy for engine health.
Regular inspection of the water pump impeller
A seasonal check of your impeller allows for early detection of deterioration. This proactive habit helps you avoid unexpected breakdowns. Examine the rubber for fractures, deformed vanes, or signs of heat damage near the center. This simple visual assessment safeguards your motor from temperature-related stress. Gaining access by detaching the pump cover provides a direct look at the impeller's state.
Areas to concentrate on:
- The pliability and consistent form of the vanes.
- A secure and unobstructed fit on the driveshaft.
- Absence of corrosive pitting on or around the seals.
Extending the life of your water pump
You can increase the longevity of your Johnson or Evinrude pump by ensuring it circulates only clean water and never starts without it. Make a habit of flushing the system following every outing, particularly after saltwater exposure. This consistent attention is what adds years to the pump's operational life. Prevent leaves and silt from entering the water intakes and apply a fresh layer of marine grease to the driveshaft at each service interval. Storing the boat in a sheltered, dry location helps inhibit corrosion within the pump assembly. These practices minimize wear and support reliable impeller function over many seasons.
Signs of impeller wear and necessary repairs
Every impeller has a finite service life, as the rubber material will eventually harden, develop cracks, or lose sections. Early warning signs, if ignored, can lead to more significant damage. Observing a diminished telltale stream or hearing unusual noises from the lower unit warrants an immediate inspection of the impeller for broken or degraded vanes. Any sign of melting or chunks missing from the blades means a replacement is needed without delay.
Steps for replacement:
- Carefully slide the driveshaft out of the housing.
- Thoroughly clean the interior of the pump cavity.
- Fit new gaskets and seals from your repair kit.
- Lubricate the shaft and install the fresh impeller, setting the vanes correctly.
Troubleshooting and Common Issues
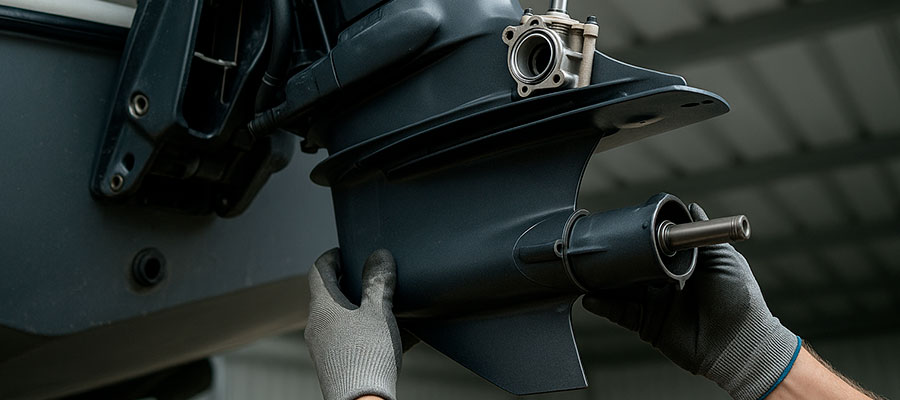
If your Johnson Evinrude outboard starts running hotter than usual, low water pressure might point to a worn impeller or a cracked pump housing. Sometimes, debris or sand can block the cooling passages near the drive shaft, reducing flow. Pay attention to small changes like weak telltale streams or rough idling, as they often warn you early. Solving these issues quickly means you can get back on the water with confidence.
Common problems after water pump replacement
| Problem | Possible Cause | Recommended Fix |
|---|---|---|
| Weak water flow | Misaligned impeller or blocked water tube | Reopen the pump housing, realign the impeller vanes, and clear the passage. |
| Overheating engine | Seal not seated or gasket leaking | Inspect gasket edges, reapply sealing compound, and retighten screws. |
| No water discharge from telltale | Driveshaft not engaging pump correctly | Check if the driveshaft is fully inserted into the impeller hub. |
| Unusual vibration | Loose bolts or unbalanced impeller | Retorque bolts and ensure the impeller key is in place. |
| Leaking around lower unit | Damaged gasket or old seal | Replace gasket and reapply a thin coat of sealing compound. |
| Rattling noise in gearcase | Shaft spline dry or under-greased | Add marine grease to the shaft spline before reassembly. |
| Rapid wear on impeller | Sand, debris, or overheating | Flush system thoroughly and inspect for rough inner housing surfaces. |
| Hard shifting or no forward gear | Shift rod out of alignment | Reconnect the shift linkage carefully and verify gear engagement. |
How to read a water pump diagram for repair
An exploded diagram offers a complete parts breakdown, detailing everything from individual fasteners to the correct application areas for sealant. Interpreting this schematic successfully helps avoid errors when putting the unit back together. Each symbol and line on the diagram conveys specific assembly information. Observe the directional arrows illustrating the coolant's path and see how the impeller key fits onto the driveshaft. Confirming that the numbers on the schematic correspond with your physical parts guarantees a correct rebuild.
When to rebuild vs replace the water pump
The decision to refurbish the pump or install a new one hinges on the state of the main body and the central shaft. A simple kit containing an impeller and seals is sufficient if these are the only parts showing wear. If the pump's main body shows fractures or significant corrosion, a complete replacement becomes the more practical path. Opting for a rebuild is cost-effective, while a full swap reestablishes total dependability—a key consideration for aging Johnson and Evinrude outboards with a long service history.

