
A successful Webasto heater installation requires methodical preparation. Start by selecting the appropriate model like the Webasto Air Top 2000 STC, confirming its compatibility with your vehicle and high-altitude operation. The installation integrates three critical systems: coolant, fuel, and electrical. For coolant models, connect specialized hoses and a temperature sensor to the engine's cooling circuit.
The fuel system needs an auxiliary fuel port, while the electrical system requires proper gauge wiring and secure connections. While Chinese heaters offer budget alternatives, their reliability remains debated in van life forums. Beyond the core unit, essential components include a robust mounting bracket, vibration dampers, and safety-critical exhaust routing with high-temperature seals.

Preparing to Install a Webasto Heater
Prior to fitting a Webasto Air Top 2000 STC, carefully plan its physical placement and electrical wiring. Organize all elements—including the fuel line, power supply, and mounting hardware—before starting the physical work. Reviewing a handful of van conversion tutorials can provide valuable visual guidance and build confidence for a first-time installer. This preparatory phase streamlines the entire procedure, allowing you to sidestep typical errors when setting up your new auxiliary heating system.
Choosing the right Webasto diesel heater for your vehicle
Selecting the best Webasto heater starts with understanding your travel habits and vehicle type. If you live full-time on the road, a Webasto gasoline heater can be an efficient choice, especially for smaller vans or campers using petrol systems. Diesel versions, on the other hand, work seamlessly with most engines and offer reliable heat in cold climates. It’s worth comparing the running noise, fuel efficiency, and heating output before making a final decision.
Some users consider a propane heater for backup use, but diesel systems often win in energy consistency. Every vehicle deserves tailored heating comfort, so choose the model that best fits your driving lifestyle and needs.
Tools and parts required before you mount the heater
| Category | Item | Purpose & Specification |
|---|---|---|
| Core Components | Heater Unit | The primary appliance; verify model number matches your application. |
| Mounting Bracket | The dedicated frame for securing the heater to your wall or surface. | |
| Fastening System | Appropriate Fasteners | Hardware suited to your wall type (e.g., concrete anchors for masonry, heavy-duty screws for studs). |
| Neoprene Vibration Pads | To dampen sound and isolate the unit from the mounting surface. | |
| Electrical Essentials | Circuit Breaker | A correctly rated disconnect switch for safe power isolation. |
| Correct Gauge Wiring | Copper wiring sized to handle the heater's specified amperage. | |
| Sealing & Safety | High-Temp Sealant | A tube of heat-resistant sealant for sealing external penetration points. |
| Fire-Rated Caulk | To maintain fire-barrier integrity where the vent passes through a wall. | |
| Specialist Tools | Stud/Concrete Scanner | To locate studs or rebar behind the wall surface, preventing drill damage. |
| Torque Wrench | For applying the precise force specified for terminal connections. | |
| System Integration | Programmable Thermostat | For automated temperature control and enhanced energy efficiency. |
| Condensate Drain Line Kit | Required for condensing gas models to safely remove acidic condensation. |
Safety precautions when working with fuel tank and fuel line
When handling fuel, slow down and stay alert. A clean workspace and steady movements make all the difference.
Safety tips:
- Disconnect the battery before touching any fuel fittings.
- Wipe spills immediately and ventilate the area.
- Avoid using open flames near the tank.
- Double-check every clamp after tightening.
- Keep your webasto gasoline heater far from leaking points.
Selecting the Location to Mount the Heater
Finding the right place to install the heater can make a big difference in comfort and safety. Many builders mount the heater under the passenger seat or near the rear of the van for better heat flow. Keep enough space for the Webasto gasoline heater’s hot exhaust and ensure proper ventilation. Placement determines warmth and performance balance, so take your time choosing the ideal spot.
Common installation spots: under the passenger seat and cargo area
Most van builders prefer mounting the heater under the passenger seat or in the cargo area for easy maintenance and heat distribution. These locations keep the Webasto unit protected from damage and noise.
Recommended spots:
- Under the passenger seat for compact vans.
- In the rear cargo section for larger vehicles.
- Beside a storage panel near the floor.
- Away from direct water or debris exposure.
- Next to the existing air duct system for better airflow.
Benefits of mounting the heater securely in a protected space
Mounting the heater in a well-protected space ensures quieter operation, longer life, and improved airflow. When secured tightly, the system resists vibration and damage from rough roads. This also helps the Webasto gasoline heater maintain stable temperature output, even when driving through cold regions. Placing it in a sheltered location reduces noise transfer and keeps the hot exhaust away from sensitive materials.
Compared to a propane heater, diesel systems often run cleaner in enclosed areas when installed correctly. A well-mounted unit also simplifies maintenance since all parts stay accessible and free from dust. Secure placement guarantees lasting heater performance, giving your van warmth season after season.
Checking clearance for exhaust and fuel line connections
Before making any permanent modifications, always confirm you have sufficient room around your chosen installation site. Adequate spacing prevents potential issues with heat from the exhaust and contact with the fuel lines.
Check the following:
- Gap between the exhaust pipe outlet and any flooring.
- Safe distance from the primary fuel tank and its filler neck.
- Room around the Webasto gasoline heater and any surrounding insulation.
- Placement of the air intake to minimize dirt ingestion.
- A safe and unobstructed pathway for both the fuel and electrical lines.
Installing the Fuel Pump and Fuel Line
While configuring the fuel delivery for your 2000 STC gasoline heater, position the pump on a slight incline to help prevent vapor locks. The fuel hose should follow a direct and clean path from the supply source to the Webasto, fastened securely to dampen any vibrations from engine or road movement. The system's reputation for steadfast operation in harsh environments often draws comparisons to other premium brands like Espar. An uncontaminated and smooth fuel supply is the key to consistent heat output, night after cold night.
How to mount the fuel pump near the fuel tank
Mounting the fuel pump near the tank ensures efficient fuel delivery and prevents pressure loss in the line. Keep it positioned below the fuel level for smoother flow and fewer air pockets.
Mounting steps:
- Choose a flat metal surface near the tank.
- Secure with rubber mounts to reduce vibration.
- Keep distance from exhaust or hot areas.
- Align pump direction with fuel flow arrow.
- Test the webasto gasoline heater for consistent startup.
Step-by-step guide to run the fuel line to the Webasto heater
The task of running the fuel line may seem complex, but it is quite manageable with a methodical approach. The primary goal is to ensure a gentle, continuous route free of sharp kinks.
Steps:
- Accurately measure and trim the hose to the required distance.
- Guide it along a path that avoids hot exhaust components and areas with movement.
- Fasten it firmly using clamps spaced at regular intervals.
- Attach the line securely to the fuel inlet on the Webasto gasoline heater.
- Purge any air from the line before initiating the heater's first start-up.
Preventing leaks and ensuring correct diesel flow
Preventing leaks starts with clean cuts and tight fittings. Even a small gap can interrupt flow or let air enter the system, reducing heater performance.
Tips for proper flow:
- Always double-clamp fuel hose connections.
- Avoid mixing components from propane heater kits.
- Inspect fittings after running the heater once.
- Replace any line showing surface cracks.
Setting Up the Exhaust and Air Intake
Proper exhaust and air intake installation keeps your Webasto AirTop 2000 running efficiently and safely. Mount the exhaust pipe away from the van floor and direct the hot exhaust to the outside to prevent fumes from entering the cabin. The air intake should face away from dust or road spray for best airflow. Safe breathing means steady heating power, and that’s something every Webasto heater owner values.
Positioning the exhaust safely away from the passenger seat area
A safe exhaust setup protects both passengers and equipment. The hot pipe should always point downward and away from the van’s underside to prevent heat buildup.
Positioning advice:
- Keep at least 20 inches from the seat base.
- Direct exhaust toward the road surface.
- Use a heat shield if close to the floor.
- Avoid routing near the propane heater or fuel lines.
- Verify no fumes re-enter through vents.
Proper routing of intake and exhaust pipes for clean combustion
A consistent and clean air supply is fundamental for the heater to operate efficiently. Correctly routing the air pipes prevents condensation and exhaust backpressure, which can impair the combustion process.
Routing guidelines:
- Maintain separation between the fresh air intake and exhaust lines.
- Employ durable, heat-resistant materials for the exhaust section.
- Ensure the piping does not have dips where water can pool.
- Face the air inlet away from sources of moisture or debris.
- Verify that your Webasto gasoline heater has an unrestricted flow of air.
Common mistakes with exhaust setup in a diesel heater
Small installation errors can cause big headaches with exhaust flow. Most issues come from poor alignment, bad sealing, or incorrect pipe angles.
Mistakes to avoid:
- Using flexible hose instead of rigid steel.
- Pointing the exhaust toward the van body.
- Forgetting to insulate near heat-sensitive parts.
- Mixing propane heater exhaust parts with diesel kits.
- Ignoring carbon buildup over long use.
Wiring and Power Connection for the Webasto Heater
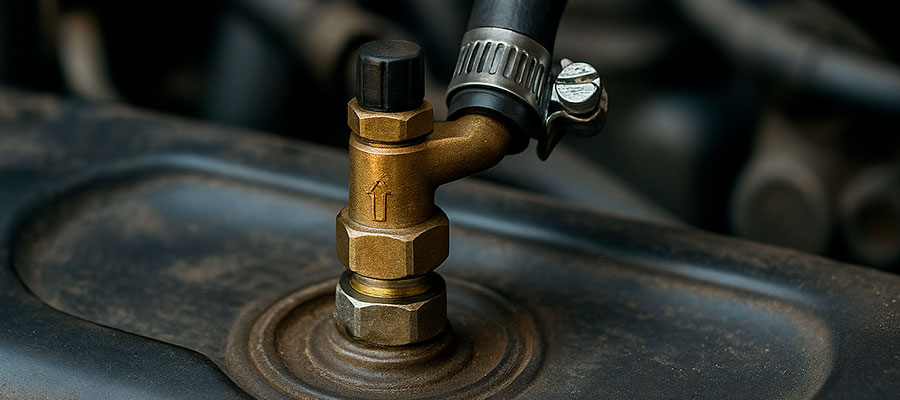
When connecting the electrical system for the Webasto unit, adhere precisely to the supplied schematic for the thermal sensor, user controller, and main power cables. Employ solid, corrosion-resistant connectors and route the wiring away from areas with heat, movement, or fluids. The 12-volt electrical setup is straightforward once the circuit layout is clear. A robust electrical connection is what activates your heater's potential, supplying steady electricity to combat the cold.
Connecting the Webasto heater to vehicle power
Powering your Webasto system means finding a reliable 12V source with proper grounding. Make sure all terminals are tight and free of corrosion.
Power connection steps:
- Connect positive lead directly to the battery post.
- Ground the negative wire on clean metal.
- Route away from sharp edges or heat.
- Fuse the line close to the power source.
- Test with a multimeter before running the heater.
Testing heater wiring before first startup
Before firing up your system, check each wire for continuity and polarity. This small step prevents short circuits and startup errors later.
Testing process:
- Inspect all connectors for loose pins.
- Use a tester on each power lead.
- Verify the webasto gasoline heater controller responds.
- Secure cables before reattaching panels.
- Wait a minute before turning on ignition.
Troubleshooting wiring issues in a diesel heater system
| Wiring Issue | Possible Cause | Real-World Symptoms | Recommended Fix |
|---|---|---|---|
| No Power to Control Unit | Blown fuse or loose terminal in the wiring harness. | Display won’t light up; no response when turning on. | Replace fuse and tighten terminals; recheck battery ground. |
| Heater Turns Off Randomly | Voltage drop from weak connection or undersized wire. | Heater shuts down mid-cycle or resets during startup. | Upgrade wiring gauge; clean and secure all connections. |
| Fan Runs but No Heat | Faulty signal wire or damaged relay to fuel pump. | Blower starts, but no ignition or fuel flow. | Inspect relay and continuity; replace damaged wiring segment. |
| Intermittent Power Loss | Corrosion at connector pins or water intrusion. | Heater works sporadically, especially in damp weather. | Clean contacts, apply dielectric grease, and reseal connectors. |
| Display Error Code Appears | Fault in communication cable between control panel and heater. | Error light flashes or screen shows code sequence. | Check continuity in data wire; replace cable if broken. |
| Fuse Keeps Blowing | Short circuit from exposed wire or damaged insulation. | Heater fails immediately after turning on. | Trace for pinched or bare wire; repair insulation and replace fuse. |
| Slow Startup Response | Weak power source or poor ground connection. | Delay before fan or glow plug activates. | Test battery voltage; re-ground the unit directly to chassis. |
Final Checks and Testing the Heater
Before finishing your full build, double-check every connection—from the fuel system to the exhaust and wiring harness. Prime the fuel line to remove air bubbles and test for leaks once the system is sealed. Then power up the Webasto AirTop 2000 STC and let it run through a complete heating cycle to ensure the altitude adjustment and sensors work properly. Testing confirms everything works in harmony, giving you peace of mind before hitting the road.
Running the Webasto diesel heater for the first time
When you finally start your Webasto diesel heater, let it complete a full cycle undisturbed. The system needs time to clear air and stabilize the burn. The webasto gasoline heater or diesel version may take several minutes before producing steady heat. Watch for any leaks, unusual smells, or exhaust noises as it runs.
Once stable, adjust fan speed and temperature to your liking. Compared to a propane heater, diesel models generally offer smoother startup behavior in cold conditions. The first run sets the tone, ensuring everything works perfectly for your future travels.
Verifying fuel pump performance and fuel line stability
Once your heater runs, it’s time to make sure the fuel delivery is smooth and even. A steady pump rhythm means your setup is working perfectly.
Verification steps:
- Listen for consistent clicking from the pump.
- Check for fuel pulsing through the clear line.
- Inspect connections for small leaks.
- Tighten clamps if vibration is detected.
- Ensure the webasto gasoline heater maintains steady heat.
Ensuring exhaust system safety and heater efficiency
The final check involves inspecting exhaust safety and heat performance. A properly routed exhaust keeps your van quiet, clean, and warm through every season. The webasto gasoline heater should emit steady, odor-free exhaust once tuned correctly. Diesel systems are slightly louder but last longer when maintained. Make sure the outlet remains clear of road debris and snow buildup. Over time, a small cleaning brush keeps carbon buildup from forming in the pipe. Safe exhaust means consistent heater comfort, giving you confidence for every trip ahead.

