Swapping out a Johnson bilge pump cartridge is a routine yet vital part of keeping marine equipment in dependable condition. With time, dirt and residues may lower the pump’s capacity and reduce efficiency. Whether you’re fitting a 12V automatic cartridge or a powerful 1000 GPH unit, correct installation guarantees steady performance.
The most reliable method for removal is a controlled two-handed twist combined with a firm pull. Before inserting the replacement cartridge, it is best to clear the impeller of any buildup to restore strong water flow. Many owners choose to upgrade by installing cartridges rated at 750 GPH, 800 GPH, or even 1000 GPH, depending on their pumping demands.
A new cartridge can serve as a direct swap for the old one or be used to replace an entire Aqua Series setup. Carefully detaching the shaft and seating the Johnson cartridge in the right position provides consistent operation and helps avoid expensive breakdowns over time.

Introduction to Johnson Bilge Pumps
Johnson bilge pumps keep vessels safe by quickly clearing water from the bilge. Models with different gph bilge ratings fit boats of all sizes, and options like the Aqua Void auto bilge pump offer reliable automatic use. The consistent output of your bilge pump is its main advantage, but many owners choose to upgrade the output with a higher-capacity new pump. A replacement cartridge can be used with the current system, or a pump or to simply replace worn parts. Some boaters decide to simply replace an Aqua Series model or even replace an Aqua Series bilgecompletely for better reliability.
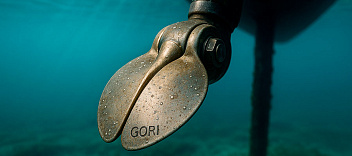
Overview of Johnson Pump Aqua Void Auto Bilge
The Johnson Pump Aqua Void Auto Bilge is built to remove water effectively, helping a vessel remain dry and secure. It features a compact motor cartridge that can be swapped out easily once performance begins to decline. Thanks to its accessible design, servicing the unit takes little time and effort.
This model is valued for blending dependable operation with straightforward upkeep. Many owners select it because it offers a good mix of pumping capacity and convenient construction. Its automatic mode minimizes the need for supervision, and with regular maintenance, it can deliver reliable service for years.
Types of Bilge Pumps: 500 GPH to 1250 GPH
| Pump Capacity (GPH) | Suitable For | Key Advantage | Typical Use Case |
|---|---|---|---|
| 500 GPH | Small dinghies & kayaks | Lightweight and energy-efficient | Occasional water removal in calm conditions |
| 750 GPH | Fishing skiffs & day boats | Balance between size and flow rate | Handling moderate spray or rainwater |
| 800 GPH | Compact cruisers | Steady output without heavy power draw | Routine bilge clearing for short trips |
| 1000 GPH | Mid-sized recreational craft | Reliable performance during longer outings | Managing water in rougher seas |
| 1250 GPH | Larger vessels & offshore boats | High-volume pumping for safety | Continuous protection in demanding marine environments |
Importance of Regular Bilge Pump Maintenance
Maintaining a bilge pump properly requires frequent checks and quick attention to minor problems before they grow. Exposure to saltwater, grime, and particles can lower efficiency if ignored. Routine care helps the unit respond immediately when faced with sudden water intrusion. Reliability in emergencies comes from consistent maintenance. Keeping electrical connections clean and inspecting the cartridge motor helps avoid performance loss. Even brief checkups can add years to the system’s service life. A small amount of preventive effort today can prevent expensive repairs in the future.
Understanding the Bilge Pump Cartridge
The cartridge motor serves as the main element that drives water removal in Johnson bilge systems. Over time, wear or debris can lower its efficiency and reduce performance. Installing a fresh cartridge restores full pumping capacity and keeps the system running smoothly.
Early signs often show when the Johnson pump cartridge bilge requires service. These cartridges are designed for quick replacement, whether used in a Void Auto Bilge Pump Replacement setup or a standard SPX model. Knowing how the shaft, impeller, and motor cartridge interact helps avoid damage during maintenance. Regular cleaning and inspection extend the working life of both the cartridge and the pump.
Role of the Cartridge Motor in Automatic Pumps
The cartridge motor is the driving force behind the pump, controlling how effectively water is cleared from the bilge. Without this component, an automatic setup cannot respond to rising water levels. Its design allows quick replacement so owners can restore performance with minimal effort. Often described as the core of an automatic bilge pump, the cartridge motor keeps the system responsive whenever water appears. Replacing it over time brings back both steady flow and reliable output. Understanding its role turns upkeep into simple care for the vessel rather than a complicated task.
Differences Between Pump Cartridge Types (500, 800, 1000, 1250 GPH)
| Pump Cartridge Type | Flow Rate (GPH) | Best Use Case | Design Notes | Advantage |
|---|---|---|---|---|
| 500 GPH | 500 gallons per hour | Small open boats or dinghies | Compact, easy to install, often lightweight | Handles light water removal with ease |
| 800 GPH | 800 gallons per hour | Small to mid-size fishing craft or tenders | Balanced output, fits tighter spaces | Provides steady pumping with moderate power |
| 1000 GPH | 1000 gallons per hour | Mid-size sailboats and family cruisers | Quick-swap cartridge motor and stronger build | Moves water faster during active conditions |
| 1250 GPH | 1250 gallons per hour | Larger yachts or offshore vessels | High-capacity design with durable materials | Offers dependable flow for heavier demands |
Components: Impeller, Motor, Float Switch, and Hose Connections
Every bilge pump relies on a few key parts working together. The impeller and motor form the heart of the system, while the float switch and hose ensure smooth operation.
Main components to check include:
- Impeller moves water efficiently
- Motor powers the pumping action
- Float switch activates the pump automatically
- Hose connections direct water safely out
Preparing for a Johnson Pump Cartridge Replacement
Before replacing the cartridge, the bilge should be cleared and the power supply disconnected to ensure safety. Gather all necessary tools and a suitable bilge pump replacement cartridge motor for your model. Preparation is critical to a smooth replacement and prevents accidental damage to the pump or boat. Remove any debris that may obstruct access to the cartridge motor. Check the existing motor cartridge for wear, corrosion, or buildup that may have reduced performance. Position the pump in a stable area to make the two-handed twist and pull operation easier. Planning the replacement reduces frustration and guarantees proper installation.
Tools and Replacement Cartridges Needed
Having the right tools on hand makes the replacement process faster. A proper replacement cartridge ensures the pump returns to full performance quickly.
Essential tools and items are:
- Screwdriver set
- Pliers
- Replacement cartridge motor
- Clean cloths
- Waterproof grease
Ensuring the Pump Is Disconnected and Safe to Work On
Before touching any bilge pump, disconnecting power should be the first step. Water and electricity together can create hazards if safety is overlooked. Securing the area also prevents accidental activation during service. Disconnecting the pump ensures peace of mind while working on it. Once power is cut, cleaning, replacing, or inspecting becomes much safer. This small step allows full focus on the task rather than worrying about risks. Treating safety as part of routine maintenance builds good habits for every repair.
Inspecting the Bilge Pump and Float Switch Before Replacement
Before changing parts, it’s best to check how the system is running. A quick inspection can reveal wear or damage that affects performance.
Key inspection points include:
- Look for cracks in the housing
- Test the float switch manually
- Check wires for corrosion
- Confirm hose is free of blockages
Step-by-Step Johnson Bilge Pump Cartridge Replacement
Start by disconnecting the power and removing any cover over the pump housing. Carefully twist and pull the old motor cartridge out, making sure to clear debris from the impeller area. Replacing the cartridge correctly restores the full output of a pump and prevents leaks or jams. Insert the new bilge pump replacement cartridge motor, ensuring it seats properly on the shaft. Reattach any housing or covers and secure connections according to the manufacturer’s instructions. Double-check that the cartridge moves freely and that the pump is ready for operation. Following each step carefully avoids damage and ensures long-term reliability.
Removing the Old Cartridge Bilge Pump Motor
Taking out the old cartridge motor requires a steady approach and attention to detail. Most models use a simple twist-and-pull system to release the motor. This method allows quick service without removing the entire pump. Replacing the old cartridge restores the pump’s ability to clear water effectively. While removing it, checking for debris around the impeller helps prepare for the new part. The process is straightforward but should never be rushed. A careful hand ensures the pump body remains intact for long use.

Installing the Johnson Pump Cartridge Replacement Motor
Replacing the motor cartridge is a straightforward task with a few steps. Following the sequence carefully helps the pump work reliably again.
Steps for installation are:
- Disconnect power supply
- Remove old cartridge motor
- Clean inside pump housing
- Insert new Johnson pump cartridge
- Secure with twist-lock system
Once the cartridge is in place, the pump needs to be sealed and connected. Ensuring tight hose connections prevents leaks during use.
Reassembly process includes:
- Align pump housing
- Tighten screws evenly
- Reattach discharge hose
- Check clamps for secure fit
- Restore electrical connection
Testing the Bilge Pump After Cartridge Replacement
Once the new cartridge is installed, reconnect the power and add a small amount of water to the bilge. Turn on the Aqua Void auto bilge pump or equivalent model to verify flow. Testing confirms that the johnson pump cartridge bilge is functioning at full capacity. Observe the output of a pump to ensure there are no unusual noises, vibrations, or leaks. Check that the pump automatically shuts off when the bilge is clear if using an auto model. Make minor adjustments if necessary to the motor cartridge seating or alignment. Proper testing ensures that the replacement was successful and the pump is ready for real conditions.
Checking Automatic Function with Float Switch or Combo Switch
After reassembly, the automatic feature should be tested. A reliable float or combo switch ensures the pump activates without manual input.
Testing steps are:
- Lift float to trigger pump
- Observe water discharge
- Test combo switch manually
- Verify wiring continuity
- Confirm shut-off once water lowers
Ensuring Proper Flow Rate (GPH) and Pump Operation
Each pump is rated by GPH, showing how much water it can move per hour. Matching this rating with your boat’s size and conditions ensures the right balance of safety and efficiency. If the pump struggles, it may be due to a worn cartridge motor or debris buildup. The flow rate is the best indicator of whether the pump is doing its job well. Testing after maintenance confirms the system is reliable. Choosing a model with the correct capacity reduces stress on the pump. This approach ensures smooth sailing without worrying about bilge water buildup.
Troubleshooting Common Issues with Pump Cartridge or Impeller
Sometimes, issues arise even after replacement. Most problems can be traced back to the cartridge or impeller condition.
Common troubleshooting actions include:
- Check for debris blocking impeller
- Ensure cartridge motor is seated
- Inspect for loose connections
- Test for weak water flow
- Replace faulty components
Maintenance Tips for Long-Lasting Johnson Bilge Pumps
Regular maintenance keeps the pump cartridge motor performing efficiently and prevents unexpected failures. Clean debris from the impeller and inspect the shaft for wear. Routine care extends the life of both the johnson pump cartridge bilge and the overall pump system. Avoid running the pump dry for extended periods and check for corrosion on connections. Replace worn motor cartridges promptly with SPX or compatible models. Keeping the pump housing clean and secure reduces strain on the motor cartridge. Consistent attention ensures that your bilge pump remains reliable and ready for any emergency.
Regular Cleaning and Inspection of the Cartridge and Motor
Salt, oil, and dirt naturally collect in the bilge and can affect the cartridge and motor. Routine cleaning removes these elements and prevents damage. Inspecting the shaft, impeller, and seals ensures continued performance. A clean and well-checked cartridge motor lasts far longer than a neglected one. Even quick rinses with fresh water extend the pump’s life. Regular attention means fewer surprises when you need the pump most. This habit keeps both boat and crew confident in any conditions.
Preventing Clogs in the Hose and Aerator
Keeping hoses clear is essential for steady flow. Regular checks stop clogs from disrupting the entire system.
Preventive measures are:
- Flush hose with clean water
- Remove buildup in aerator
- Inspect hose bends for kinks
- Replace worn sections
- Keep debris screens in place
Scheduling Routine Bilge Pump Replacement to Avoid Failures
A planned schedule keeps the system reliable when needed most. Replacing cartridges before they fail prevents emergencies on the water.
Routine replacement practices include:
- Review manufacturer’s service intervals
- Log replacement dates
- Inspect every season
- Keep spare cartridges onboard
- Replace when wear is noticeable