Out on the water, reliable communication is more than convenience — it’s safety. Many boaters don’t realize how much performance depends on proper setup of their marine radio system. This guide explains how to mount and connect a Shakespeare unit correctly, with tips on signal clarity, placement, and weatherproofing that help you stay connected when it matters most.
Introduction to Shakespeare VHF Antennas
Out on the water, clear maritime communication matters more than ever. Poor signal or frequent dropouts can turn a peaceful cruise into frustration. A reliable radio mast setup can make all the difference. In this guide, you’ll see how to mount and connect a Shakespeare device properly. I’ll share details on wire routing, fastening tips, and connector care. You’ll avoid mistakes I’ve seen on boat repair forums. With good technique, your gear will perform dependably. Let’s begin this journey toward better onboard connectivity.
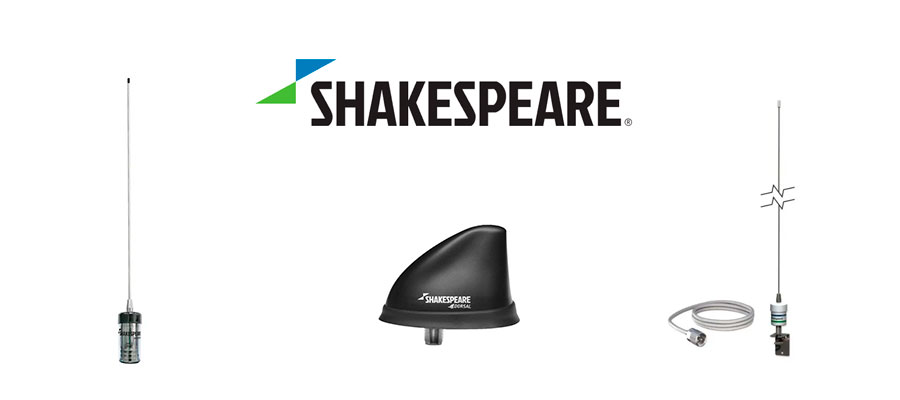
What is a Shakespeare VHF antenna
These devices are designed for long-range marine communication. They use durable materials for harsh conditions. Pre-assembled units simplify the setup process. They include a base with secure attachment points.
The central element is tuned to maximize horizontal reach.
Most models feature corrosion-resistant components. Many include pre-fitted lines for easier routing. Owners value longevity and reliability in challenging environments. Variations exist for different vessel sizes and communication needs.
Benefits of installing a Shakespeare antenna on your boat
You’ll enjoy better signal stability and lower dropouts. It offers solid long-range communication without excess tweaking. A quality device enhances safety at sea by keeping you reachable. The sturdy build resists harsh marine wear.
Key benefits:
- Consistent coverage in coastal zones
- Better resistance to corrosion and vibration
- Pre-terminated coax or screw-on adapter options
- Readily available spare parts on marine forums
- Compatibility with SWR meters and common wire types
Overview of VHF antenna types
| Type | Description | Best For | Pros | Notes |
|---|---|---|---|---|
| Single-section whip | A straight fiberglass or stainless rod that radiates evenly in all directions. | Small craft and short-range trips. | Light weight, quick setup, minimal tuning needed. | Ideal when deck space is limited. |
| Collinear multi-section | Several internal elements stacked to boost horizontal signal strength. | Mid-size and offshore vessels needing extra range. | Stronger coverage, better clarity during transmission. | Needs a firm antenna mount for stability. |
| Compact stub style | A short, sealed unit with reduced gain but excellent durability. | Cabin cruisers or areas with height restrictions. | Weather-resistant, low profile, and easy to hide. | Slightly less reach than taller versions. |
| Fold-down or ratchet-base design | Mounted on a pivot for quick lowering under bridges or during storage. | Boats often trailered or docked in covered slips. | Adjustable angle, convenient for DIY owners. | Keep bolt and joints clean to avoid corrosion. |
| Integrated rail model | Fixed to handrails using a stainless bracket and coax connection. | Sailboats or open decks without mast space. | Saves room, simple coaxial cable routing. | Check for loose fittings after long trips. |
Preparing for Installation
Before you begin, gather all parts and boat paperwork. Ensure your new device is free from damage. Clean the mounting area thoroughly. Remove any previous wiring or hardware. Check that your mast or rail is sturdy. Plan your cable path before proceeding. Mark positions lightly with pencil. Be ready to adapt if surprises appear.
Choosing the right location to mount the antenna
Evaluate mast height and obstruction clearance first. Look for stray metal near your installation location. Ensure the mount sees open sky in all directions. Keep distance from power cables and engines.
The radiation element must remain clear of nearby objects.
Avoid corners or places with turbulence. Think about access for future repairs. Also check that mounting bolt clear interior space. Balance height against stability and ease.
Necessary tools and materials for installation
You’ll need proper hand tools and quality wire and connectors. Use fresh electrical supplies for any splice. Have sealing compound and tape ready. Keep spare screws and washers on hand.
Essential items include:
- Screwdriver and socket ratchet set
- Coaxial feed line or cable
- Mounting bracket or ratchet mount
- Sealing gel or marine epoxy
- Heat-shrink tubing and solder kit
Safety tips for boat antenna installation
Always wear non-slip shoes on deck. Secure yourself with harness near edges. Turn off electrical power before touching wires. Watch for sharp edges under fittings.
Safety reminders:
- Use gloves when handling metal parts
- Avoid working alone at sea
- Keep tools from rolling off the boat
- Be cautious near railings or overhangs
- Double-check your footing before torqueing screws
Mounting the Shakespeare VHF Antenna
Begin by confirming your chosen mounting point is solid. Use proper fasteners rated for outdoor marine use. Clean surfaces to remove salt and grime. Apply sealant where metal meets fiberglass. Hold the base firmly while tightening hardware. Avoid overtightening and damaging threads. Check alignment so the mast is straight. Finish by inspecting all connexions for security.
How to select the proper mount for your antenna
Choose a mounting base that fits your boat’s structure. Check that the thread matches your marine vhf device. Go for corrosion-resistant equipment and solid hardware. Make sure it stays stable under vibration and motion. A strong, well-fitted mount ensures lasting performance.
Recommended options:
- Ratchet base for quick angle changes
- Rail clamp for sailboat handrails
- Deck bracket for cabin tops
- Side bracket for narrow masts
Step-by-step mounting process
Follow these concise steps to secure the device properly:
- Position mount in your pre-marked spot
- Tighten fasteners just until snug
- Apply sealant under all boundary surfaces
- Insert the radiating section into the base
- Final-torque fasteners per spec sheet
Securing the antenna for optimal performance
Check that all fasteners are firmly seated. Don’t let the radial element tilt under wind load. Use lock nuts or thread locking gel.
Proper torque ensures stable alignment even at sea.
Finally, inspect after initial voyage and retighten if needed.
Connecting the Antenna Cable
Check that your new antenna is properly aligned. Inspect all equipment for dirt or corrosion. Confirm that adapter match in type and size. Dry all surfaces before making connections. Follow every step in the instruction sheet. Watch a video guide if unsure about procedure. Avoid twisting or forcing any metal parts. Gently test connections and secure the base afterward.
Choosing the correct cable for your installation
Select the proper vhf marine line for your setup. A quality new cable ensures better clarity and durability. Ask for advice from experts or trusted forums. Avoid reusing parts from an old antenna.
Recommended options:
- Low-loss line for longer distance performance
- Flexible shielded cable for tight or curved paths
- Pre-terminated sets from shakespeare marine suppliers
- Weatherproof connectors for open-deck exposure

Routing the cable safely on your boat
Plan the path before drilling any holes. Keep routing away from electrical sources or heat. Secure the line with clips or adhesive mounts. Protect edges with tubing where contact occurs. Leave slack near moving components for safety.
Routing tips:
- Avoid sharp bends in the new cable
- Maintain distance from power wiring
- Label both ends clearly for future checks
- Seal joints with protective compound
- Check that nothing rubs or chafes
Properly connecting cable to the VHF radio
Confirm your radio’s connector type before starting. Clean both ends thoroughly to remove dust. Align connectors carefully and start threading by hand.
A precise connection ensures consistent performance at sea.
Tighten just enough to secure without stripping metal. Avoid over-torquing or forcing fittings. Test reception using a coast guard or marina call. Inspect connections after initial voyages. Secure excess new cable to prevent vibration damage.
Testing the Installed Antenna
Power on your marine antenna after all setup steps. Check that the device is receiving energy. Observe for any unusual noise or interference. Walk around the boat while monitoring performance. Verify that all equipment is secure and stable. Consult the instruction sheet if readings appear off. Record results to compare with later tests. Repeat the process to confirm consistent output.
Checking antenna connection and performance
Inspect every joint and attachment carefully. Make sure all marine antenna parts are aligned. Look for bent or stressed components.
Proper alignment ensures reliable operation under all conditions.
Test with different channels for best feedback. Check for any unexpected fluctuations during usage. Note any weak spots or gaps in range. Repeat the test in calm and moving conditions. Keep a log to track performance over time.
Troubleshooting common installation issues
Identify areas with poor performance first. Check marine antenna orientation and level. Inspect base and mounting points. Clean debris or corrosion if found.
Helpful troubleshooting tips:
- Tighten loose equipment gently
- Replace worn parts from trusted suppliers
- Ensure no obstruction blocks the path
- Review the instruction manual for overlooked steps
- Test repeatedly to confirm problem resolution
Adjusting the antenna for best reception
Loosen fasteners slightly to change angle. Adjust height or tilt for clear line-of-sight. Small modifications can significantly improve reception quality. Avoid overextending or stressing any part. Once optimal, tighten hardware and secure position.
Adjustment recommendations:
- Check multiple angles for strongest reception
- Observe real-world usage during boat movement
- Re-test with different channels or frequencies
- Use markers to record optimal placement
- Inspect periodically for shifting after voyages
Maintenance and Care for Shakespeare VHF Antennas
Regular attention keeps your marine device performing reliably. Inspect all hardware for looseness or wear. Wash the unit with fresh water after exposure. Remove any debris or salt buildup promptly. Avoid harsh chemicals that might damage finishes. Lubricate moving parts lightly if recommended. Store removable components safely during off-season. Routine care extends life and prevents unexpected failures.
Regular inspection of the antenna and mount
Check the supporting base for cracks or corrosion. Inspect bolts, brackets, and surrounding area carefully. Make sure the device remains upright and level.
Consistent inspection ensures early detection of potential issues.
Look for bends or stress marks on the mast. Confirm that all fasteners remain tight but not over-torqued. Check for water ingress near junction points. Document any anomalies for reference. Repeat inspections at least every few months.
Protecting your antenna from corrosion
Salt and moisture can reduce performance quickly. Rinse components with fresh water after trips. Dry thoroughly before storing. Apply protective lubricant to exposed metal areas. Check for oxidation on screws or fittings. Use marine-grade protective coatings if recommended. Store removable units in a dry place.
Best practices include:
- Apply corrosion inhibitor periodically
- Cover the unit during storms
- Replace worn brackets or fasteners
- Avoid prolonged exposure to salt spray
- Inspect after rough weather trips
When to replace your VHF antenna
Replace your marine device if cracks appear. Change if performance noticeably drops. Bent or broken elements require immediate replacement. Follow manufacturer guidance for lifespan estimates. Always choose verified replacement parts from trusted sources.