

Of all the sounds on a sailboat—the hum of the wind in the rigging, the gentle tap of halyards against the mast—the most unwelcome is the persistent glug of water sloshing in the bilge. Whether it’s a small leak, spray from a rough passage, or just accumulated condensation, finding bilge water where it shouldn't be is a universal experience for anyone who spends time on the water. While electric pumps are fantastic, there's a profound sense of security in having a robust, manual backup that doesn't rely on a battery.
That’s where the legendary reliability of a manual pump like the Whale Gusher comes in. Installing one isn't just a task; it's an act of seamanship, a direct line of defense between you and the sea. Your direct link to safety.Perhaps you’re fitting a new Whale pump to replace an old, tired unit, or maybe you’re installing a high-volume Whale Gusher Urchin manual pump in your cockpit for the first time.
The process is a satisfying project that connects you intimately with the inner workings of your vessel. From choosing the right spot on the deck or in a locker to understanding the simple magic of the diaphragm and valve, each step brings you closer to true self-reliance. And if you’ve salvaged an old pump, the ability to completely rebuild it with a service kit is a point of pride. This guide will walk you through the journey of getting a manual bilge pump ready for action, ensuring you can handle whatever the marine environment sends your way.
Choosing the Right Location for Installation
Think of your feet during a stressful moment; you need a solid, comfortable stance to put your weight into the pump handle. Look for a spot in the cockpit or on the deck where you can brace yourself without stumbling, close to the source of the bilge water but clear of other gear. Ensure the new pump's intake hose can run a fairly straight path down into the lowest part of the hull for strong suction. A solid stance saves energy.
Factors to Consider for Optimal Placement
| Consideration | The "Why" Behind It |
|---|---|
| The Operator's Stance | Can you plant your feet and use your body weight effectively, or are you stuck in an awkward, unbalanced position? A confident posture translates directly to pumping power. |
| Heeled-Over Accessibility | Imagine the deck at a 30-degree angle. Is the pump handle still within reach and operable, or is it now buried under a pile of gear or a hard-to-reach spot? |
| Run of the Intake Hose | The path from the bilge strainer to the pump should be as direct and steep as possible. Avoid serpentine routes that can trap air and cripple the pump's suction. |
| Defending Against Deck Flow | Mount the base where casual foot traffic and boarding waves won't kick it. You want it ready for action, not being tripped over or submerged by a rogue sheet of water. |
Accessibility and Ergonomic Considerations
Finding the perfect spot for your new pump is a conversation between you and your sailboat. Get down in the cockpit and actually mimic the pumping motion; you need a stable stance where you can put your back into it without contorting your body. Think about how a heeled-over deck changes your center of gravity and whether you can still operate the handle effectively.
The goal is to make this high-volume pump feel like a natural extension of your own strength, not a piece of equipment you have to fight against. A location that feels right during a calm day in the marina is the one that will serve you best when things get lively. Your stance is your power.
Comparing Manual and Electric Bilge Pump Locations
Their roles are different, so their ideal locations often are too. An electric pump is an automated sentry, while a manual pump is your personal, brawny response to a crisis.
- Electric pumps are often buried in the bilge for maximum water collection.
- Manual pumps demand a dedicated, ergonomic operator's station.
- Co-locating them requires ensuring one doesn't impede access to the other.
Mounting the Pump Base Securely
That satisfying, rock-solid feel when you lean into the handle comes from a perfectly secured base. Carefully mark your mounting holes using the pump itself as a template, double-checking for any hidden wires or tanks below the deck. When you drill the thru-deck holes, a dab of sealant prevents any future leaks from compromising the core. Tighten the bolts with conviction, knowing this foundation will take all your effort. Drill once, seal perfectly.
Preparing the Mounting Surface
This step is all about creating a flawless foundation for your new pump. A flat, solid surface ensures the base doesn't rock or develop stress cracks over years of use.
- Clean the area thoroughly of any salt, wax, or old adhesive.
- Check for core rot by tapping the area; a dull thud can signal trouble.
- Use a level to mark the position, accounting for any inherent deck curvature.
Drilling and Sealing Screw Holes
This is the moment of commitment, so precision is everything. Carefully drill your pilot holes for the thru-deck bolts, using a bit size that matches the fastener for a snug fit. Before you even place the pump base, generously fill each hole with a marine-grade sealant; this creates a protective gasket that prevents water from wicking into the deck core.
Run the bolts through and tighten them down just enough to see a consistent bead of sealant squeeze out evenly around the base—this is your visual confirmation of a good seal. Wipe away the excess immediately for a clean, professional look. A well-sealed hole is a gift to the future owner of your sailboat, preventing hidden rot. Seal now, save the core.
Ensuring a Solid and Permanent Installation
A wobbly pump is a useless pump when you need it most. You should be able to put your full weight on the handle without the base shifting a millimeter.
- Use stainless steel locknuts or Nyloc nuts to prevent vibration from loosening them.
- Tighten the bolts in a criss-cross pattern to ensure even pressure.
- After a few days of use, re-check the tightness of all fasteners.
Connecting the Inlet and Outlet Systems
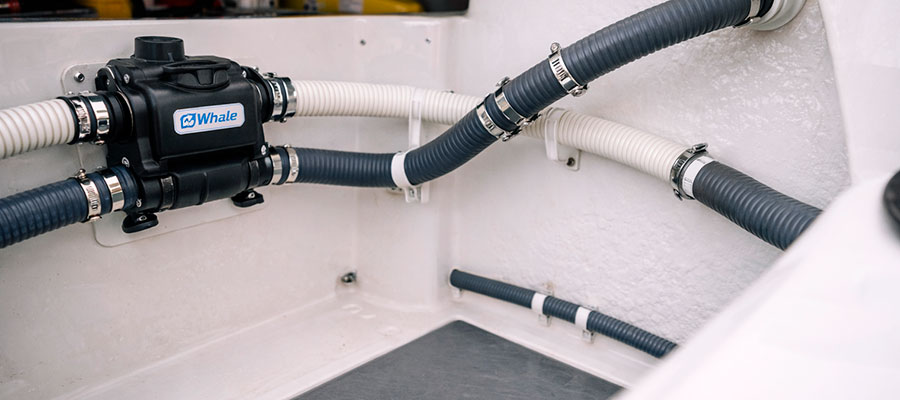
This is the plumbing that gives your manual whale bilge pump its purpose. For the inlet, use a sturdy hose from the hull strainer to the pump's intake, ensuring every connection is tight to maintain that critical suction and avoid pulling in air. The outlet hose should lead well overboard, away from the sailboat's topsides, and a rubber flap valve can prevent back-siphoning. A tidy hose run prevents kinks. Secure hoses move water.
Installing the Strainer and Inlet Hose
The strainer is the guardian of your pump, a small but vital component. Its job is to keep debris from entering and jamming the delicate diaphragm, ensuring a clear path for water.
- Choose a strainer with a fine enough mesh to block common bilge sediments.
- Ensure the strainer sits low in the bilge, but is easy to access for cleaning.
- Use smooth-bore, reinforced hose to prevent collapse under strong suction.
Routing the Discharge Hose to Overboard
Your goal is to create a smooth, efficient escape route for the high volume of water you're about to displace. Plan the hose run to rise steadily from the pump to the thru-hull fitting, avoiding any sags or low spots that could trap water and freeze in cold weather or create back pressure. Keep the path as straight as possible, but if bends are necessary, make them gentle and wide to prevent kinks that would choke the flow.
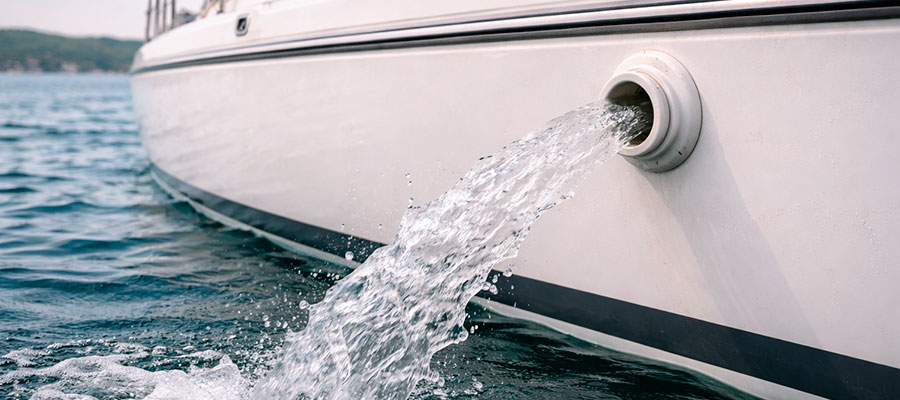
Always terminate the hose at a thru-hull fitting positioned well above the waterline, even when the sailboat is heeled over, to prevent the sea from siphoning back in. A clean, forceful stream shooting out from the side of the hull is the satisfying proof of a job well done. Give water an easy exit.
Creating Watertight Hose Connections
A single drip at a connection undermines all your effort. Double-clamping every joint is a simple practice that provides essential security and peace of mind.
- Slide both clamps onto the hose before connecting it to the fitting.
- Use high-quality, stainless steel clamps and tighten them securely.
- Position the screw mechanisms of the two clamps on opposite sides of the hose.
Installing the Pump Handle and Mechanism
This is the part you'll have a physical relationship with, so its installation should feel smooth. Follow the diagram for your specific model, whether it's a Gusher 10 or another, ensuring any pivot pins are secure but move freely. Give the handle a few test swings to confirm it has full, unobstructed range of motion without banging into winches or rails. You'll feel the satisfying resistance of the diaphragm working. Your direct power connection.
Assembling the Pump Handle Components
| Component | Its Role in the Motion |
|---|---|
| The Pivot Spindle | This is the heart of the lever, the fixed point around which all your effort rotates. A smooth, well-greased spindle ensures your energy goes into moving water, not fighting friction. |
| Drive Pin & Bushings | These unsung heroes connect the swinging motion of the handle to the linear, in-and-out stroke of the piston rod. They bear the brunt of the force, so their secure fit is non-negotiable. |
| Handle Grip Texture | Often overlooked, the grip is your personal interface with the system. A positive, non-slip texture ensures your hands won't slip during the wet, frantic moments when it matters most. |
| Travel Limit Stops | These internal features prevent you from over-enthusiastically pulling the handle beyond its designed range, protecting the internal diaphragm from being over-extended and torn. |
Adjusting for Smooth Operation
The handle should move with a fluid, consistent rhythm, not a jerky, grinding effort. Listen and feel for any binding or hesitation that points to internal resistance or misalignment.
- Check that the pump base is perfectly flat and not being stressed by the hoses.
- Ensure the handle mechanism is clean and lubricated according to the manual.
- Verify that hoses are not pulling or twisting the pump body out of alignment.
Testing the Mechanical Action
This is the moment of truth, where your installation comes to life. Pour water into the bilge, grab the handle, and put the entire system through its paces, feeling for the satisfying resistance of the diaphragm moving water. You are not just testing for function; you are building muscle memory and confidence in this vital piece of equipment. Watch for a strong, unwavering stream from the outlet, which confirms there are no air leaks crippling your suction. A hesitant, sputtering flow means it's time to retrace your steps and check every connection for tightness. Prove the system with action.
Integrating with Existing Bilge Systems
Your manual pump shouldn't replace your electric water pump; it's its trusted backup. The ideal setup allows both systems to draw from a common strainer in the bilge, giving you multiple layers of defense. Just make sure the check valves are oriented correctly to prevent them from working against each other. This creates a resilient team watching over your bilge. Create a layered defense system.
Connecting to the Same Inlet as Electric Pumps
This integration creates a powerful team that draws from the most effective spot in the bilge. You can use a T-fitting to connect your manual pump's intake to the existing line from the electric pump's strainer.
- Install a seacock on the main thru-hull intake for safety and control.
- Ensure all connections are perfectly air-tight to maintain prime for both pumps.
- Consider a Y-valve to manually select which pump draws from the strainer.
Creating a Dual-Pump Backup System
This configuration offers superb redundancy, ensuring you always have a way to move water. If the electric pump fails, your manual pump is ready to take over immediately from the same strategic location.
- The manual pump serves as a powerful, battery-independent backup.
- Clearly label all valves and hoses for quick identification in an emergency.
- Test the switching sequence between pumps during routine maintenance.
Maintaining Separate Independent Systems
For some, true peace of mind comes only from complete and total separation of critical systems, leaving no single point of failure. This philosophy means your manual whale pump operates on its own entirely isolated circuit, with a dedicated strainer sitting in the bilge and its own private intake hose running to the pump.
You are essentially building two parallel, unrelated defense layers; a clog or failure in the electric pump's strainer or hose has absolutely no effect on your ability to manually move a high volume of water. While this approach demands more hardware and a more intricate installation, it provides the ultimate level of self-reliance for a sailboat facing any condition. Total independence brings total peace.
Maintenance and Operation Testing
The real test isn't in the manual; it's a bucket of water in the bilge. Pour it in and start pumping, feeling for a smooth, consistent stroke and watching for a strong stream overboard. Listen for any hissing of air leaks at the intake connections, which would weaken suction. This hands-on test is the only way to be truly confident your system is ready. Prove its worth with water.
Regular Inspection and Lubrication Needs
Treating your manual pump like a trusted crew member means giving it a little periodic attention to keep it in peak condition. During your regular sailboat checks, take a moment to visually inspect the pump for any cracks in the housing or signs of corrosion on the fasteners. Operate the handle through a few full strokes, feeling for any new grit or stiffness that wasn't there before, which is the pump's way of asking for help.
A drop of light marine grease on the pivot points once a season is all it takes to maintain that smooth, fluid motion you rely on. This isn't just maintenance; it's a conversation with a vital piece of your safety equipment, ensuring it never lets you down. A minute of care prevents failure.
Simulating Emergency Use Scenarios
You don't want the first true test of your pump to be during an actual leak. Regularly practicing its use builds the muscle memory and confidence needed for a real crisis.
- Once a month, have a crew member pour water into the bilge while you locate and operate the pump.
- Time how long it takes to evacuate a known volume, like a five-gallon bucket.
- Practice accessing and operating the pump from different positions in the cockpit.
Troubleshooting Common Operational Issues
Even a well-maintained system can have an off day, but most problems have simple fixes. A pump that moves air instead of water is telling you about a suction leak, while one that's suddenly stiff may have ingested debris.
- Loss of Prime: Check the strainer for debris and tighten all intake hose clamps.
- Stiff Handle: Inspect the discharge hose for a kink and check the internal mechanism for grit.
- Weak Flow: Ensure the diaphragm valves are clean and not being held open by a small piece of dirt.

