Getting your MultiPlus-II working right takes just a few steps. Grab your phone and open the Victron Connect app - that's where the magic happens. You'll need either the little VE.Bus dongle or an MK3 cable to connect.
First things first: tell it what kind of battery you're using. AGM? Lithium? The app's got options for all of them. Set your voltage (12V or 24V) and how much power it should store. Those tiny dip switches on the side matter more than you'd think. They handle the basic stuff so you don't have to. If you're running solar, you might want to tweak the charging settings. The app lets you turn off the charger when the sun's doing all the work.
Need to run appliances? Set your AC output limits so you don't trip anything. And hey - don't forget to update the firmware while you're at it. Victron's always improving things.

What is the Victron Multiplus and how does it work?
The Victron MultiPlus is a smart inverter/charger from Victron Energy. It switches between battery power and AC sources automatically. When connected to shore power, it charges batteries while powering loads. During outages, it instantly provides AC power from batteries.
The Multi or Quattromodels handle different power needs. It protects sensitive electronics with clean output. Built-in VE.Bus Smart Dongle enables remote monitoring. Users love its silent operation in homes. RVs benefit from its compact installation. It works with solar power systems seamlessly.
Understanding the Victron Multiplus inverter charger functionality
The Multiplus combines two vital systems. Inverter and charger work seamlessly together. It provides uninterrupted power when needed.
Key features:
- Pure sine wave output
- Automatic transfer switching
- PowerAssist technology
- Parallel operation capable
- Eco mode for efficiency
Differences between Multiplus, Multiplus II, and Quattro models
| Feature | MultiPlus | MultiPlus II | Quattro |
|---|---|---|---|
| Inverter | Basic sine wave | Improved sine wave | Dual-input sine wave |
| AC Inputs | 1 | 1 | 2 (auto-switching) |
| PowerAssist | Yes | Enhanced version | Advanced version |
| Parallel Support | Up to 6 units | Up to 10 units | Up to 10 units |
| Remote Control | Requires add-on | Built-in Bluetooth | Built-in Bluetooth |
| Best For | Simple setups | Most home systems | Critical power systems |
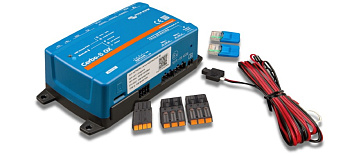
Key components: VE.Bus, Cerbo GX, and VictronConnect
These elements create a smart system. VE.Bus enables communication between devices. The Cerbo GX serves as the brain.
Component roles:
- VE.Bus: Device networking
- Cerbo GX: System controller
- Victron Connect: Configuration tool
- MK3-USB: Wired interface
- Bluetooth dongle: Wireless access
- VRM portal: Remote monitoring
- GX Touch: Local display
- Color Control: Advanced interface
How to set up initial Multiplus configuration?
Start by connecting 12 volt or higher battery voltage. Use the Victron Smart app for basic setup. Follow the configuration guide on the Victron website. Set standard settings for your battery type first. Adjust power consumption limits to match your needs. The Multi Control panel helps verify connections. Enable low power mode if running small loads. Check inverter output before powering critical devices. Document your config for future reference. Test with a light load before full use.
Basic setup using VictronConnect app with MK3-USB or Bluetooth Smart Dongle
Getting started is straightforward. Choose your connection method first. The app guides you through setup.
Setup steps:
- Download VictronConnect
- Connect interface (USB/BT)
- Select device
- Follow prompts
- Set basic parameters
- Verify operation
- Save configuration
Configuring AC input current limit for shore power or generator
When configure the MultiPlus, start with AC input limits. Set lower amps for weak shore power. Generators need higher limits for best performance. The MultiPlus or Quattro adapts to your power source. Watch for overload warnings during initial testing. Match limits to your breaker capacity. Lower settings prevent tripping shared campground circuits. Higher settings maximize generator output when needed. Find the sweet spot for your setup. Save power by reducing unused capacity. Always verify with your actual loads.
Setting up PowerAssist and default settings for inverter mode
PowerAssist boosts limited sources. Configure it properly for best results. Set inverter defaults first.
Configuration options:
- Enable PowerAssist
- Set current limit
- Adjust sensitivity
- Choose default mode
- Program switch delay
- Set low-power cutoff
- Configure alarms

How to configure Victron Multiplus for lithium battery charging?
Go to the charger tab in VictronConnect. Set bulk charge voltage per your battery specs. Disable lead acid batteries preset if not needed. Lithium profiles prevent overcharging better than AGM batteries. Monitor charging the batteries during first cycles. Adjust low battery cut-off to protect cells. The MultiPlus is connected to lithium BMS in most setups. Avoid using old standard settings for modern batteries. Check cell balance occasionally for best life. Update firmware if connected to a generator.
Setting the correct battery type and charge parameters for LiFePO4 batteries
Choose lithium profile when configure the Victron system. LiFePO4 needs different voltages than lead-acid. Set charge voltages per your battery specs. Lower float voltage extends battery life. Disable equalization for lithium chemistries. The BMS handles cell balancing automatically. Monitor first few cycles closely. Adjust if cells show imbalance. Store settings as custom preset. Lithium performs best with precise tuning.
Configuring bulk, absorption and float voltage for lithium batteries
Bulk should hit 14.2-14.6V for most LiFePO4. Shorten absorption time versus lead-acid. Float at 13.5V or lower preserves cells. These settings prevent overcharging lithium packs. The MultiPlus using wrong voltages damages batteries. Check manufacturer's exact recommendations. Cooler environments may need voltage compensation. Record your final voltage choices. Test with partial cycles first. Proper settings double battery lifespan.
Integrating with Battery Management Systems (BMS)
Connect BMS communication cables properly. Enable BMS control in Victron settings. The system now protects cells individually. Alerts show before any cell fails. BMS can emergency-stop charging. Voltage readings become more accurate. Configure alarms for cell imbalances. Some BMS units need driver updates. This integration prevents costly battery mistakes. Team Victron and BMS work perfectly together.
How to optimize charge current and AC input settings?
Match charge current to your battery power capacity. Lower settings reduce power supply strain in small systems. Increase input current if connected to shore power often. Set AC power priority when grid is reliable. Use low power mode for energy-saving periods. Balance between fast charging and power consumption limits. The digital Multi Control helps fine-tune these values. Avoid maxing out inverter output continuously. Monitor heat levels during high-current charging. Change settings seasonally for temperature changes.
Configuring maximum charge current based on battery bank capacity
Proper charging extends battery life. Match charge current to your bank. Follow battery manufacturer guidelines.
Setting guidelines:
- Calculate 10-30% of capacity
- Consider temperature
- Account for parallel banks
- Set absorption
- Adjust float
- Program equalization
- Enable temp compensation
Setting up appropriate AC input current limits for 50 amp service
Avoid tripping breakers unnecessarily. Set limits below the breaker rating. Allow headroom for surges.
Configuration tips:
- Start at 40 amps
- Monitor actual usage
- Adjust downward if needed
- Consider other loads
- Set transfer threshold
- Program delay
- Test under load
Balancing charging and inverting priorities
Set priority based on your power needs. Choose charging first for quick battery refills. Inverting priority keeps appliances running smoothly. The MultiPlus or Quattro handles both well. Find balance for your daily routine. Solar systems often prioritize charging daytime. Grid-tied systems may invert first. Adjust based on battery levels. Test different scenarios realistically. Your usage pattern decides best priority.
How to update Multiplus firmware and troubleshoot common issues?
Download updates from the Victron website using a computer. Connect the VE.Bus Smart Dongle to your MultiPlus. Backup your config before updating firmware. Reset if the unit gets stuck mid-update. Check connections if disable the charger errors appear. Verify battery voltage matches expected readings. For noise issues, inspect inverter output wiring. Reboot if the Multi Control panel freezes. Review error codes in the manual. Contact support if problems persist after troubleshooting.
Updating firmware via VictronConnect or VRM portal
Check firmware version in Victron Connect. Download updates through wired connection first. The VRM portal shows latest versions. Updates often fix bugs quietly. Backup config before starting update. Don't power off during firmware flash. New features sometimes appear after updates. Bricked units need factory recovery. Update every 6-12 months typically. Security patches matter for connected systems.
Troubleshooting voltage and charging problems
Many issues have simple fixes. Check connections first. Then verify settings match your batteries.
Troubleshooting steps:
- Measure actual voltage
- Inspect terminals
- Test under load
- Verify settings
- Check temp sensor
- Monitor charge cycle
- Review logs
- Reset if needed
Resolving communication issues with GX devices
Lost connections frustrate users. Start with basics. Most issues resolve quickly.
Fix sequence:
- Restart devices
- Check cables
- Verify terminations
- Test ports
- Update firmware
- Reset network
- Check power
How to set up advanced Multiplus configuration for specific applications?
For off-grid homes, prioritize solar power when available. RVs should optimize for connected to a generator scenarios. Marine setups need corrosion-resistant installation practices. Use back to the MultiPlus relay control for complex systems. Need to program custom charge curves for specialty batteries. Adjust change settings for peak shaving if needed. Enable grid support where local laws allow. The digital Multi Control offers deeper system tweaks. Save different profiles for varying use cases. Always test advanced setups thoroughly before relying on them.
Configuring for 120V systems and output voltage adjustments
| Setting | 120V System Setup | Output Voltage Adjustment |
|---|---|---|
| Wiring | Use L1 & Neutral | Check specs first |
| Input Range | Set to 120V AC | Adjust via dip switches |
| Output Voltage | Default 120V | Fine-tune in settings menu |
| Frequency | 60Hz (US) / 50Hz (EU) | Sync with grid if needed |
| Protections | Enable surge protection | Don’t exceed ±5% variance |
| Tools Needed | Multimeter, screwdriver | Manufacturer’s software |
Setting up generator support with specialized charge curves
Generators need special consideration. Program charge curves carefully. Protect both generator and batteries.
Setup process:
- Select generator profile
- Set acceptance voltage
- Program time limits
- Adjust for fuel type
- Configure warm-up
- Set cooldown
- Test sequence
- Monitor results
Integrating with battery monitors for smarter charging
Add SmartShunt or BMV for precision. Monitors track actual battery capacity. The system now charges more intelligently. See real state-of-charge percentages. Configure the monitor before linking. Accurate data prevents over-discharge damage. Synchronize with MultiPlus charging cycles. Monitors extend battery life significantly. Worth every penny for serious users. Final tweaks maximize system efficiency.