How to change marine ZF transmission fluid?
There's a certain rhythm to a day on the water—the steady hum of the engine, the feel of the hull cutting through the waves. That rhythm depends on a symphony of parts working together, and the marine ZF gearbox is a key player. Just like you wouldn't ignore your engine oil, giving attention to the transmission fluid and filter is what keeps everything in tune. This isn't about a complex repair; it's a straightforward act of preventative care, similar to a routine oil filter swap, that safeguards your investment and your peace of mind.Maybe you've noticed a subtle shift in performance, or you're simply following the sage advice to change the transmission fluid every 500 hours.
Whether you're a seasoned DIY enthusiast or embarking on your first transmission oil change, the process is within reach. The single most valuable tool on your workbench won't be a wrench—it will be your specific ZF manual. That booklet holds the blueprint, telling you exactly which Dexron-spec ATF your model needs and the nuances of checking the fluid level correctly.
Think of this service as giving your trans a refresh. You'll drain the old oil, replace the filter element (often housed in a filter housing on the transmission housing), and refill with pristine fluid. The goal is simple: to ensure that the next time you shift into gear, the response is as smooth as the day it left the factory. By following the steps laid out here and, most essentially, in your ZF manual, you’re not just performing maintenance—you’re preserving the joy of every future voyage.
Understanding ZF Marine Transmission Systems
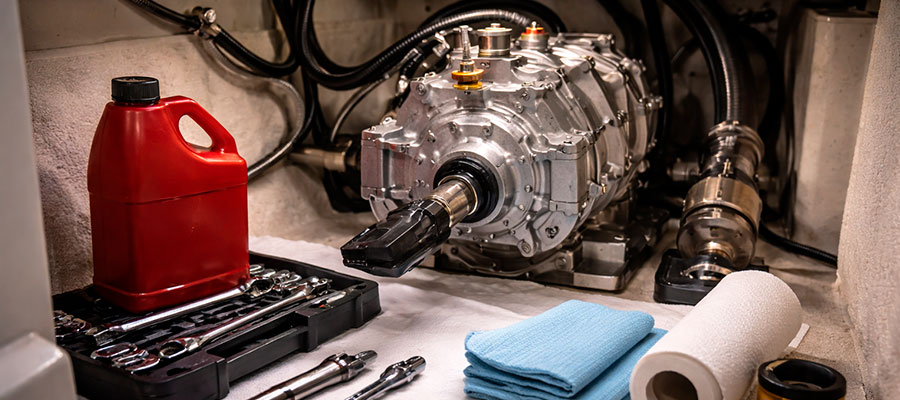
Think of your ZF unit as a highly specialized hydraulic pump that connects your engine to your propeller. It relies on a specific type of fluid to build pressure, cool itself, and protect its internal parts from wear. Getting to know whether you have a direct-drive unit or a V-drive setup is your first step, as it affects how you'll access it for service.
How a ZF marine gearbox functions on boats
Imagine your ZF gearbox as the intelligent hydraulic brain of your drivetrain, not merely a passive mechanical link. It resides in the space where your engine's power meets the water's resistance, serving as the critical translator. Moving the control lever initiates a fluid-based command, instructing the unit to channel oil pressure and actuate precise clutch packs.
This pressurized hydraulic force is the silent agent that engages forward or reverse gears with decisive smoothness, handling tremendous rotational force without drama. The system's refined architecture facilitates imperceptible gear changes even under power, converting engine output into dependable, directional propulsion. Each departure from the dock depends on this closed-loop hydraulic circuit's flawless operation.
Key differences between ZF Hurth and other marine transmissions
ZF Hurth models are known for their straightforward, mechanical cable-shift operation, which many boaters find simple and direct. In contrast, other transmissions or electronic ZF units may use hydraulic or electronic controls for shifting, offering different feel and installation flexibility.
- Check the transmission data plate.
- Consult your official ZF operator's manual.
- Use only the fluid type listed (e.g., ZF Lifeguardfluid, specific ATF).
Signs that it’s time for a transmission fluid change
Your transmission will communicate its needs through small behavioral shifts long before a failure occurs. A momentary delay or a more muted 'thud' when shifting often serves as the initial clue that the fluid's effectiveness is fading. Sluggish engagement, particularly during a cold start, clearly indicates the lubricant can no longer perform its essential duties.
Make it a habit to observe the fluid's condition on the dipstick; ideal fluid has a bright, translucent hue, whereas a murky, opaque appearance or a sharp, acrid odor signifies advanced breakdown. New sounds like a persistent whine or a grating sensation are more direct alerts demanding attention. While following the scheduled maintenance is wise, these symptoms validate that the time for a fluid swap has arrived.
Preparing for the Fluid Change Service
Assemble all necessary items on your workbench first: the approved fluid specification, a replacement filter element, any required sealing rings, and your toolkit. Turning to trusted sources such as Seaboard Marine can provide valuable insights for your particular model. A key preparatory step is to run the engine briefly, bringing the transmission up to its standard working warmth to ensure a true reading of the oil level during the refill process.
Tools, hoses, and containers needed for oil drainage
| Category | Item | Purpose & Note |
|---|---|---|
| Containment | Shallow, Wide Drain Pan | A pan with a broad opening catches the initial surge of fluid without splashing. A built-in spout makes transferring fluid to storage jugs much easier. |
| Transfer | Manual Fluid Pump or Hand Syringe | This tool is key for pulling fluid from the dipstick tube for a level check or for a partial change if a drain plug is inaccessible. |
| Transport | Sealable Used-Oil Jugs | Never reuse old fluid containers. Dedicated, sealable jugs are necessary for safe transport to a recycling center. |
| Access & Cleanup | Flexible Funnel | A gooseneck or flexible funnel helps guide new fluid into the fill port neatly, especially in tight engine compartments. |
| Access & Cleanup | Absorbent Pads or "Pigs" | Keep these within reach to instantly manage any drips or minor spills, protecting your bilge from oil stains. |
| Mechanical | Correct Sized Box Wrench or Socket | Using the exact tool for the drain plug prevents rounding its edges, which can turn a simple service into a major headache. |
Identifying the correct type of ZF transmission fluid
Never guess—the right fluid is specified in your owner's manual and is often printed on the transmission's identification tag. Using the incorrect fluid, even a generic "marine" Dexron, can lead to subpar performance and potential damage.
- Check the transmission data plate.
- Consult your official ZF operator's manual.
- Use only the fluid type listed (e.g., ZF Lifeguardfluid, specific ATF).
Safety measures before starting the marine transmission service
Priority one is creating a safe workspace. Give the engine and transmission ample time to cool to the touch, preventing burns from hot metal or fluid. Before heading into the bilge, triple-check that your boat is tied securely, the main battery disconnect is switched off, and the gear selector is firmly in neutral. A stable and de-energized environment is non-negotiable.
- Ensure the entire driveline has cooled completely.
- Disconnect the battery at the source to prevent any accidental ignition.
- Maintain good airflow in your workspace for comfort and safety.
- Always wear impact-resistant glasses and durable work gloves.
Draining the Old Transmission Oil
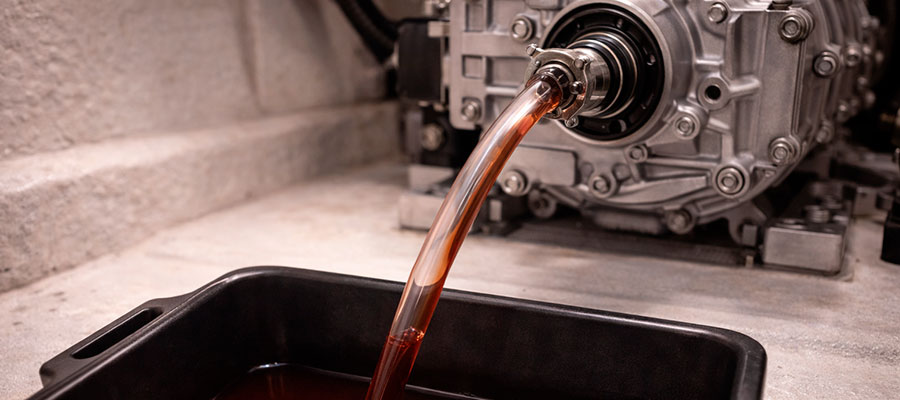
Slide a drain pan with substantial capacity directly under the transmission's lowest point. Locate the primary drain plug—typically a large, hex-head fitting—and loosen it steadily. Let the tranny oil drain fully; as it flows, take note of the old oil's color and consistency. This quick visual inspection can reveal early signs of wear or contamination in your ZF or Velvet Drive unit, offering valuable insight.
Locating the drain plug and fluid access points
Your drain plug is typically a large, hex-head bolt on the very bottom or lower side of the transmission housing. The fill plug and dipstick tube are higher up, often on the side, making them easier to access for topping up the fluid level.
- Find the lowest bolt on the transmission casing.
- Identify the separate fill port or dipstick tube.
- Clear any obstacles for clean access.
Using a hose or pump to remove old transmission oil
Employing a dedicated fluid extraction pump offers the most meticulous method for this task. Guide its pickup tube down the fill orifice or dipstick pathway to evacuate nearly all the spent lubricant. This technique proves invaluable where a conventional drain plug is awkward to reach, guaranteeing a comprehensive exchange. Operate the pump with a consistent rhythm, observing as the stream in your catch basin shifts from worn-out, dark liquid to a bare trickle. This thorough evacuation creates an ideal foundation for the new fluid.
Proper disposal of used fluid according to marine guidelines
Used transmission fluid is a hazardous pollutant and must never be dumped overboard or into a drain. Collect it in a sealed container and take it to a designated recycling center, marina waste oil facility, or an auto parts store that accepts it.
- Store old fluid in a sealed, labeled container.
- Locate a local hazardous waste collection site.
- Never pour it on the ground or into the water.
Cleaning and Replacing the Transmission Filter
After draining, the next focus is the filter. Unscrew or unbolt the filter housing to expose the internal filter element. Before any installation, thoroughly cleanse the housing's interior of all old gasket material and any sediment. Installing a fresh new filter at this stage is a small task with a large impact, as it ensures contaminants are captured and not pumped back through your transmission's vital passages.
How to locate and remove the ZF marine transmission filter
To locate the filter, first reference your specific ZF model's service manual. You will typically find it as a spin-on canister or an internal cartridge within a housing on the transmission's side. Before starting, position absorbent rags beneath the work area to manage any residual oil. Begin removal by turning the filter counter-clockwise by hand to break its seal. For a filter that refuses to budge, a specialized band wrench provides secure, non-damaging leverage. Once loosened, carefully unscrew it the rest of the way by hand, anticipating a final release of old fluid.
Cleaning or swapping the filter during an oil change
Always install a new filter element; cleaning and reusing an old filter is a false economy that leaves contaminants in the system. Before installing the new one, take a moment to thoroughly wipe out the filter housing to remove any leftover debris or sludge.
- Replace the filter element with a new, correct part every time.
- Clean the filter housing mating surface meticulously.
- Install a new O-ring or gasket with the filter.
Common mistakes when handling transmission filters
| Mistake | Consequence | The Right Approach |
|---|---|---|
| Ignoring the Housing Interior | Installing a fresh filter into a dirty housing immediately contaminates the new fluid with old sludge and metal particles. | After removing the old filter, thoroughly wipe out the filter housing with a clean, lint-free rag until no residue remains. |
| Forgetting the Housing Seal | Reusing a worn or cracked O-ring or gasket almost guarantees a leak, leading to low fluid levels and potential damage. | Every filter change must include inspecting and replacing the housing seal. Lubricate the new seal with a bit of fresh fluid before installation. |
| Over-Tightening the Assembly | Applying excessive force can crack the filter housing or distort the seal, creating a leak path. It also makes the next removal incredibly difficult. | Tighten the housing or canister filter only by hand, or with a tool using moderate force—typically a quarter to a half-turn after the seal makes contact. |
| Using an Incorrect Replacement | A filter with the wrong bypass valve pressure, micron rating, or fit can restrict flow or fail to filter properly, undermining the entire service. | Cross-reference the part number from your old filter or your service manual. Don't assume a generic "will-fit" part meets the manufacturer's specification. |
Refilling the Gearbox with Fresh Fluid
Begin by gently pumping the specified new fluid into the transmission via the fill opening until a small amount weeps back out. Next, following your manual's procedure, start the engine and leave the gear selector in neutral. Then, using the dipstick, verify and carefully adjust the fluid level until it aligns exactly with the indicated "full" line. This phase calls for a measured, patient approach to prevent adding too much.
How to refill the ZF transmission to the correct level
Introduce new fluid gradually through the fill port until it begins to emerge, then initiate the engine's idle. With the engine running and the gearbox in neutral, assess the oil level via the dipstick and add small amounts of fluid until the reading is at the "Full" designation.
- Add fluid until it appears at the fill hole's edge.
- Run the engine, briefly engage gears, and recheck the oil level during stable idle.
- Make final adjustments to reach the dipstick's "Full" mark.
Checking for leaks after the fluid change
Once you've run the engine and confirmed the level, wipe the drain plug, filter housing, and all connections completely dry. Inspect these areas again after the engine has been off for a while, looking for any fresh, tell-tale drips or wet spots.
- Dry all fittings and housing after the final level check.
- Re-inspect for seepage after the first short test run.
Confirming proper gear engagement and smooth shifting
After refilling, start the engine and let it idle in neutral for a few minutes to circulate the new fluid, then gently shift into forward and reverse. You're listening and feeling for a confident, solid engagement—a distinct "clunk" without any grinding or hesitation. Take the boat for a brief, slow-speed test run, paying close attention to how the transmission responds to throttle adjustments. The shifts should feel crisp and seamless, with no slipping or unusual vibrations. A successful service results in a transmission that operates with a quiet, authoritative smoothness, returning that direct connection between throttle and propeller you rely on.
Performing Regular Transmission Service and Maintenance
Making a habit of this service is what keeps your boat reliable. When you want to change the oil, follow a consistent schedule, and always use the opportunity to inspect for leaks or loose connections. This proactive approach is far simpler than dealing with the aftermath of a neglected tranny.
Recommended service intervals for ZF marine transmissions
The standard guideline is to service the transmission every 500 hours of operation or annually, whichever comes first. However, always defer to the specific interval listed in your official ZF operator's manual for your model, as it is the definitive source.
- General rule: Every 500 hours or once per year.
- Always confirm with your specific ZF manual.
- Reduce interval for severe usage (extended trolling, high loads).
Tips to extend gearbox and transmission fluid life
Consistent, gentle shifting habits prevent shock loads and excessive heat, which are the primary enemies of transmission fluid. For boats with a V drive, ensure its remote cooler is clean and its fluid is also serviced, as it shares the system and affects overall temperature.
- Practice smooth, deliberate gear engagements.
- Ensure the transmission cooler is free of debris.
- Service the V drive unit concurrently if equipped.
Troubleshooting performance issues after a fluid change
If shifting feels worse after your service, the first thing to re-check is the fluid level; an incorrect level is the most common culprit. Verify you used the exact fluid specification, as the wrong type can cause erratic clutch engagement and poor performance. Listen carefully for new noises, as whining could indicate aeration from low fluid, while grinding suggests a more serious internal concern. If problems persist, double-check that the filter was installed correctly and that the system is free of air. Sometimes, the new fluid can highlight an existing, underlying issue that the old, degraded fluid was masking.