A well-installed Victron SmartShunt keeps you from guessing whether your battery bank will last the night at anchor.
On a 12V offgrid system, the Victron SmartShunt comes preloaded with default settings so you can start monitoring right away—but those defaults won’t perfectly match every battery. After installation, use VictronConnect to set the state of charge parameters for your specific battery chemistry and capacity. This ensures the SmartShunt not only tracks voltage and current but also calculates your remaining amp-hours accurately. By tailoring those few key values, you’ll transform the SmartShunt from a generic gauge into a precise “fuel tank” indicator for your battery as well.
The guide below walks you through every cable lug and screen tap—from unboxing to state-of-charge (SOC) fine-tuning—so your yacht-supply24.com crew can sail off-grid with rock-solid power data.

What Is a Victron Smart Shunt and How Does It Work?
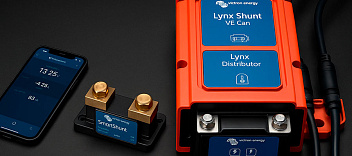
The Victron SmartShunt is like a super-smart meter for your battery that tells you exactly how much power is left, how fast it’s charging or draining, and what the voltage is. It works by watching tiny changes in voltage across a special metal strip and turning those into precise amp readings. With its built-in Bluetooth, you can see all this info right on your phone using the VictronConnect app, or send it to a central display if you have one. It’s really easy to snap into place, so you go from guessing your battery parameters to seeing the real numbers in no time.
Understanding the Victron Smart Shunt as a Battery Monitor
The Smart Shunt is a tiny dc energy meter that sits on the negative side of your battery system. It measures current flow and battery voltage in real time and feeds those numbers— via Bluetooth or through a GX device—to your phone, tablet, or Cerbo GX.
How the Victron Shunt Measures Voltage, Current, and State of Charge
Inside the shunt is a precision resistor. As amps pass through, the resistor creates a small but measurable drop in voltage. A built-in processor logs that drop, adds up every milliamp-hour that enters or leaves the main battery bank, and applies the Peukert exponent, tail current, and charge efficiency factor (1.05 by default) to estimate SOC.
Differences Between Victron SmartShunt and Other Battery-Monitoring Solutions
One battery sensor, zero screens. Unlike traditional gauges that need a display head, the Victron Connect app, your Cerbo, or any other GX hub. That means fewer holes in the panel and quicker installs—ideal when space inside a battery box is tight.
Step-by-Step Installation Guide
Before you dive in, gather your tools and clear some workspace near your battery bank. This guide will walk you through each connection—from mounting the SmartShunt to wiring your loads—so you don’t miss a step. We’ll cover how to tighten bolts, attach Bluetooth antennas, and double-check polarity for safe, accurate readings. By the end, you’ll have a fully installed SmartShunt that’s ready to report real-time battery stats right to your phone.
Preparing Your Battery System for SmartShunt Installation in a Motorhome
Even if you’re fitting out a van instead of a yacht, the workflow stays the same:
- Switch off inverter, solar controller, and battery chargers.
- Remove the negative cable from the battery terminal and confirm zero current flow with a multimeter.
- Install the shunt right next to your main battery so the wiring leads stay as short as possible.
Proper Wiring: Which Side of the Shunt Goes Where
| Connection | Goes to | Purpose |
|---|---|---|
| Battery side | Battery negative (battery positive cable remains untouched) | Reads cell voltage accurately |
| System side | Loads, charger, BMS, inverter | Logs every amp that leaves or enters |
Foolproof guideline: always hook your loads to the opposite side of the shunt.
Connecting to Your Battery Bank and Ensuring Proper Voltage Reading
Tighten the lugs to the torque spec; loose lugs cause heat. Use one heavy-gauge cable if you have 2 batteries wired in parallel, or separate cables if you monitor a single battery and a starter battery.
How to Configure Your SmartShunt Using the VictronConnect App
Getting your SmartShunt talking to your phone is quick and painless. In this section, we’ll show you how to launch the Victron Connect app, pair with your SmartShunt, and tweak all the shunt settings —like battery capacity, alarms, and display preferences. By the end, you’ll know exactly how to customize your monitor so it fits your setup perfectly and keeps you in the know about your battery’s health. Let’s dive in!
Setting Up Bluetooth Connection
Launch the VictronConnect app, pick SmartShunt XXXX, then enter the PIN code 000000.
Change the pin under Settings ➜ Security if you prefer.
Battery Capacity and Battery Settings
Tap Configure the Battery Settings and input:
- Nominal battery capacity (Ah)
- Chemistry (choose LiFePO4, lithium batteries, or lead-acid batteries)
- Absorption voltage, float voltage, and charge voltage limits
Adjusting Advanced Parameters: Tail Current, Charge Efficiency, and Peukert Exponent
Reduce tail current (amps at which the battery is considered fully charged) so battery chargers stop charging when the current drops below your spec.
Set the Peukert exponent:
| Battery Type | Value |
|---|---|
| Flooded | 1.10 |
| AGM | 1.05 |
| Lithium | 1.01 |
Special Configuration for Different Battery Types
Batteries aren’t one-size-fits-all, so your SmartShunt needs a little tweaking depending on whether you’re using flooded, AGM, or lithium cells. In this part, we’ll explain which settings to adjust—like the Peukert exponent, charge and discharge voltages, charge current, and low-voltage cutoffs—to match each battery’s chemistry. Getting these details right means more accurate readings and longer battery life. Let’s jump in and make sure your monitor knows exactly what kind of battery it’s talking to.
Configuring Smart Shunt for LiFePO4 and Lithium Batteries
Lithium demands precision, so lower the discharge floor to protect cell life.Set:
- Discharge floor = 10 %
- SOC detection time = 3 minutes
- Enable BMS relay if your BMS is wired to the shunt’s alarm port.
Setting Parameters for Lead-Acid Batteries
For flooded or AGM, keep float voltage at 13.6 V (on a 12 V system) and raise tail current to 4 % of battery capacity.
Optimizing Discharge Floor and SOC Detection Time
| Chemistry | Safe Discharge Floor | SOC Detection Time |
|---|---|---|
| LiFePO4 | 10 % | 3 min |
| AGM | 50 % | 1 hr |
| Flooded | 60 % | 2 hr |

Integrating Victron Smart Shunt with Other Victron Energy Products
When you’ve got a full Victron setup—like a MultiPlus inverter/charger, a Solar Charger, or a GX device —it’s time to let your SmartShunt join the team. In this section, we’ll walk through pairing your shunt with other Victron gear so they share data seamlessly over VE.Direct or Bluetooth. You’ll learn how to route current and voltage readings into your GX dashboard, set up automated system responses, and get unified alerts across all devices. By the end, your energy system will speak one language and keep you informed at every step.
Connecting to Cerbo GX and Other GX Units
Plug the VE.Direct cable from the shunt into any free VE.Direct port on the Victron Cerbo or Color Control. Data appears instantly on the touchscreen.
Monitoring Multiple Batteries in a Single System
Use the auxiliary input to monitor a second battery (e.g., the starter battery) for battery voltage only—handy when your yacht carries a house bank plus an engine crank battery.
Troubleshooting Common Victron SmartShunt Issues
Even the most polished devices can stumble now and then—your SmartShunt included. In this section, we’ll walk you through the most common hiccups—like connection dropouts, weird readings, wires connected to the other side, or unresponsive Bluetooth—and show you how to fix them fast. You’ll learn quick checks for wiring, tips for updating firmware, and tricks to reset settings without losing your custom setup. By the end, you’ll be back on track with accurate battery data in no time.
Fixing Inaccurate State of Charge Readings
If SOC drifts, perform a synchronization when the bank is definitely full.
That means charge until current drops below the tail-current value and the voltage holds steady.
Resolving Bluetooth Connection Problems
- Verify proximity: Bluetooth typically covers around 10 meters.
- Update firmware inside the VictronConnect app.
Addressing Calibration and Reset Procedures
If your readings start to drift or you swap in a new battery bank, a full reset gives you a clean slate. Simply open VictronConnect, tap the SmartShunt settings, and choose “Factory Reset” to wipe all custom values. After rebooting, you’ll need to re-enter your battery capacity, Peukert exponent, and voltage cutoffs so the monitor knows exactly what it’s measuring. Finally, run a zero-offset calibration by briefly disconnecting all loads while the shunt idles at 0 A — this fine-tunes its internal reference and keeps future readings spot on.
Quick Tips & Notes (FAQ-style)
- Install a Victron Smart Shunt on the negative side only.
- A mid-string midpoint monitor needs two shunts.
- Off-grid cruisers often set an early alarm so they stop charging once absorption is done.
Conclusion
By pairing a properly wired Victron Smart Shunt with well-tuned parameters, you turn random guesswork into clear numbers that extend battery life and keep every onboard system humming.
Follow the steps above, keep an eye on your SOC screen, and your main battery bank—whether AGM, LiFePO4, or classic flooded—will work smarter, not harder, every mile you travel.