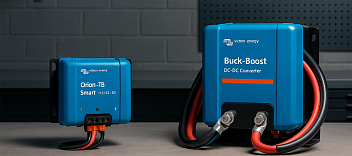
Found in many RVs and marine installations, Isotemp water heaters provide warm water using either shore-supplied electricity or excess heat from an engine. To prevent dangerous overheating, these systems are equipped with a dedicated safety thermostat that acts as a high-temperature cutout. When internal water temperature exceeds safe operational limits, this thermal device interrupts the electrical circuit to avoid potential hazards. Should this safety element fail or become permanently tripped, the electric heating mode may cease functioning entirely.
In this guide, you'll learn how to identify, assess, and change the overheating protection switch within your Isotemp system. Whether you're resolving a hot water issue or carrying out routine maintenance, the following steps will help you get your heater safely back in working condition.

What is the high temperature cutout on an Isotemp water heater and why might you need to replace it?
In Isotemp water heating systems, there's a critical safety component that works independently from the main user-adjustable thermostat: the overheat cutoff switch. This part is designed to automatically interrupt the flow of electricity to the heating element if the internal water temperature surpasses a defined danger point—typically as a result of malfunctioning sensors or thermal overload. Unlike the standard thermostat, which manages temperature in real-time, the cutoff switch serves only as a fail-safe. In most configurations, it cannot be reset once tripped, and a faulty or permanently open unit will prevent the electric heater from functioning even if all other components are operational. To restore heating capability and protect the unit, this part must be replaced when compromised.
How the High-Limit Thermostat Ensures Thermal Protection in Isotemp Systems
The high-limit thermostat in an Isotemp unit acts like a thermal fuse, designed to respond to extreme temperature conditions that exceed safe limits. While the main thermostat continuously regulates heating cycles to maintain a stable water temperature, this backup device is triggered only in overheat scenarios. When the liquid inside the stainless steel tank reaches a temperature that's typically close to 190°F (88°C), this safety mechanism mechanically disconnects the heater from the power supply to prevent damage. Unlike adjustable thermostats, this cutoff usually can’t be reset and requires full replacement once activated.
Typical Reasons for High-Temperature Cutoff Activation in Isotemp Systems
In most cases, the high-temperature cutoff switch in an Isotemp water heater doesn't fail without cause. Its activation is typically the result of a separate malfunction or operational issue within the system:
- Stuck Thermostat Relay: When the main thermostat fails to disengage and remains locked in the heating cycle, it may allow the water to reach boiling point, triggering the thermal cutoff as a last line of defense.
- Element Heating Without Water (Dry-Fire Event): If the heating element is energized while the tank is empty, rapid overheating occurs due to the absence of thermal dissipation, which leads to immediate cutoff activation.
- Heavy Mineral Scaling: Accumulated limescale or mineral deposits on the heating element can create concentrated hot zones, causing localized overheating that exceeds the sensor's safety threshold.
- Excess Heat from Engine Loop: If the engine’s coolant circuit, connected to the heater’s exchanger, circulates water at excessively high temperatures, this heat can raise the tank’s internal temperature to a point where the cutoff intervenes.
How to Tell If the High-Temperature Sensor Needs Replacing
If the high-limit thermal device is no longer functioning correctly, you may encounter several telltale signs that suggest it needs to be replaced:
- No Electrical Heating: You don’t get hot water when using electric shore power or battery sources, yet the engine loop still produces heat, indicating that only the electrical path is blocked.
- Breaker is Intact: You've verified that the system's circuit breaker is not tripped, ruling out a general power supply fault.
- Reset Button Unresponsive: Pressing the built-in reset on the thermostat housing has no effect, suggesting that the issue lies beyond the standard control mechanism and that the high-limit cutoff has failed.
What tools and parts do you need for changing an Isotemp high temperature cutout?
Preparing the correct tools and materials ahead of time ensures a smoother and safer replacement process. By having everything readily available, you reduce the risk of delays or mistakes during the repair. The specific part number and technical details for your model can typically be found in the digital user manual for your Isotemp water heater, available on the manufacturer's website or support pages. Reviewing this documentation beforehand will help confirm compatibility and proper installation steps.
Required Tools for Accessing and Servicing the Thermostat in Isotemp Heaters
Before beginning the replacement or inspection of the high-temperature cutoff, it's important to gather the appropriate tools. The following categories cover the essential equipment typically needed for safe and efficient access:
| Category | Tools Included |
|---|---|
| Basic Hand Tools | Phillips-head screwdriver, precision flathead screwdriver, standard pliers |
| Electrical Equipment | Digital multimeter (for voltage and continuity testing), wire strippers, crimping tool |
| Additional (If Needed) | Compact drill driver (may be useful on older installations with tight panel screws) |
How to Identify and Source the Correct Thermostat Replacement for Your Isotemp Unit
- Using the exact replacement thermostat designed for your specific Isotemp model is essential to ensure reliable function and electrical safety. Fitting the wrong part can lead to operational faults or even damage to the system. To determine the correct replacement, begin by consulting your unit’s technical manual—many of which are accessible online through platforms like ManualsLib or directly from the manufacturer's support site. If documentation is unavailable, you can inspect the removed thermostat itself: the part number and specifications are often labeled or stamped directly on the component. Avoid substituting it with a universal or third-party device; only install a thermostat that matches the official Isotemp requirements for your heater model.
Safety materials needed before working on hot water systems
Working on water heaters—especially electric models like those from Isotemp—requires more than just tools. Safety must come first, and that starts with a few essential items. Skipping them isn’t just risky — it’s dangerous. Here’s what you must have before you begin:
- Safety Glasses – Protect your eyes from sudden sprays of hot water, debris, or electrical sparks when opening panels or disconnecting wires.
- Insulated Work Gloves – These reduce the risk of shock when handling terminals, wires, or grounded metal parts in damp conditions.
- Dry, Non-Conductive Surface Underfoot – Whether it’s a clean rubber mat, thick towel, or even a piece of dry plywood, never stand barefoot or on a wet floor while working with electricity.
Even a simple repair job can become hazardous without the right precautions. Always set up your work environment before touching the unit.
Step-by-step instructions for changing the high temperature cutout on your Isotemp heater
Always follow each step precisely. If you're uncertain at any point, pause and consult your heater's official manual before proceeding.
How to safely shut off and drain your Isotemp water tank
- Disconnect Electrical Supply - Completely shut off all sources of electricity going to the heater. This includes switching off the AC breaker and disconnecting any DC feeds coming from onboard batteries or power systems.
- Turn Off the Cold Water Inlet - Locate the cold water supply valve that feeds the tank and close it tightly to prevent fresh water from entering during maintenance.
- Release Internal Pressure - Open a hot water faucet—such as the one in your galley or shower—to allow any built-up pressure in the system to safely escape.
- Fully Drain the Tank - Attach a suitable hose to the heater’s bottom drain outlet. Open the drain valve and allow all remaining water to flow out completely into a container or floor drain.
Accessing the thermostat: removing the cover and locating the reset button
The thermostat housing is typically positioned behind a plastic cover on the side of the Isotemp unit. In most cases, the panel is secured with a single screw. Remove this screw carefully and lift off the cover to expose the internal thermostat assembly. On some older models, you might find that the cover lacks a factory access hole. In such cases, it may be necessary to drill a small opening to reach the reset mechanism without fully removing the housing.
Disconnecting wires and installing the replacement temperature sensor
This is the core of the replacement process. Be precise, and double-check each connection.
- Photograph for Reference: Before touching any wires, take a clear photo of the existing setup to guide reassembly later.
- Double-Check Power Status: Use a multimeter to verify that the unit is completely de-energized before continuing.
- Disconnect Wires: Gently detach the two wires connected to the high-temp sensor, keeping track of where each was placed.
- Remove the Old Cutout: If it’s secured by a small clip or screw, loosen it carefully and remove the sensor from its slot.
- Install the New Sensor: Fit the replacement unit into the original position, making sure it seats properly. Fasten it as needed.
- Reconnect Wiring: Refer back to your photo and restore each wire to its correct terminal. Confirm all connections are tight and clean.

How to test your newly installed Isotemp high temperature cutout
Before considering the job complete, it's essential to confirm that the system operates correctly and poses no safety risks. Verifying your work isn’t as simple as restoring power—this step involves deliberate checks to ensure all components are properly installed, wiring is secure, and the heater responds as expected under normal conditions.
Proper reset procedure for your Isotemp thermostat after installation
Once installation is complete, reactivating your water heater requires careful attention to sequence. Skipping or rushing steps may damage the unit or pose a safety risk. Here's how to bring your Isotemp heater back online the right way:
- Ensure the Tank is Completely Filled: Never apply power to a dry heater. Begin by turning on a hot water tap located farthest from the unit—this helps purge any trapped air from the lines. Let the water flow continuously until all sputtering stops and a steady stream runs, confirming the tank has filled completely.
- Reconnect Electrical Supply: With the tank full, it’s now safe to restore electricity. Switch on the corresponding AC breaker, and re-enable any DC power source (such as a battery disconnect switch) that feeds the heater.
- Listen for Activation & Perform Reset if Needed: You may hear a low hum or soft click—this indicates the heating element has engaged. If the system remains silent, locate the main thermostat near the high-limit sensor you just replaced. Firmly press the recessed reset button (typically red or black) until you feel it engage. This should re-enable the unit and begin the heating process.
Checking for leaks and proper water temperature output
- Leak Test: Wipe around the thermostat cover and wire terminals with a dry paper towel. Also check the inlet and outlet fittings. Any leaks will show as wet spots on the towel.
- Temperature Test: Let the unit heat up fully (about 20–30 minutes). Open a hot tap carefully—the water should be steady and comfortably hot. If there’s no leaking and the temperature feels correct, you're done.
Maintenance tips to extend the life of your Isotemp water heater thermostat
Consistent maintenance can help you avoid repeating this repair in the near future.
Recommended temperature settings to prevent cutout issues
Keep your thermostat at a moderate setting—ideally between 120°F and 130°F (roughly 50–55°C). Cranking it up to maximum doesn't make water heat faster, but it does accelerate mineral scaling, increases wear on internal parts, raises electricity use, and raises the risk of triggering the thermal cutoff due to overheating. Staying within this safe range helps your system last longer and run more efficiently.
Regular checks for your Isotemp water heater's pressure relief valve
The temperature and pressure (T&P) relief valve plays a vital role in preventing dangerous pressure buildup inside your water heater. It’s designed to automatically release excess pressure if things get too hot or too pressurized. To ensure it's working properly, test it annually with this simple procedure:
- Position a container below the discharge tube connected to the T&P valve.
- Gently lift the valve’s test lever for a second or two. You should see a quick release of hot water from the pipe.
- Let go of the lever and confirm that it springs back fully. If it continues to drip afterward, the valve is no longer sealing properly and should be replaced.
Preventing Scale and Sediment Buildup in Your Isotemp Water Heater
Mineral deposits are a leading factor in heating element damage and reduced system efficiency. To minimize buildup and extend the life of your unit, follow these two essential maintenance steps each year:
- Check the anode rod: This sacrificial component helps protect the inner tank from corrosion. Over time, it deteriorates by design. Inspect it annually and replace if it's heavily worn or consumed.
- Flush out the tank: Completely drain the system to remove accumulated sediment and mineral scale from the bottom. This helps prevent overheating spots that can lead to element failure.
Consistent maintenance of these two areas helps keep your heater running smoothly and reduces the risk of expensive repairs.