The Lofrans windlass is a reliable and widely used device for handling anchors on boats. However, there are times when you may need to remove it—for maintenance, repair, or replacement. Removing a windlass properly is important to avoid damage to your boat and ensure safety. This article will guide you through the basic steps and tips for safely and efficiently removing a Lofrans windlass, making the process straightforward even for those with limited experience.
Understanding the Lofrans Windlass
A windlass is key for anchor handling on boats. It uses an electric motor to lift heavy loads. The main shaft connects to the gypsy for chain. You must lubricate the worm gear regularly. Corrosion can damage the stainless parts over time. During windlass maintenance, check the clutch often. The gearbox houses gears for smooth operation. Always strip down components for thorough inspection.

What is a windlass and its purpose on a boat
A windlass is a mechanical device on boats. It helps raise and lower the anchor easily. Without it, anchoring becomes hard work. The purpose includes saving time and effort. It uses electric power for quick action. A manual windlass offers backup if needed. The winch handle provides manual control. It secures boats in various water conditions. Overall, it enhances boating safety and comfort.
Features of a Lofrans windlass
The windlass includes a robust electric motor. It features a durable gearbox for power. The gypsy handles rope or chain well. You can adjust the clutch for control. It comes with a sight glass for grease levels.
- Stainless components resist corrosion effectively.
- The bearing ensures smooth shaft rotation.
- Spare parts like nuts and washers are available.
- The switch allows easy operation.
- The cone helps in chain guiding.
Types of windlass motors
| Motor Style | Core Mechanism | Key Strengths | Common Uses | Removal Notes |
|---|---|---|---|---|
| Electric Powered | Relies on battery-driven rotation | Delivers steady pull without physical effort | Ideal for mid-sized boats in calm waters | Disconnect power sources first during extraction |
| Hydraulic Driven | Uses fluid pressure for smooth operation | Handles heavy loads with minimal vibration | Suited for large vessels in rough seas | Drain fluid systems carefully before disassembly |
| Manual Hand-Crank | Operates via human force through gears | Provides reliable backup without electronics | Perfect for small craft or emergencies | Ensure gear alignment to avoid jamming on removal |
| Worm Gear Electric | Incorporates helical designs for torque | Offers precise control and quiet performance | Fits compact spaces on yachts | Lubricate gears prior to pulling out components |
| Planetary Gear Hydraulic | Employs orbiting elements for efficiency | Balances power with compact size | Used in high-demand marine environments | Check seals for leaks during the process |
Preparing for Removal
Gather all necessary items before starting. Check the deck for any obstructions. Ensure the anchor windlass is stable. Use a diagram for reference. Measure the diameter of components. Locate the gear box carefully. Have a lofrans progress model ready. Prepare for windlass overhaul if needed.
Reviewing the windlass manual and safety procedures
Read the anchor windlass guide thoroughly first. Understand all safety steps outlined. Identify potential hazards during removal. Follow procedures to avoid injuries. Check for imtra compatibility notes. Review thread specifications carefully. Note stud and screw details. Ensure chain gypsy is mentioned. Double-check terminal connections in the guide.
Tools needed for windlass removal
You'll need basic tools for the job. A screwdriver set is essential. Wrenches match various diameters. Pliers handle pipe fittings well. Safety gear protects during work. Refer to the diagram for tool specifics.
- Screwdrivers for removing screws.
- Wrenches to loosen nuts.
- Pliers for gripping inner clutch.
- Plug extractor for tight plugs.
- Stud remover for stubborn studs.
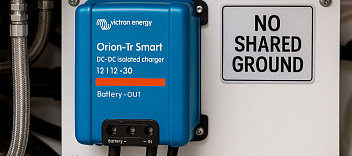
Disconnecting power and wiring
Start by turning off the main power. Locate the terminal block carefully. Unplug any connected wires gently. Use a diagram to trace connections. Avoid damaging the wiring harness.
- Power switch must be off.
- Terminal screws need loosening.
- Wiring should be labeled.
- Pipe conduits may encase wires.
- Chain gypsy wiring detaches last.
Removing the Windlass Motor
First, ensure the system is powered down. Locate the lofrans tigres windlass unit. Prepare your workspace for easy access. Gather tools needed for the task. Follow steps in sequence carefully. Avoid rushing to prevent errors. Check for any hidden fasteners. Secure the new windlass nearby.
Accessing the windlass motor assembly
Begin by exposing the motor housing. Remove any protective covers gently. Inspect the assembly for wear. Use proper lifting techniques. Clear space around the area. Note the orientation for reassembly. Avoid forcing any parts. Double-check for loose components. Proceed with caution always.
Disconnecting the motor wiring
Start from the power source. Unplug each connection methodically. Label parts to avoid confusion. Work in a dry environment. Test for continuity if possible. Refer to the lofrans tigres windlass specs.
- Power leads detach first.
- Ground connections follow next.
- Signal cables require care.
- Fuse holders stay intact.
- Connector pins align properly.
Detaching the motor from the windlass
Loosen mounting bolts evenly. Support the motor during removal. Slide it out carefully. Check for alignment marks. Store components safely. Prepare the new windlass for installation.
- Bolts turn counterclockwise.
- Brackets release with ease.
- Shaft couplings separate cleanly.
- Seals stay in place.
- Frame adjusts for clearance.
Removing the Windlass from the Boat
Ensure safety gear is on. Clear the area around. Use a helper for support. Follow steps in order. Avoid sudden movements. Check for hidden connections. Prepare lifting equipment. Store parts securely.
Loosening mounting bolts and fittings
Start with the base fasteners. Turn them counterclockwise slowly. Use the right tool size. Apply even pressure. Inspect threads for damage. Remove washers if present. Keep track of pieces. Wipe away debris. Double-check tightness afterward.
Lifting the windlass from its position
Position the hoist correctly. Attach straps to secure points. Raise slowly and steadily. Guide it away gently. Avoid tilting excessively. Monitor the electric windlass weight. Check the electric windlass alignment.
- Straps go under the base.
- Hoist controls stay accessible.
- Feet clear the deck edge.
- Balance maintained throughout.
- Lower onto a stable surface.

Handling the windlass during removal
Wear gloves for grip. Move it in small steps. Avoid dropping or bumping. Communicate with your partner. Inspect for transport damage. Ensure the electric windlass stays dry.
- Gloves prevent slips.
- Steps keep control.
- Bumping avoided carefully.
- Partner signals clearly.
- Damage checked immediately.
Handling the Removed Windlass
Place it on a stable surface. Use protective padding underneath. Avoid exposing to moisture. Keep away from direct sunlight. Label all parts clearly. Transport with care to avoid damage. Store in a cool spot. Check for any immediate issues.
Inspecting the windlass and motor for wear
Look for visible signs of damage. Check gears for unusual wear. Examine bearings for smooth rotation. Test switches for functionality. Listen for unusual noises. Feel for excessive heat. Measure clearances if possible. Note any corrosion spots. Document findings thoroughly.
Cleaning and storing components
Rinse with fresh water gently. Dry completely to prevent rust. Apply lubricant to moving parts. Wrap in protective cloth. Place in a sealed container. Avoid using harsh chemicals.
- Water removes salt residue.
- Drying prevents moisture buildup.
- Lubricant keeps parts smooth.
- Cloth avoids scratches.
- Container blocks dust entry.
Identifying parts that require repair or replacement
Compare against original specifications. Mark damaged sections clearly. Prioritize critical components. Consult a specialist if unsure. Plan for timely fixes. Budget for new parts.
- Specifications guide decisions.
- Marks highlight issues.
- Priorities focus on safety.
- Specialists offer expert advice.
- Plans ensure quick action.
Preparing for Reinstallation or Replacement
Gather all necessary tools. Clean the mounting area. Inspect replacement parts if applicable. Ensure power sources are ready. Read through instructions carefully. Double-check compatibility. Organize components logically. Wear appropriate safety gear.
Aligning the windlass for reinstallation
Position the base securely. Use a level for accuracy. Adjust for proper orientation. Secure temporarily with clamps. Check shaft alignment. Verify clearance around. Mark positions if needed. Test fit without full fastening. Make final adjustments.
Connecting motor wiring correctly
Identify each connection point. Match colors or labels. Plug in securely. Tighten terminals firmly. Test for continuity. Avoid loose or exposed connections. Ensure polarity is correct.
- Power inputs go first.
- Ground attaches next.
- Signals connect afterward.
- Fuses insert properly.
- Covers snap into place.
Testing the windlass after installation
Power on the system slowly. Operate the switch gently. Listen for unusual sounds. Check the clutch engagement. Monitor for corrosion signs. Record test results for future reference.
- Power starts low.
- Switch activates smoothly.
- Sounds indicate health.
- Clutch performs reliably.
- Corrosion gets addressed.