Installing a Victron MPPT solar charge controller is a core part of any high-performance DIY solar project. A quality charge controller is the brain of your solar system, and getting the installation right is critical for safety and efficiency. This guide will walk you through setting up a Victron SmartSolar controller, from sizing the unit to connecting the last wire.
This process is about more than just connecting wires; it's about building a robust power system. The solar controller is the critical link between your solar panel array and your batteries. Whether you're adding a victron unit to an existing system with an inverter and shunt, or building a new Victron solar project from scratch, this guide will provide the necessary steps for a successful installation of your new solar charger. This will be the heart of your energy storage system.

Introduction to Victron Solar Charge Controllers
Before you begin, it’s important to understand what a solar charge controller does and why Victron Energy is a top choice for so many installers. The controller regulates the voltage and current coming from your solar panels to safely charge the battery.
MPPT vs. PWM: Which Victron Controller is Right for You?
There are two main types of solar controller technologies: PWM and MPPT. Victron specializes in the superior MPPT (Maximum Power Point Tracking) technology.
| Feature | MPPT (Maximum Power Point Tracking) | PWM (Pulse Width Modulation) |
| Efficiency | High (up to 30% more power harvest). Actively converts excess panel voltage into charging current. | Lower. Essentially a smart switch that connects the panel directly to the battery when needed. |
| Best For | All systems, especially those with high-voltage panels, in cold weather, or where maximizing every watt of solar power is critical. | Small, simple systems where cost is the primary driver and efficiency is not a major concern. |
For any serious project, the mppt solar controller is the clear choice.
Key Features of Victron SmartSolar MPPT Controllers
The Victron SmartSolar line stands out for several reasons:
- Ultra-fast Tracking: The algorithm tracks the maximum power point with extreme speed, improving energy harvest, especially with intermittent shading.
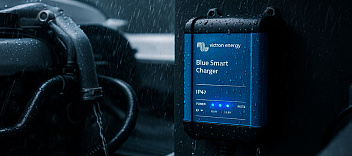
- Built-in Bluetooth: Allows for easy setup, monitoring, and firmware updates via the VictronConnect app.
- Advanced Protection: Safeguards against reverse polarity, short circuit, and overheating.
Why Choose Victron for Your Solar Power System?
Victron products are known for their reliability and seamless integration. When you choose a victron controller, you're investing in a component that will efficiently manage your solar energy for years to come.
Pre-Installation Planning
Proper planning is 90% of the job. Rushing this stage leads to costly mistakes.
Sizing Your Victron MPPT Controller for Solar Panels
Sizing the mppt controller correctly is the most critical step. An undersized unit will be damaged, and an oversized one is a waste of money. You must check two key specifications from your solar array:
- Open Circuit Voltage (Voc): The total Voc of your panels wired in series must NOT exceed the controller's maximum PV input voltage limit. Always check the pv open circuit voltage.
- Short Circuit Current (Isc): The controller's output rating (e.g., 30A) must be sufficient for the potential charge current.
The best practice is to use the official mppt sizing calculator on the company's website.
Compatibility Check: Lithium, AGM, and Other Battery Types
The victron charge controllers are compatible with virtually any battery type, including acid batteries. However, they are especially well-suited for a lithium (LiFePO4) battery, offering fully customizable charging profiles to match the specific requirements of your battery and its BMS.
Tools and Components Needed for Installation
Before you start, gather your tools. Having everything on hand makes the process smooth.
- Screwdrivers (with insulated handles)
- Wire stripper/cutter
- Wire crimper
- Multimeter
- Drill for mounting
- Properly sized cable for battery and PV connections
- Fuses or circuit breakers
- Ring terminals or other necessary connectors
Step-by-Step Installation Guide
Safety First: Disconnect all power sources before you begin wiring. Cover your solar panels with a heavy blanket to stop them from producing power.
Mounting Your Victron MPPT Solar Charge Controller
First, mount the Victron unit. Choose a location that is:
- Indoors and protected from the elements.
- Well-ventilated to allow for heat dissipation.
- As close as possible to the battery bank to minimize voltage drop in the cables.
Do not mount the device in the same compartment as flooded lead-acid batteries, as gasses can cause corrosion.
How to Connect the Solar Panels to the Controller
Run the wire from the solar array down to the location of your device. These cables often use standard MC4 connectors. Make sure you identify the positive and negative leads correctly. Connect the solar cables to the PV input terminal on the unit, ensuring you match the polarity (+ to + and - to -). It is critical to connect the positive wire from the solar to the PV+ terminal.
Wiring the Victron Controller to Your Battery Bank
This is the most important step in the sequence. You must always connect the battery before connecting the solar panels. This allows the device to detect the system voltage (e.g., 12V, 24V) correctly.
- Run a properly sized wire from the battery (including an in-line fuse on the positive line) to the controller.
- Connect the positive cable to the battery+ terminal on the unit.
- Connect the negative cable to the battery- terminal.
- Double-check that every terminal connection is tight.
Once the victron battery is connected, you can remove the blanket from your panels.

Bluetooth and Smart Features Setup
Once installed, the real power of a victron smart device comes from its connectivity.
Using VictronConnect App for Bluetooth Monitoring
Download the Victron Connect app on your smartphone. Open the app, and your smartsolar charge controller should appear in the list. You can connect to it via Bluetooth to see live data, including power yield and battery voltage.
Configuring Charging Profiles for Lithium Batteries
Inside the VictronConnect app's settings, you can select the battery type. For a lithium battery, you can select a preset or enter custom absorption and float volt settings to perfectly match what your battery manufacturer recommends.
How to Update Firmware on Your Victron Controller
The app will automatically notify you if a firmware update is available. Updating is a simple process done wirelessly through the app and ensures your victron solar charge controller has the latest features and performance improvements.
Integrating with Existing Solar Systems
The modular nature of Victron makes it easy to add to an existing solar setup.
Connecting Victron MPPT to an Inverter
The solar charger and the inverter do not connect directly to each other. The controller connects to the batteries, and the inverter also connects to the batteries. They work together as part of the same power source, one replenishing the battery charge and the other using it.
Adding a Victron Controller to an Off-Grid Solar System
When adding a new victron mppt solar charge controller to an existing system, ensure it is compatible with your battery voltage. You can run two solar arrays on two separate controllers to the same battery bank. The smart solar units will work together seamlessly.
Troubleshooting Common Installation Issues
If your charger doesn't work after installation, check these first:
- Reverse Polarity: Did you connect the positive and negative wires backwards on either the PV or battery terminal?
- Loose Connections: Is every screw on the terminal block tight?
- Blown Fuse: Check the fuses on both the battery and PV lines.
- PV Voltage Too High: Use a multimeter to confirm the panel Voc is within the controller's limits. Some units also have a load output terminal; ensure no wires are connected there unless you intend to use that feature.
Maintenance and Optimization Tips
Your victron mppt requires very little maintenance, but a few checks will ensure it runs at peak performance.
How to Monitor Your Solar System’s Performance
The best way to monitor your system is by using the VictronConnect app. For a more comprehensive view, a dedicated battery monitor like a BMV or smart shunt will give you a precise state of charge, which is more accurate than just monitoring battery volt levels.
Regular Maintenance for Longevity of Your Victron Controller
Periodically (every few months), check all wiring connections at the controller terminals to ensure they haven't vibrated loose. Check that the unit is free of dust or obstructions that could impede airflow.
Maximizing Efficiency with Victron’s MPPT Technology
Trust the technology. The mppt solar charge controller is designed to maximize your energy harvest. Ensure your panels are clean and positioned for optimal sun exposure. The smartsolar mppt smart controller will handle the rest, constantly adjusting to squeeze every available watt from your panels until your batteries are fully charged.