Ready to dive into the world of energy conversion setups? This guide is your friendly companion for linking your power management system step by step. Whether you're a beginner exploring sustainable energy solutions or someone refining an existing setup. We'll cover everything from basics to advanced tips. Get ready to build a dependable system that keeps your appliances humming without the hassle. Let's get started on making your energy dreams a reality!
Introduction to Victron Inverters
Hey, power enthusiasts! These energy converters change direct current into usable alternating current. They help run appliances off-grid. Many models include extra features for charging. They work with various storage units. They make off-grid living possible. They support renewable sources like wind or sun. They are reliable for long trips.
What Is a Victron Inverter and How It Works
Alright, tech fans! It's a device that flips DC to AC electricity. It draws from a battery bank for power. The process involves transformers and switches. It handles different loads efficiently. It protects against overloads.
The core function is seamless conversion.
It monitors input and output closely. It ensures clean power delivery.
Key Features of Victron Energy Inverter Systems
These systems offer robust performance. They include smart monitoring tools. They support multiple input sources. They provide high efficiency ratings. The features enhance overall usability. They integrate with other gadgets.
- Built-in safety mechanisms.
- Remote access via apps.
- Scalable for larger setups.
- Quiet operation in any environment.
When to Install a Victron Inverter
Consider it for remote locations. It's ideal for camping or boating. It's useful during power outages. It's great for solar-powered homes. Timing depends on energy needs. Start with small projects.
- When expanding renewable systems.
- For backup in unstable areas.
- If using advanced storage units.
- Before long-term off-grid stays.
Preparing to Install a Victron Inverter
First, gather all your components carefully. Check your setup for any damages. Read the manual twice for clarity. Ensure you have the right power sources ready. Test each part before starting. Plan your steps in advance. Finally, double-check everything once more.
Required Tools, Cables, and Safety Checks
You'll need screwdrivers and pliers handy. Grab some wire cutters too. Don't forget insulated gloves for protection.
Always wear safety glasses to avoid risks.
Measure voltages with a multimeter first. Use proper fuses to prevent overloads. Inspect all connections thoroughly. Turn off power before touching anything.
Connecting Solar Panels and Battery Charger Systems
Start by linking your solar charger to panels. Attach the battery monitor securely. Route wires away from sharp edges carefully. Add a shunt for accurate readings.
- Connect the mppt controller next.
- Fuse the dc wiring properly.
- Use rj45 for network links.
- Attach ve.direct for data flow.
Choosing the Right Location to Install a Victron
Pick a spot with good ventilation. Avoid damp or dusty areas. Ensure easy access for maintenance. Keep it away from heat sources safely.
- Choose indoor or outdoor based on model.
- Mount on a sturdy wall.
- Leave space for cooling fans.
- Protect from direct sunlight exposure.
Step-by-Step Guide to Install a Victron Inverter
Grab your tools and manuals first. Unbox everything gently to avoid scratches. Plan your workspace for easy access. Secure the unit to a solid base. Link the main wires step by step. Test each connection as you go. Double-check for loose parts. Finally, give it a thumbs up.
Connecting the AC Input and AC Input Current Settings
Start by locating your power feed. Ensure it's clean and stable. Attach the input link carefully. Adjust the flow rate slowly.
Fine-tune the limits for your needs.
Monitor the readings on screen. Use the app for quick changes. Save all settings securely. Run a sample test cycle. Verify no errors pop up.
Wiring the Inverter with the Correct Cable Size
Pick cables that match your load. Measure lengths before cutting. Strip ends neatly for safety. Crimp connections firmly to prevent issues. Route them away from hazards.
- Use battery cable for heavy duty.
- Add a battery switch for control.
- Label wires for future ease.
- Test resistance with a meter.
- Secure with ties to stay tidy.
Initial Power-Up and Testing
Flip the switch gently now. Watch lights for any warnings. Check the display for battery capacity. Run a small load to verify. Listen for unusual noises. Adjust charger tab if needed.
- Monitor inverter output levels.
- Test with air conditioner briefly.
- Note any heat buildup.
- Use victron connect app for logs.
- Celebrate a successful first run.
Configuring a Victron Inverter After Installation
Open the app on your device. Connect to your victron system first. Select the right settings menu. Dive into the configure the multiplus options. Adjust for your battery power needs. Save changes as you go. Test with a small load. Double-check everything before finishing.
How to Configure Using Bluetooth and GX Devices
Grab your bluetooth dongle for wireless link. Pair it with your phone easily. Launch the app for quick access. Navigate to the device list.
Link up with cerbo gx for control.
Choose your victron multiplus from options. Tweak settings like charge the batteries. Monitor via the screen. Save and exit safely.
Adjusting AC Input Current and Charger Limits
Start by checking your current setup. Use the menu to find limits. Increase or decrease as needed. Fine-tune for connected to shore power. Ensure it matches your load.
- Set for 12v systems carefully.
- Adjust battery charging rates.
- Monitor inverter output closely.
- Use victron stuff for guidance.
- Test with solar power input.
Common Configure Options in Victron Energy Systems
Here's a friendly guide to some popular settings you can tweak in your setup. I've put it into a simple table so it's easy to follow. Remember, these are based on common tweaks for smooth operation—always check your manual first. Each row explains an option, what it does, and a quick tip on how to handle it.
| Option Name | What It Does | Quick Tip to Apply |
|---|---|---|
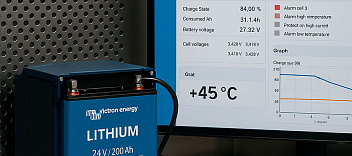
| Battery Monitor Setup | Tracks your battery voltage and capacity levels. | Link it via ve.direct for real-time data. |
| State of Charge Adjustment | Shows how full your lithium batteries are. | Adjust through victronconnect app to avoid low battery alerts. |
| MPPT Controller Tuning | Optimizes solar charger efficiency from panels. | Set via victron connect for best dc power flow. |
| BMS Integration | Manages battery bms for safe charging. | Connect using rj45 to monitor battery management. |
| Shore Power Switching | Handles input from shore power or generator. | Use a transfer switch for seamless ups function. |
| AC Output Limits | Controls 50 amp output to appliances. | Program the multiplus for 120 volt safety. |
| Fuse Protection | Safeguards dc wiring against overloads. | Add breakers to prevent issues in 12 volt systems. |
| Remote Console Access | Lets you control via victron vrm remotely. | Install a dongle for easy remote console use. |
Monitoring and Control with GX and VRM
Let's keep an eye on things. Start by logging into your dashboard. Check the live data feeds. Adjust settings from afar. Use victron cerbo for full oversight. View battery levels anytime. Make changes on the fly. Save your preferences securely. Enjoy that remote peace of mind.
Setting Up a GX Device for Remote Monitoring
First, power up your device. Connect it to your network. Download the app for setup. Create an account quickly.
Link it to victron community portal.
Select your equipment list. Enable alerts for key events. Test the connection remotely. Confirm data syncs properly.
Connecting Your Victron Inverter to the VRM Portal
Grab your login credentials now. Open the portal on your browser. Enter your system details. Sync with victron equipment online. Verify the link is active.
- Use inverter via for access.
- Monitor 48 volt systems.
- Check solar charge controller stats.
- Adjust victron mppt settings.
- Share with victron community.
Using Bluetooth for Local Monitoring and Configuration
Pair your dongle with the unit. Open the app on your phone. Scan for nearby devices. Access local controls easily. Tweak settings without wires. Save changes instantly.
- View connected to the battery data.
- Adjust dc to dc charger.
- Check phoenix inverter modes.
- Monitor battery terminal connections.
- Use diy solar tips.
Troubleshooting and Maintenance of Victron Inverter Systems
Let's keep things running smoothly. Start by checking error codes. Clean dust from vents regularly. Update firmware when available. Inspect ve.bus connections weekly. Test battery levels often. Replace worn parts promptly. Log issues for future reference. Stay proactive with your setup.
Common Connection Issues and How to Fix Them
First, unplug and restart the device. Check for loose plugs everywhere. Reset network settings if needed. Update apps to latest versions.
Tighten all multiplus ii links.
Verify power sources are stable. Clear cache on your phone. Test with a different outlet. Document fixes for next time.
Checking Cable, Charger, and AC Input Problems
Look for frayed ends on wires. Measure voltage at key points. Swap out faulty units. Use multiplus or quattro mode. Ensure inputs match requirements.
- Inspect inverter charger components.
- Test with victron multiplus-ii.
- Check quattro settings.
- Monitor using the victron.
- Secure battery terminal firmly.
Best Practices for Maintaining a Victron Inverter
Schedule regular check-ups monthly. Keep area clean and dry. Backup data before changes. Follow inverter control guidelines. Train others on basics.
- Use victron multiplus inverter wisely.
- Update inverter install records.
- Monitor multiplus inverter health.
- Avoid overloading systems.
- Share tips in communities.