Proper heater maintenance is critical if you rely on a Webasto unit. Over time, carbon and soot buildup inside the burner can lead to hard starting, excessive smoke, and even a complete flame failure. This guide will provide a step-by-step walkthrough on how to service your Webasto Air Top 2000, a process that is also very similar for other models like the air top 2000 stc and even competitors like Eberspacher.
Cleaning your diesel heater is not just about performance; it's about reliability. When your heating system fails on a cold night, it's often due to a lack of cleaning. We will cover how to inspect the flame sensor, clean the burn pot, and check the outlet pipe to get your Webasto diesel heater running like new. This is the core procedure for this type of webasto heating device.

Introduction to Webasto Heater Maintenance
Before you take it apart, it's essential to understand why you're doing it and what signs to look for. This isn't just wiping down the outside; this is an internal service of the core components of the heater.
Why Regular Cleaning is Crucial for Your Webasto Heater
Regular cleaning is the single most important part of maintaining your unit. It ensures:
- Reliable Starting: A clean glow plug and combustion pot ignite quickly every time.
- Efficient Operation: A clean unit burns diesel fuel more completely, producing more heat and less smoke.
- Longevity: Preventing heavy carbon deposits reduces wear and tear on critical components.
- Safety: A properly maintained device with a clear exhaust system operates safely.
Understanding the Webasto Air Top 2000 Components
The Webasto Air Top is a forced-air device. Key internal parts you'll interact with include:
- Control Unit: The electronic brain that manages the startup sequence and operation.
- The component where fuel and air mix and ignite. This part gets the dirtiest.
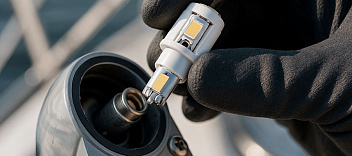
- Glow Pin: An electric element that heats up to ignite the diesel spray.
- A set of metal fins that transfers heat from the burning process to the cabin air.
- Fuel Pump: A small, clicking pump that delivers fuel.
While this guide focuses on air heaters like the Airtop, many principles also apply to water units like the Thermo Top series, including the Thermo Top C. This process is also similar for newer models like the Air Top Evo series.
Signs Your Diesel Heater Needs Cleaning
Your device will tell you when it needs attention. Look for these signs:
- Excessive White Smoke: Especially on startup, this indicates unburnt fuel.
- Starting Failures: The unit tries to start but shuts down, often logging an error code.
- Reduced Heat Output: The hot air coming out isn't as hot as it used to be.
- Loud Noises: Rumbling during operation can indicate an uneven burn.
Tools and Safety Precautions for Cleaning
This is not a beginner's job. If you are not mechanically confident, seek professional help. If you proceed, safety is paramount.
Essential Tools for Webasto Heater Service
Having the right tools makes the job much easier. Here is a basic checklist:
- Socket and wrench set
- Torx bits
- A set of small picks and stiff brushes
- Carb cleaner or a similar carbon-dissolving spray
- A new gasket set (do not reuse old gaskets)
- Clean rags and gloves
- The service manual for your specific model (highly recommended)
Safety Measures Before Starting the Cleaning Process
DO NOT SKIP THIS STEP.
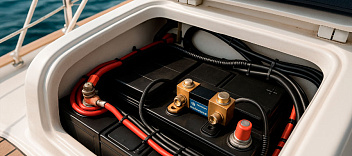
- Disconnect Power: Unplug the main wiring harness or disconnect the battery.
- Disconnect Fuel: Shut off the valve to the fuel line and carefully disconnect it. Have a rag ready.
- Ensure Ventilation: Work in a well-ventilated area.
- Cool Down: Make sure the unit is completely cold before you begin.
Preparing Your Workspace for Heater Maintenance
Lay down a clean cloth on your workbench to keep track of small screws and parts. As you disassemble the unit, take photos at each step as a reference for reassembly.
Step-by-Step Cleaning Process
With the device removed and on your bench, you can begin the internal cleaning.
How to Clean the Burner and Combustion Chamber
This is the most important part of the job. The combustion chamber is where carbon accumulates. You will need to carefully remove the outer casings to access the inside of the heater. Once inside, unbolt and remove the combustion pot. Use a pick and brush to scrape all the hard carbon and deposits from the inside of the burner. A spray with solvent can help dissolve stubborn buildup. The goal is to clean the burner back to bare metal.
Removing and Cleaning the Glow Plug
The glow plug is a delicate component. It is usually held in place by a collar. Carefully unscrew and remove it. The tip will likely be covered in hard carbon. Gently scrape it clean, being careful not to damage the element.
Inspecting and Cleaning the Flame Sensor
The flame detector is a small "eye" that tells the main electronic unit that a flame has been established. If its lens is covered in soot, it can't see the flame and will shut the device down. Locate the sensor and gently wipe the lens clean with a soft cloth.
Cleaning the Heat Exchanger and Air Intake
A clean combustion path is just as important as a clean burn pot.
How to Access and Clean the Heat Exchanger
With the main burn pot removed, you can access the heat exchanger. Use a brush and compressed air to clean any deposits and dust from between the metal fins. Clean fins are essential for efficient heat transfer and good air flow.
Clearing Combustion Air Pathways
The heater needs a clear path for both the combustion air it draws in and the waste gases it pushes out. Inspect the air intake pipe and the exhaust pipe for any blockages like insect nests or mud. A restricted air inlet will lead to a rich, sooty burn.
Checking and Replacing the Gasket if Necessary
This is not optional. Webasto recommends replacing the main burner seal and any other seals you remove. Reusing an old, compressed gasket will cause leaks. Always use genuine Webasto parts for a proper seal.

Reassembling and Testing Your Webasto Heater
Patience during reassembly is key.
Proper Reassembly of the Webasto Diesel Heater
Reassemble the unit in the reverse order of how you took it apart, referring to your photos. Ensure every screw is tightened correctly and all electrical connectors are firmly seated. Reconnect the fuel line and check for leaks.
Testing the Heater After Cleaning
Once reinstalled, reconnect the main power. Start the unit. It is normal to see some smoke for the first few minutes as any residual cleaning solvents burn off. Let the heater on high for a full 15-20 minute cycle to burn everything clean.
Troubleshooting Common Post-Cleaning Issues
If the unit still doesn't work correctly, consult this table.
| Problem | Possible Cause | Solution |
| Unit won't start at all. | Electrical connection issue; glow element damaged during cleaning. |
Double-check all wiring connections. Test the glow element for resistance with a multimeter.
|
| Still produces a lot of smoke. | Incorrect reassembly; blocked fuel filter; fuel pump issue. |
Disassemble and re-check burner/seal seating. Check the main fuel filter. Listen for the regular "ticking" of the fuel delivery pump.
|
| Shuts down with an error. | A component has failed (e.g., flame detector, overheat sensor). |
Look up the fault code in the product literature to diagnose the specific fault. You may need a new burner or other components.
|
Preventive Maintenance Tips
An ounce of prevention is worth a pound of cure.
How Often Should You Clean Your Webasto Heater?
For heavy users, an annual cleaning before the winter season is a good rule. For occasional users, every two years or 1,000 hours of operation is a reasonable interval for this kind of work.
Best Practices for Long-Term Heater Maintenance
The best thing you can do is running the heater on its highest heat setting for at least 15 minutes once a month, even in the summer. This helps burn off deposits. At high altitude, this is even more important. Some users report that occasionally running a cycle with kerosene mixed in the fuel tank can also help clean the system. The newer Evo models have improved high-altitude performance.
When to Seek Professional Service for Your Webasto Air Top
If you've cleaned the webasto air top 2000 and it still has problems, or if you are not comfortable performing the full disassembly yourself, it's time to take it to an authorized technician. They have the diagnostic tools and experience to solve complex issues.