

Keeping a boat ready for the season isn’t just about shining the hull or checking for the occasional leak—it’s also about knowing what happens down in the shadows of the bilge area. For many boaters, that space feels like a mystery pit where bilge water, lost screws, and old rags go to disappear. But when your rule pumps, especially a rule 2000 bilge or rule automatic bilge, start to act sluggish or the pump motor hesitates, you know it’s time to clean the bilge and give that hardworking little pump the attention it deserves.Some people don’t think much about their automatic bilge pump, the discharge hose, or whether the float switch, sensor, or third wire are behaving as they should—until the day the water level rises higher than you’d like.
That’s why experienced boaters rely on routine bilge cleaning, even if it means getting cozy with dirty water, a shop vac, a scrub brush, and a bottle of bilge cleaner. Somewhere in the middle of the job, you’ll probably mutter something like keep the pump steady as you wrestle with the hose to the pump or clear a stubborn clog near the inlet or strainer.Whether you’re dealing with a rule 2000, an 1100 gph setup, or a centrifugal model designed to pump the water overboard, the steps are roughly the same: rinse, inspect, scrub, and make sure the pump turns on with both the manual switch and the automatic feature.
If your circuit board, check valve, or fuse misbehave, or if the pump may be sending water back into the bilge, you might end up shopping for a new pump. But once everything is flowing properly from aft to the outlet, and the flow rate feels healthy again, you’ll have that mellow peace of mind every boater chases—knowing that when high water hits, your system is ready to start pumping water and push every last gallon of water in the bilge safely overboard.In the end, give the space a final wash with soapy water, grab an absorbent pad, let the bilge dry, and enjoy that quiet confidence that comes from real boat maintenance done right.
Preparing for Bilge Pump Maintenance
Before you reach for a wrench, take a moment to create a safe and organized workspace. Disconnect the battery to eliminate any chance of the pump turning on automatically or creating an electrical hazard while you're handling the wires. Gather some absorbent pads, a bucket, and a shop vac to remove the standing water and grime from the bilge area, giving you a cleaner space to work. Safety first, cleaning second.
Gathering Necessary Cleaning Supplies
Before starting any bilge cleaning, a boater usually collects everything needed so the job feels less chaotic from the start. You’ll want items that help you deal with dirty water, stubborn grime, and the odd splash of bilge water that always shows up when you least expect it. Halfway through gathering your tools, you’ll probably remind yourself that keep the pump healthy is the whole reason you’re doing this.
Many people preparing to clean the bilge grab brushes, rags, and cleaners that won’t damage a rule 2000 bilge or its fittings. If you plan to rinse the area afterward, it helps to bring a bucket big enough to hold at least a gallon or two. Don’t forget gloves, since water in the bilge can hide rusty bits or slippery residue. Once everything is packed together, you’re ready to approach the job with a calmer mindset.
Safety Precautions and Electrical Disconnection
Before touching anything near the pump, disconnecting power helps ensure nothing suddenly activates while your hands are in tight spaces. In the middle of this step, remember safety starts with silence as you cut all electrical flow.
Items to disconnect or verify:
- fuse
- circuit board leads
- battery switch or breaker
- any auxiliary feed to the pump
Identifying Access Points and Mounting Hardware
| Component | Its Role & What to Look For |
|---|---|
| The Discharge Hose Connection | This is the pump's main artery, a sturdy hose leading overboard. It's typically held on with two stainless steel clamps that need a screwdriver to loosen. |
| The Power Wire Conduit | A flexible plastic tube protecting the wires where they enter the pump body. It may have a threaded collar that unscrews by hand to free the wiring. |
| The Base Mounting System | Many pumps sit on a dedicated baseplate that is screwed or bonded to the hull. The pump itself often twists or slides to unlock from this base. |
| Strainer Cover or Guard | A removable plastic grate or cover over the pump's intake. It usually has tabs that can be pressed or requires a quarter-turn to release for cleaning. |
Accessing the Pump for Service
Finding the pump may require some flexibility, as it’s often positioned deep in the aft portion of the bilge. You’ll likely need to follow the discharge hose from where it leaves the hull back to the pump body. Once you locate it, take a photo of the wiring with your phone before disconnecting the third wire or any connectors—this prevents mix-ups later—making reassembly straightforward.
Locating the Bilge Pump in Your Vessel
Finding the pump may take a bit of searching, as placement varies between boat layouts. Most units sit at the very lowest point of the bilge where water naturally settles.
- Look near the aft bilge compartment on many vessels.
- Trace the discharge hose from the thru-hull back to the pump.
- Identify a compact rectangular or cylindrical body with wires attached.
- Move stored gear or lift an access panel if the view is blocked.
Removing the Pump from Its Mounting Bracket
This step calls for caution, since older plastic components may become brittle from heat and age. Most pumps, such as the Rule 2000, lift or slide out of a base plate secured to the hull. You might have to press a release tab or small clip to free it, so resist the urge to pry aggressively, which could damage the bracket.
If it feels stuck, a gentle tap with a screwdriver handle can help loosen it.Taking a moment to understand the release mechanism avoids broken parts and the hassle of buying a replacement pump. Gentle handling always beats brute force.
Disconnecting Hose and Wiring Connections
With the pump free, you can now carefully disconnect its lifelines. The hose to the pump is usually secured with one or two stainless steel clamps that need a screwdriver to loosen.
- Loosen the hose clamps and gently twist the hose to break its seal before pulling it off.
- Note the wiring order, or take a photo, before disconnecting the plug or individual wires.
- Keep the disconnected wires elevated to prevent them from falling back into any residual bilge water.
Thorough Cleaning Procedures
Once you’ve got access, you can rinse everything with soapy water and start scrubbing with a scrub brush to remove grime around the rule 2000 bilge housing. In the middle of that process, remind yourself that pumping water cleanly begins with removing even tiny buildup around the discharge hose. A vac can pull out the last bit of dirty water before you apply bilge cleaner for a deeper wash. When finished, let the bilge air out so residual moisture doesn’t sneak back into hidden corners.
Removing Debris and Grime from the Pump Housing
Once the pump is free, clearing grime helps you see any hidden issues. You’ll notice that grime hides problems if you don’t scrub properly.
Tools to use:
- soft brush
- cloths or rags
- mild bilge cleaning solution
- freshwater for rinsing
Cleaning the Intake Screen and Impeller Area
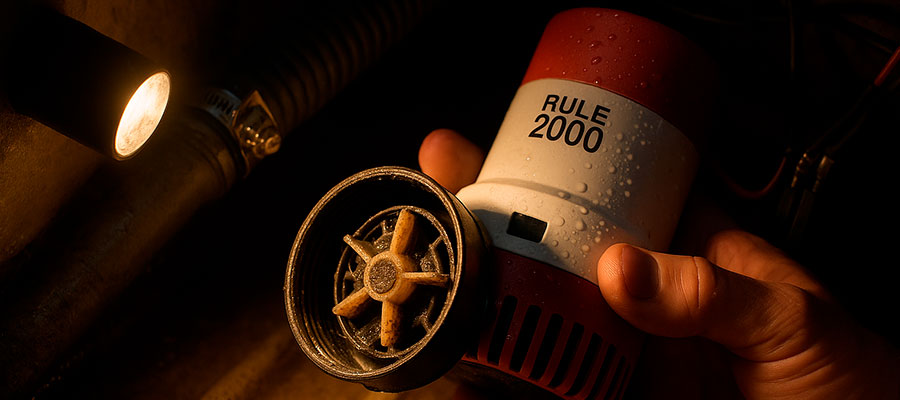
The intake screen often traps debris, so giving it attention helps restore full gph performance. When you pop it open, you might find strands of old leaves, hair, or bits that drifted back into the bilge during rough rides. Right in the middle of the task, you may think smooth flow saves effort as you remove stubborn particles. The impeller area of a centrifugal pump is delicate, so a gentle touch prevents scratches.
Clearing it thoroughly ensures the pump can pump the water without hesitation when high water conditions hit. If you have a rule 2000, you'll notice the housing is roomy enough to inspect closely. Finish by rinsing with clean water and letting it drip dry.
Using Appropriate Marine-Grade Cleaners
Choosing the correct cleaner ensures you remove oily residue without harming pump components. Marine-safe formulas break down grime effectively while staying gentle on plastic surfaces.
- Pick a biodegradable bilge cleaner designed for boats.
- Avoid household degreasers that can weaken rubber and plastic.
- Let the cleaner sit briefly to loosen buildup before scrubbing.
- Rinse thoroughly so no residue remains to cause clogs.
Inspecting Components During Cleaning
While you’re wiping things down, check the pump motor to see if it spins freely and whether the automatic feature still reacts when water in the bilge rises. Pay attention to the check valve integrity, since a worn valve can reduce flow rate or push water overboard too slowly. Look over the circuit board, fuse, and any wiring connected to your rule 2000 or 1100 gph model to make sure no corrosion is hiding under the casing. Anything suspicious might mean the pump may need repair before high water becomes a real issue.
Checking for Wear on Impeller and Moving Parts
After cleaning, inspecting wear ensures you notice issues before they become failures. Remember that small wear matters when the pump may be older or heavily used.
Areas to inspect:
- impeller blades
- spindle or shaft movement
- side clearances
- interior wear rings
Examining Electrical Connections and Wiring
While the pump is out, you have a perfect opportunity to inspect its electrical health. Look for any green or white corrosion on the terminal posts or within the connector plug, which can interrupt the power needed for reliable operation. Corrosion is a silent killer. Check the wires themselves for any cracks in the insulation or signs that they have been chafing against the hull, which could lead to a short circuit. A clean, tight electrical connection is what brings this little workhorse to life when you need it most.
Verifying Hose Integrity and Clamp Security
A pump’s performance depends on a discharge hose that stays strong and leak-free. Inspecting the hose and clamps prevents failures once the pump is back in service.
- Check the entire hose length for cracks, soft spots, or deformation.
- Ensure the hose is tightly fixed to the thru-hull fitting.
- Confirm any check valve faces the correct direction and moves freely.
- Keep spare hose clamps in the proper size for reassembly.
Reassembly and Reinstallation
Once each part is dry and clean, you can place your dependable pump back into service. Reconnect the wiring exactly as before, making sure every contact is tight and shielded from moisture. Give the pump a short test by restoring power and using the manual switch to confirm it spins freely and pushes water with full strength—proper function confirms readiness—before securing it back in position.
Properly Reconnecting Hoses and Wiring
Once the parts are clean and inspected, reconnect everything with care so the system can operate smoothly. As you work, think of solid connections matter to give your pump consistent power.
Reconnect the following:
- hose to the pump
- electrical leads
- float switch wires
- ground or bonding wire
Securing the Pump Back in Position
A pump that isn't firmly seated can vibrate, become noisy, or even shift out of position in a seaway. Carefully align the pump with its mounting bracket and press or slide it until you hear or feel a positive click. Tug on it gently to confirm it's locked in and won't work itself loose from the vibrations of pumping water. A securely mounted pump operates more efficiently and has a longer service life. A solid mount prevents problems.
Testing Operation After Cleaning
| Step | What to Do | What to Look For | Why It Matters |
|---|---|---|---|
| 1 | Restore power to the pump system once everything is dry | The pump should stay off until triggered | Ensures no unexpected activation before testing |
| 2 | Lift the float switch or press the manual test button | The motor should start smoothly | Confirms the pump reacts to controls without hesitation |
| 3 | Pour a small amount of water into the bilge | Pump should begin moving water within a few seconds | Shows the sensor responds to rising water levels |
| 4 | Observe the discharge stream outside the hull | A steady, uninterrupted flow should appear | Verifies that the outlet path is free of blockages |
| 5 | Let the water level drop naturally | Pump should shut off once the bilge is nearly empty | Confirms the automatic stop function works correctly |
| 6 | Run a second brief test cycle | Motor sound should remain even and consistent | Helps detect early mechanical strain or vibration |
| 7 | Inspect wiring and connectors after the test | No heat, moisture, or loose contacts should be present | Ensures the electrical system remains safe and stable |
Preventive Maintenance Strategies
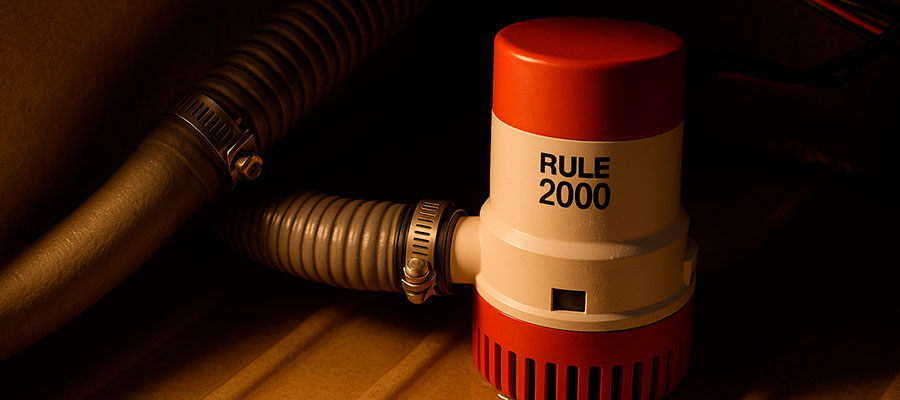
Staying ahead of trouble means giving the bilge area quick checkups instead of waiting for something dramatic to happen. A new pump installed early can spare you from emergency fixes if your current unit seems hesitant or clogged. Even simple habits—like removing absorbent pads before they saturate or verifying that pumping water reaches water overboard without hesitation—extend the life of your gear. In the long run, these small efforts keep the pump healthy and let the bilge stay as calm as possible.
Establishing a Regular Cleaning Schedule
Having a routine makes maintaining the pump feel less like a chore and more like a habit. You’ll soon realize that consistency prevents problems long before they appear.
Schedule suggestions:
- monthly quick rinse
- seasonal deep cleaning
- post-storm inspection
- annual wiring check
Protecting the Pump from Excessive Debris
Reducing debris in the bilge helps the pump work longer without overheating or clogging. The phrase clean bilge lasts longer rings true for any boater.
Ways to protect the pump:
- keep the bilge free of loose items
- add screens or strainers
- remove standing water in the bilge
- secure wiring above the lowest areas
When to Consider Professional Service
If you've gone through the entire cleaning process and the Rule 2000 still refuses to work, or if you discover a cracked housing or a badly corroded circuit board, it's time to call for help. Likewise, if the pump motor runs but fails to move water with its rated GPH, there may be an internal mechanical issue beyond a simple cleaning. Know when to call an expert. A qualified marine electrician can diagnose deeper electrical faults and determine if a new pump is the most reliable solution.

