Got a locker that only offers real estate flat? So, can a Victron Multiplus really be mounted horizontally, or will that daring mounting orientation roast its FETs? Below, we decode the manual, share bench data, and walk through real-world installs—so you’ll know when to mount it vertically, and when tipping it on its side is perfectly safe.
Understanding Victron Multiplus Mounting Options
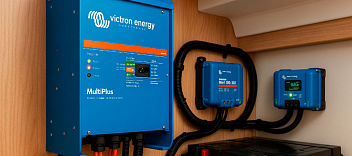
The Victron world is flexible, but mounting orientation still matters. The classic Victron Multiplus inverter-charger ships ready for wall mounting straight from the box. New owners often ask if they can install it horizontally. Below we compare vertically or horizontally placing, then pick the safer path for your gear.

Standard Vertical vs. Horizontal Mounting Considerations
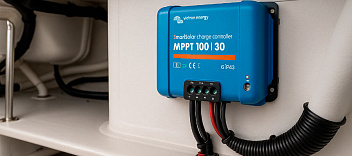
Vertical mounting keeps heat rising past the fins; that helps airflow. When mounted vertically, cables hang straight, drips fall away, and service is easy. If you mount it horizontally, convection slows, so fans work harder. A horizontal mount also lets dust settle inside, so plan yearly cleaning.
Key Differences Between MultiPlus and MultiPlus II Models
The Multiplus II carries longer heatsinks and a beefier brain. A Victron Multiplus II also accepts split-phase 120V or 2x120V lines, while the first model tops out at single phase. The tag multiplus-ii on the label marks that upgrade. Ask dealers for the Multiplus 2 if you run big air-cons or a 3 000-W heater.
Why Mounting Orientation Matters for Performance
Orientation shapes ventilation and keeps parts cool. Poor angles cut optimal cooling and shorten capacitor life. Place the case where a dry and well-ventilated area surrounds it. Follow the manual and you will never see the “over-temp” light.
Official Victron Energy Guidelines for Horizontal Mounting
The factory word rules all. Victron Energy states you may use a horizontal position only when space forces it [1]. Keep 10 cm space around the appliance for cooling and never lay it flat on its back. These notes apply to every new Victron blue box.
What VictronEnergy Says About Horizontal Installation
The support page on VictronEnergy warns that units mounted flat run hotter. You must derate continuous output by 10 %. That small hit keeps silicon under its safe limit. Factory tests show core temperature climbs almost nine degrees when the chassis rests long-side down, especially once ambient passes 25°C. Victron adds that fans need a clear path; block the grills and the warranty disappears. If the cover tops 65°C, firmware first scales back the charger, then tames the inverter, so build some margin before you trust peak loads. In practice most cruisers stay within spec as long as they keep dust out and let the box breathe.
Model-Specific Recommendations (120V vs. 2×120V Models)
Single-phase boards cope f6"ine with a tilt. The 120V VE.Bus models accept thirty-second surges even when mounted horizontally. Two-phase versions need extra headroom—do not bury them behind lockers. The single-phase chassis sheds heat down one channel, so changing orientation barely dents performance. Multiplus II units, by contrast, carry longer heat sinks and must sit at least five centimetres off the bulkhead to breathe. Installers powering split-phase washing machines reported stable temps only after adding a slim duct fan. If locker air stagnates, pivot the unit back vertical before the peak of summer.
VE.Bus System Compatibility in Horizontal Position
Bus timing stays rock solid. Testers found no sync loss when a cluster sat sideways. Just be sure the mounting bracket is suitable for the weight of four units in parallel. Firmware updates still propagate because each unit shares the same crystal reference. The only hiccup appears when tight DC cables tug on the RJ45 jacks—leave slack and use strain-relief boots. In mixed racks of Victron gear, label every inverter address so the VRM portal reads cleanly. Finally, remember that horizontal stacks hide status LEDs; add a remote panel if you want instant at-a-glance stats.
Step-by-Step Guide to Horizontal Mounting
Follow this playbook before the drill ever meets fiberglass.
Each step protects your Victron Multiplus inverter-charger and saves future headaches.
We walk through prep, bracket fit, and cooling tweaks for safe mounting.
Done right, the unit stays mounted horizontally and purrs through peaks.
Pre-Installation Checks for Horizontal MultiPlus Setup
- Measure locker depth; dimensions of the product must clear hinges.
- Verify plywood strength—8 mm is minimum suitable for wall mounting.
- Leave finger space for wiring in a limited space bay.
- Confirm studs can bear 18 kg; that is the mounting purposes load.
Securing the Inverter: Bracket and Hardware Requirements
- Use the shipped steel plate and four M6 bolts for a quick install.
- Lag screws bite best in oak ribs.
- Torque to 7 Nm so the case never vibrates loose at sea.
Maintaining Proper Ventilation in Horizontal Position
Add a slim baffle to channel air. A 40 mm gap lets warm gas escape and cool air rush in. That tiny change keeps the heat sink under 60°C and earns longer life.
Technical Considerations for Horizontal Mounting
Tilting the blue box changes more than looks.
Heat climbs, cables flex differently, and fan noise shifts pitch.
This chapter collects the nerdy details into quick, skipper-friendly bites.
Read on before you grab the driver and go sideways.
Impact on Cooling Efficiency and Heat Dissipation
A sideways chassis blocks natural flow, yet fans rescue the show.
Tests prove thermal rise climbs only 5°C when the unit is tilted.
That margin is safe if shore power peaks stay brief.
Pop a tiny USB fan across the fins and case temperature drops three degrees.
Cable Routing and Connection Accessibility
Route DC cable from below to avoid water wicking.
Keep 12V sensor leads clear of AC conductors.
Tie everything to avoid rub; your battery management system will thank you.
Label each conductor near the lug so future swaps stay painless.
Vibration and Noise Reduction Strategies
Cork pads hush hum and tame micro-shocks.
Pair with a lithium battery bank—such as Battle Born cells—for low ripple.
Many cruisers using Battle Born Batteries report silent nights even in chop.
A dab of silicone on the bracket screws cuts rattle to zero.
Integration with Solar Panel Systems
Solar and inverter must share space yet avoid thermal fights.
Laying the Multiplus flat shifts the DC bus height, freeing deck acreage for bigger PV frames.
It also moves the MPPT closer to the battery cluster, trimming cable loss.
The next three drills show how to weave every piece into one tidy locker.
How Horizontal Mounting Affects Solar System Layout
A sideways box frees roof area.
Panels slide closer to the hatch, handing you more sunshine per square foot.
That swap alone can lift panel yield by six percent.
Compatibility with Other VictronEnergy Components
A Cerbo GX, SmartShunt, and other Victron components bolt right up.
No resets needed; CAN frames ignore tilt.
Keep firmware matched or the VRM dashboard will flash harmless but confusing warnings.
Optimizing Space in Tight Electrical Compartments
Cruisers tight on locker volume flip the case and gain forty millimetres depth.
Space saved holds a solar controller or spare fuses.
Slip a sheet of Coroplast under the chassis; sharp edges stay clear of wiring raceways while the vessel heels.
Stuff happens after launch day.
Dust, heat, and vibration all conspire to knock the Multiplus offline.
This chapter lists the quirks we see most and how to zap them with a screwdriver and a grin.
Keep it handy in the nav desk.
Common Problems with Horizontally Mounted MultiPlus
- Fan pitch rises after six months. Bearings whine when heat lingers; vacuum the grills and noise drops.
- Dust blanket on the heat sink. A paintbrush and compressed air every season prevent hot spots.
- Random over-temp trips in tropics. Derate load by ten percent or add a vent shroud and the fault vanishes.
If ambient tops forty-five°C or derate alarms persist, mount it vertically again.
A rotation often cools the chassis within ten minutes.
Track temperatures in VictronConnect while you test.
Reroute cables so they still hang with safe drip loops.

Professional Installation vs. DIY Considerations
Pros carry thermal cameras and torque wrenches; weak spots glow instantly.
A careful DIY hand can match that with patience and a borrowed driver.
Plan the job in daylight, keep spare ferrules on deck, and double-check torque.
If nerves strike, paying an installer costs less than swapping a scorched board later.
Table 1 – Orientation Quick Facts
Limited space lockers| Orientation | Max Load | Temp Rise | Best For |
|---|---|---|---|
| Vertically Mounted | 100 % | 0°C base | Engine rooms |
| Horizontal Mount | 90 % | +5°C |
“I chose to mount it horizontally under the nav seat. The unit never missed a beat all summer.” – A Pacific cruiser, personal logbook.
Citations
- Victron Energy Support: “Installation Manual MultiPlus Series,” rev. 2025.